Kilimanjaro: Lemosho Route

Many people may not realize there are 7 different routes up to the summit of Kilimanjaro. Lemosho has been rated the most beautiful, and most successful route with about 98% success in an Uhuru Peak summit from this route. It is also the longest which gives more time for acclimatization which is why more people are so successful in summiting. The Lemosho route is typically climbed in either 7 or 8 days.

On July 18, 2019 I completed my first of the Seven Summits! I arrived to Moshi, Tanzania with an 8-day itinerary for the mountain which ended up being 7 because I’m a bad-ass. Before even leaving for Africa, I kept asking myself why I signed up for the longest climb when physically, because of my experience at altitude and the amount I have trained this year, I could have totally done the shortest route, but nevertheless, I was climbing Lemosho, and was and ready to go.

Day 0Materuni Waterfall

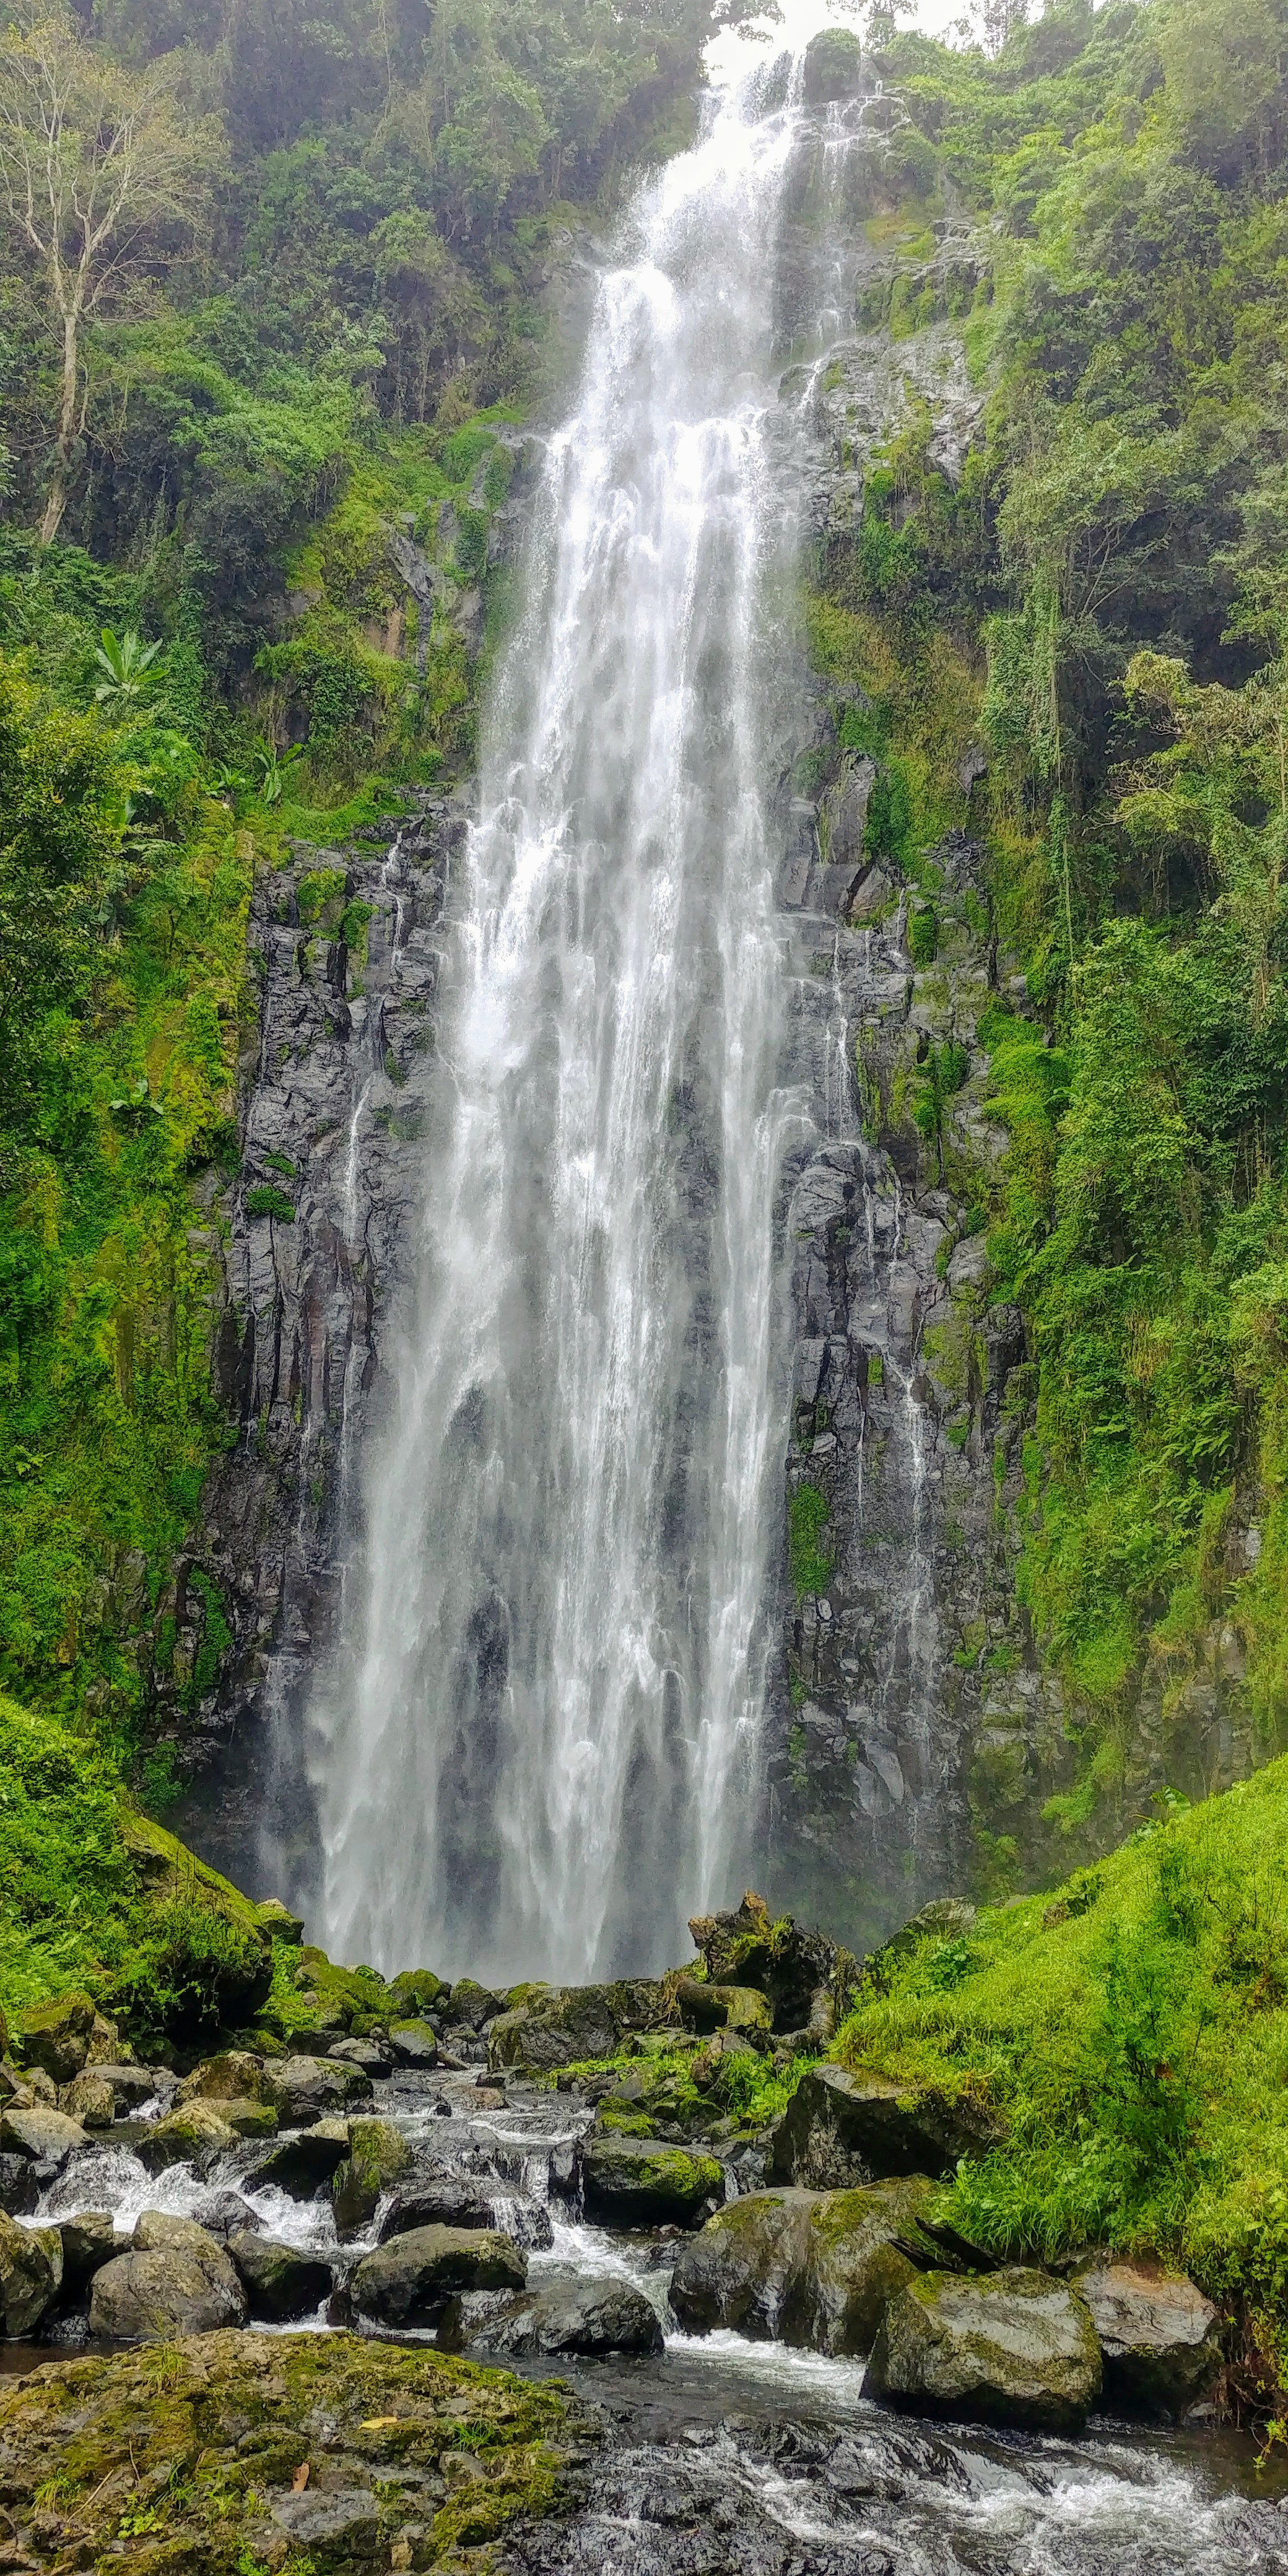
My cultural shock was little-to-none compared to Nepal. Maybe it is because I had already immersed myself in a 3rd world country once before, or maybe it’s also because my hotel in Moshi looked like a tropical island resort. Either way, I woke up ready for whatever adventure awaits. For my rest day in Moshi, I decided to check out the infamous Materuni Waterfall. It is a short hike from the Materuni Village. You are surrounded by tropical plants and trees that grow incredibly in the fertile volcanic soil. Coffee plants, Banana, Avocado, Mango, and Pineapple trees all surround the trail as you begin. The trail is fairly flat and only takes about 45min to an hour to get to the falls. With overcast conditions in the rain forest, you feel like you are on a tropical island rather than a giant mountain. The falls are gorgeous and continue to make you feel like you are in a tropical paradise. On the return you have the option of the “coffee experience” where you pick your own fresh beans, grind them by hand and drink your handmade espresso. I do not like coffee so I opted out of this adventure but overall, Materuni is a MUST see if you have spare time in your trip.

DAY 1- Lemosho Gate to Big Tree Camp (9,000′)

We started the morning by driving from Moshi town to the Londerossi Gate (not Lemosho). Londerossi is where the registration office is and we ate lunch there as well. I made some friends from the other camps that I would continue to see sporadically during the climb, and we all headed out and down towards the Lemosho Gate entrance. Finally time to start hiking! all of the camp and gate signs give estimated times of travel to the next camp. It was estimating 4 hours for a short 7km to the Big Tree Camp. It barely took me 2 hours to get there. Many guides stress going “pole-pole” which means “slowly-slowly” and it will be very slow going if you are in a large group. But it was just me so I got to set the pace! A couple other girls were supposed to be with me but they switched to the September climb. I found that in July, it is busy season but not quite peak busy season, so there were a lot of tiny groups of 1-3 people, but only a few massive groups. I would pass a majority of these larger groups on the way up since it was just me. I saw a bunch Colobus Monkeys in the rain forest on the way to camp, and could hear them chatting and hopping between trees; super cool to see out in the wild. I did not sign up to do a safari after the trek so this is the extent in wildlife I would get to see. We arrived at camp with plenty of time to spare. They feed you incredibly well to make sure you have enough calories for the mountain but I was convinced I was going to gain weight there was so much food! Day 1, easy. Done.

DAY 2- Big Tree Camp to Shira I and Shira II Camp (12,700′)

Today I skipped a camp because I am such a bad-ass. We started a little later than nearly all the other groups and I passed almost all of them on the way up to Shira I. Any of the groups that do Lemosho in 7 days instead of 8 usually skip Shira I camp. As I passed these groups, many of the other guides were asking if we were also skipping. Internally I was hoping but was almost afraid to ask if that was even a possibility. It wasn’t until we stopped at Shira I in time for lunch that my guide asked me if I wanted to and I was ecstatic to say yes. It was only 11am and there was no reason I needed to spend an extra night on the mountain at this point. I felt great, and wanted to keep going. So my 8-day climb now became a 7-day climb and we continued across the plateau and up to to Shira camp II. As for the hike itself, starting from Big Tree, it was very up and down for the first mile or so until leaving the rain forest into the Moraine vegetation zone. Once above the forest, the trail steepens as you follow a ridge up to the Shira plateau. The plateau is pretty flat between the camps I and II. Right before Shira II it steepens as you officially begin to climb up what is officially considered part of the Kibo (Kilimanjaro) Volcano.

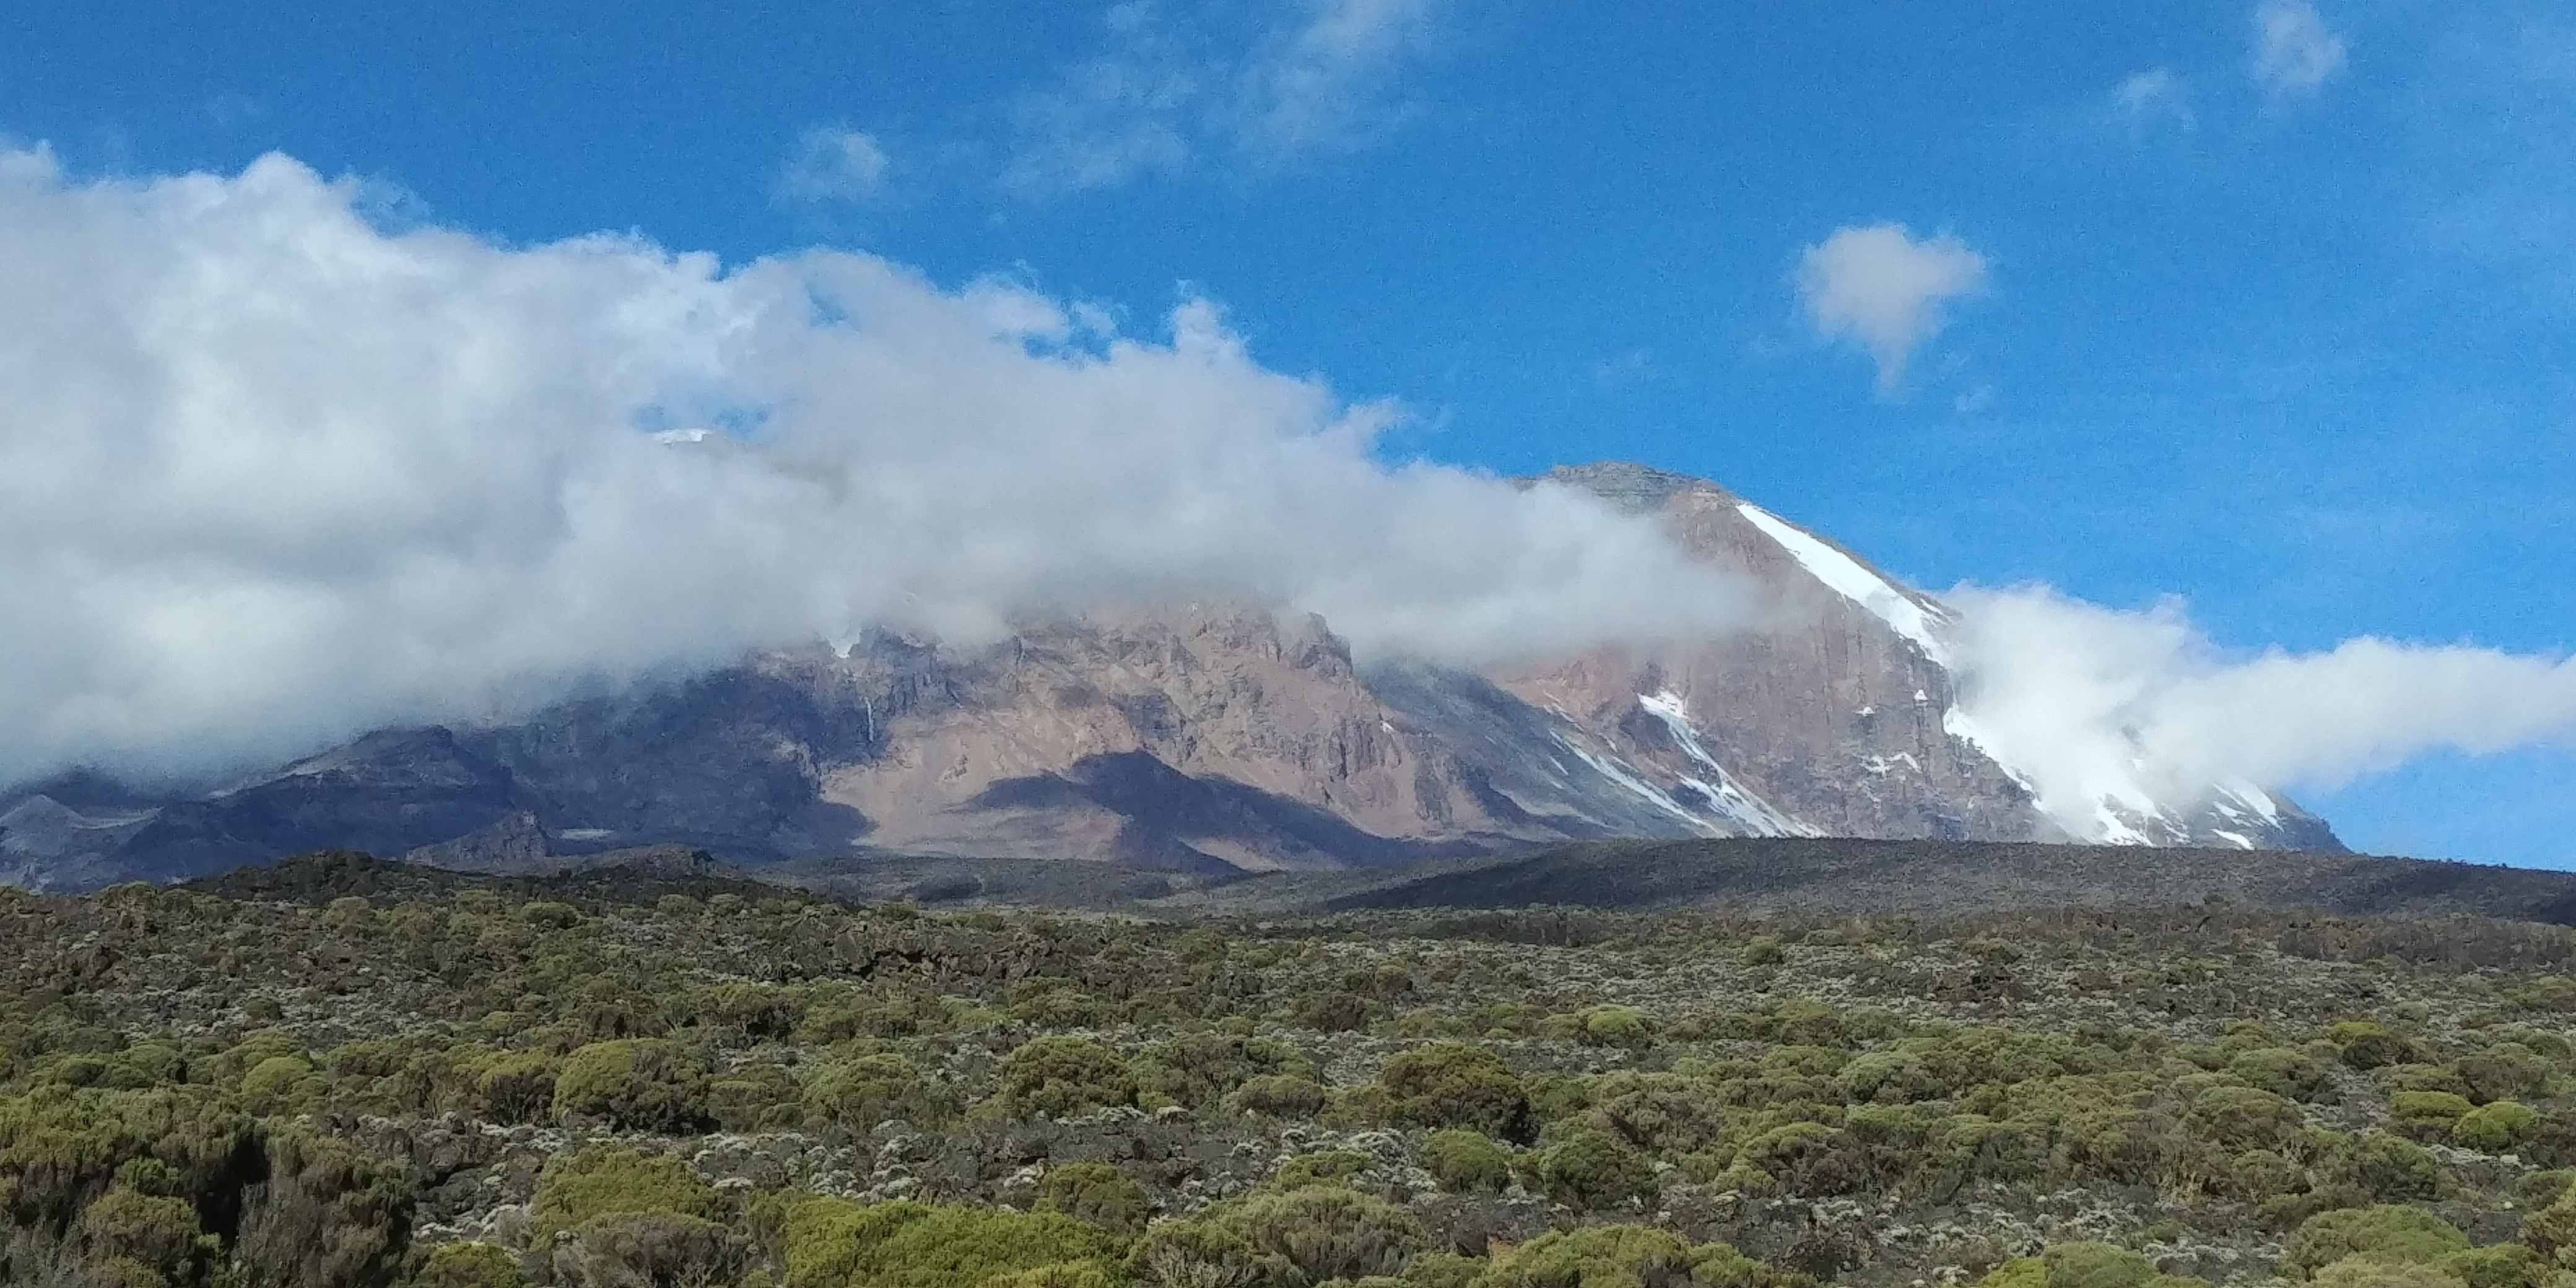
FUN FACT: The Kilimanjaro mountain is made up of 3 volcanic cones: The Shira Caldera, Kibo (Uhuru Peak), and Mawenzi. By climbing the Lemosho route, you get to climb Shira and Kibo, and view Mawenzi from summit base camp!

Meru peak (left) and the Shira Caldera as viewed from about 14,000′

DAY 3- Shira II up to Lava Tower (15,000′) and down to Barranco Camp (13,000′)

A steady climb from camp II up to the Lava Tower warrants excellent views of the Shira Caldera below. the Lava Tower gets you up close and personal with the southwest side of the mountain. A quick stop for lunch and it’s all down hill from here. The decent to Barranco camp is decently steep in spots, so knees beware. You can see the camp below pretty immediately and just watch it get continuously closer on the decent. if the clouds haven’t rolled in, you should have a fantastic view of “The Breakfast Wall” that will be climbed the next morning. Many get intimidated by the near 800′ of climbing that is required first thing in the morning but don’t worry, it looks much worse than it is.

DAY 4- Barranco Camp up “The Breakfast Wall” (13,775′) and down to Karaga Camp (13,200′)

A roller coaster of emotions today on this climb almost perfectly reflect the roller coaster in altitude. I was feeling a little down when I woke up, missing my husband and was just kind of tired and cranky honestly. We start with the infamous Breakfast Wall. Which includes some mild scrambling. Non-climbers might be intimidated by this wall but don’t be. The trail is wide and well marked. There is only one “skinny” section nicknamed the “kissing rock” because you have to hug it to walk by, I did not feel the need to do so. It was still a wide enough path that I felt just fine. I never felt like I was straddling any crazy exposure, granted I have climbed much scarier climbs. After the scramble is over, you think you are nearing the top of the wall, but take my warning: there are like 5 false summits! think of it like a stack of books lined up shortest to tallest. you climb up the side of the short book and top out, but now you have to go up over the next ridge, and the next one, and the next one. I was legitimately getting pissed off. We finally top out for real and the views are incredible. You get a front-and-center view of Kili, and an ocean of clouds down below. I instantly felt better… for now. The way down to Karanga camp is mostly downhill, but it involves jumping one more ridge line as well as dropping into the Karanga Valley before climbing back up to the camp. The last steep pitch before Karanga is hands down the hottest, steepest pitch you will do the entire climb. I felt like it was steeper then the Breakfast Wall! Its about a 200′ climb straight up to camp. Not a fan. However, overall this hike is pretty quick. they estimate 4-5 hours for most groups; didn’t even take me 3. So after lunch, it is time for a nice relaxing chill. You can hike around nearby for more acclimatization, but my knee needed a break if it was going to be in tip top shape for the summit.

Day 5- Karanga Camp to Barafu Base Camp (15,250′)

It is customary for the guide companies to give you a songful introduction to the crew at some point on your trip. Most try to do it earlier in one of the first days on the mountain, in my case it got delayed until this morning because I had skipped a camp that second day which is when they originally wanted to do so. I actually liked it better waiting for today since it is the day before our summit attempt. It was the perfect encouragement and wish of luck to the summit I needed. After singing some songs we headed upwards. A steady incline at altitude, only took me about 2 1/2 hours to get to Barafu. A long time to rest and prep for the next day although my attempt to sleep early failed miserably, I felt good and ready for the summit attempt!

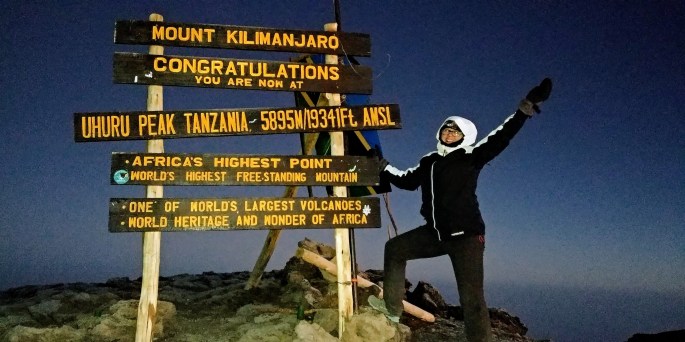
Day 6- SUMMIT! Uhuru Peak (19,341′) and down to Mweka Camp (10,000′)

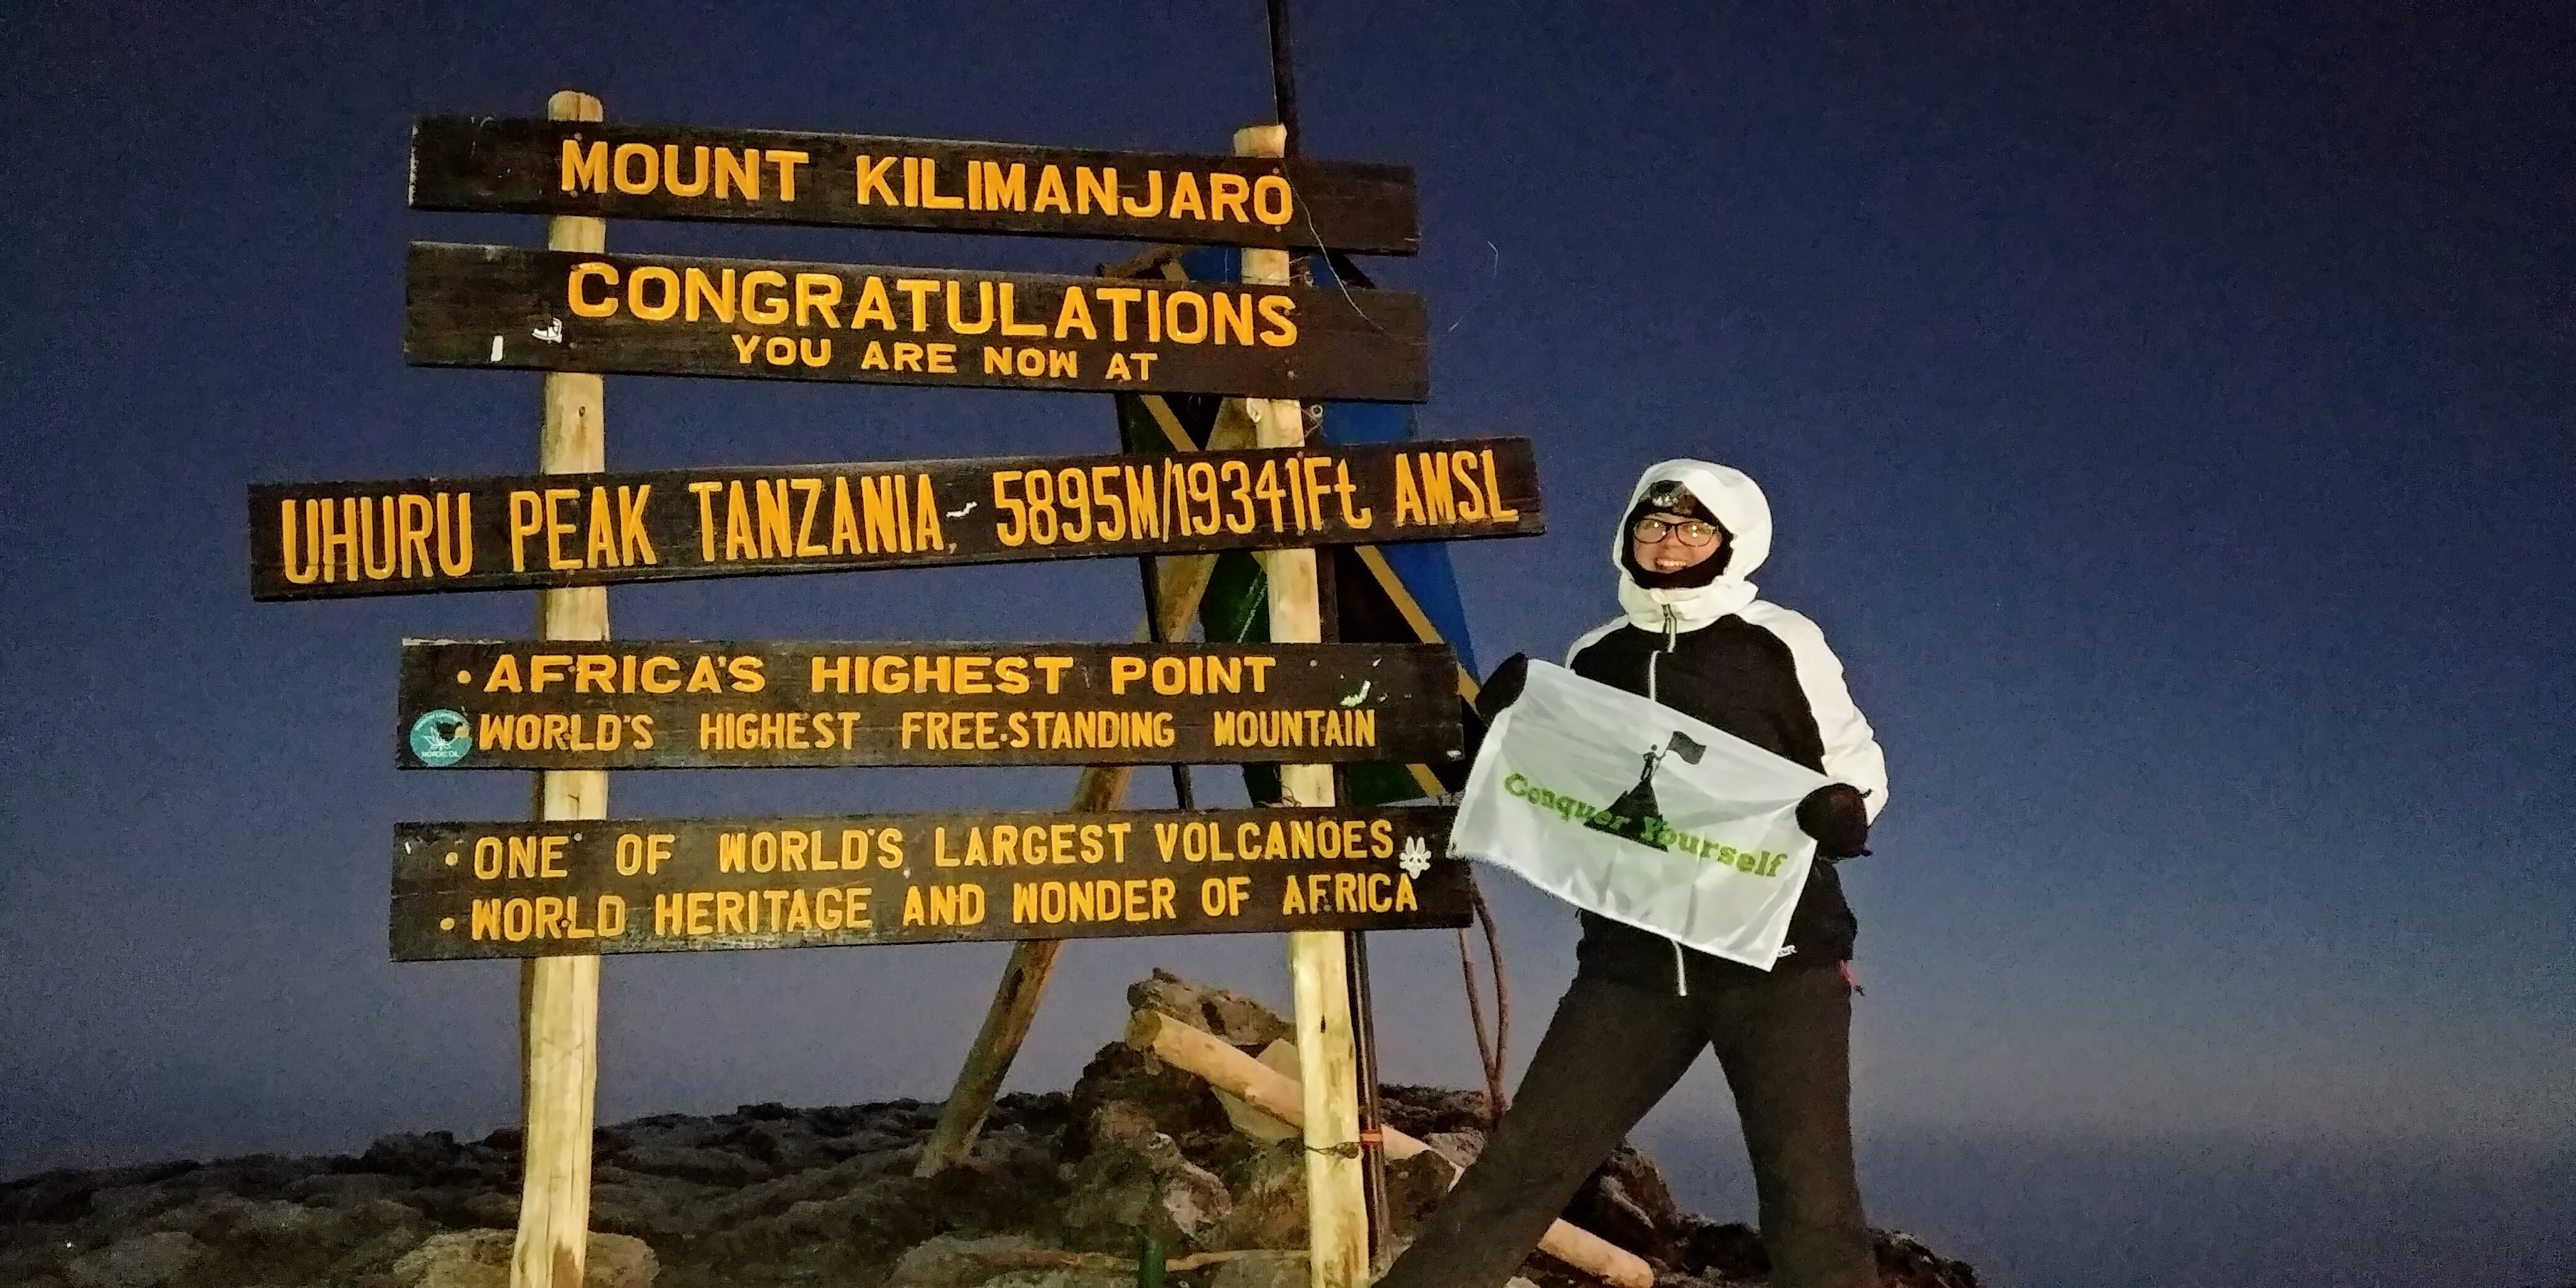
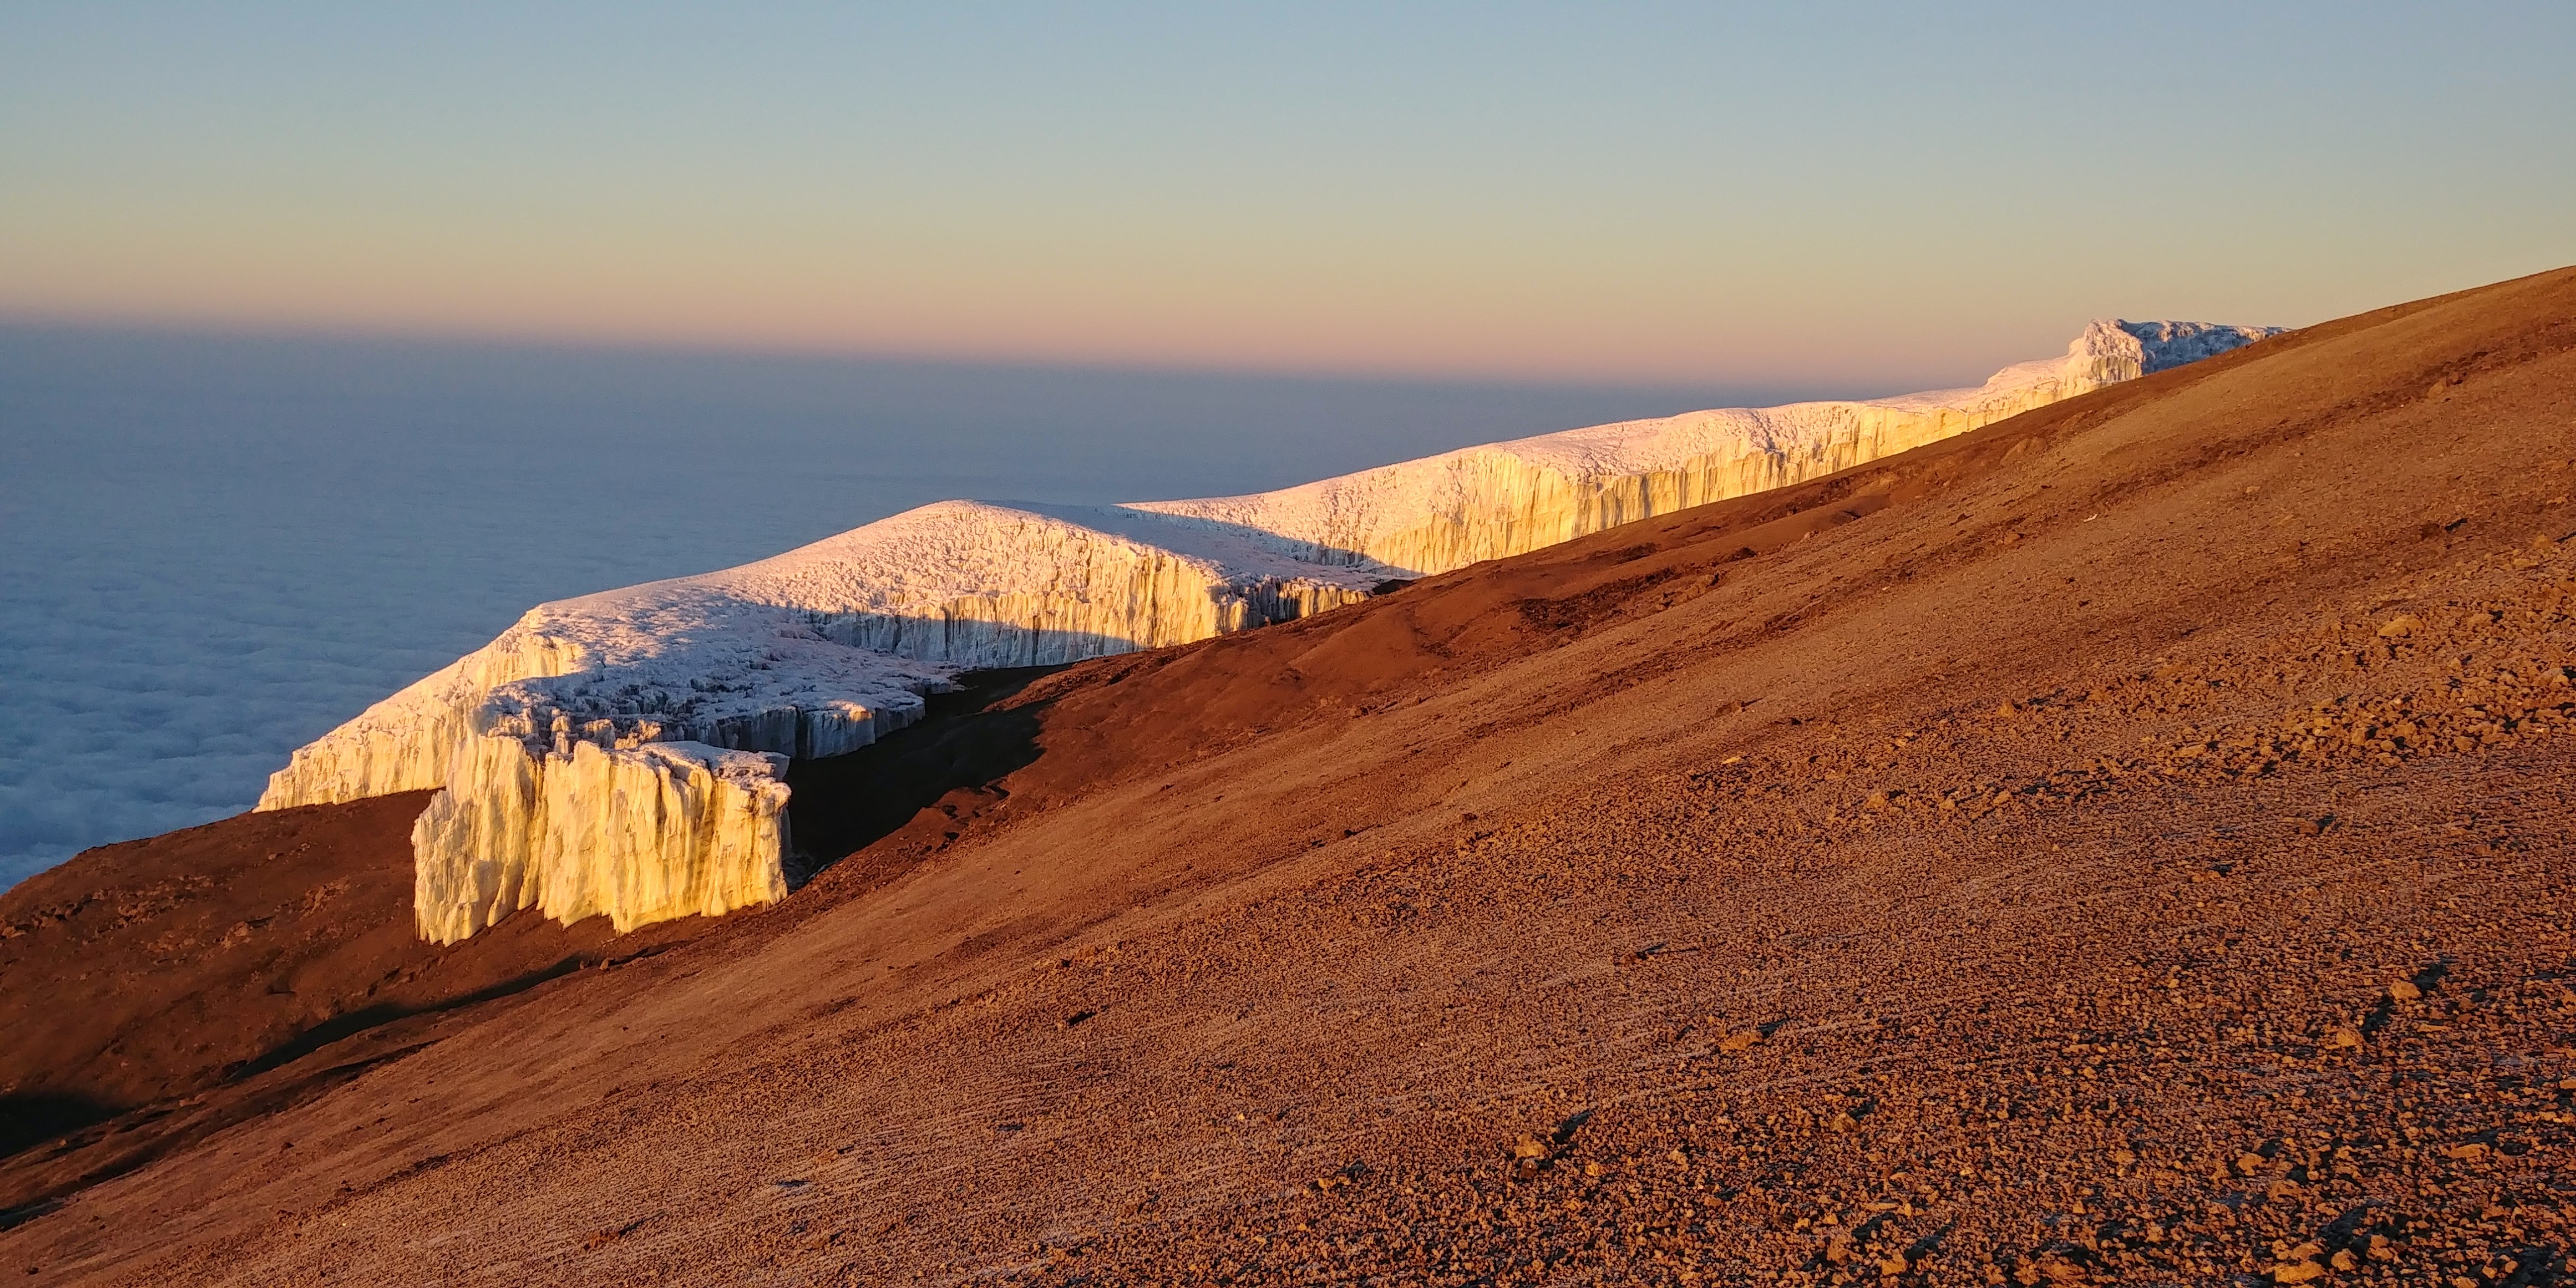
We started at midnight. I felt pretty good and although we were going what felt like a snail’s pace, we were still passing massive groups. It is a long night as you crawl your way slowly up to the summit although it felt shorter than I thought it would. As we got closer and closer to Stella Point, the wind began to pick up and the cold from the early hours of the morning were freezing my Nalgenes. At just after 5am, we came up over the crest of Stella Point. it was still incredibly dark and the wind was coming off the crater. It was Brutal. Weather reports later indicated that it was a low of 17 degrees Fahrenheit at the summit, with winds up to 15 knots which makes for windchill well below zero. The pace is set and designed to summit by sunrise. However, because I was moving so quickly, we hit Stella point well before dawn and Uhuru Peak at 6am (sunrise wasn’t until 6:30). It was too cold to honestly enjoy much time on the summit, we spent maybe 5 minutes tops, snapping quick pictures in the dark and heading down the crater rim back to Stella point. The sun finally rose as we got there, and the long decent began down the way we came. The decent from the summit involves some glicading on volcanic ash and sand in spots. It only took maybe 2 hours to get back to base camp. After a quick break and some food, we continued down to Mweka camp. Initially the decent was fine, and then the rock steps began….. after passing the Millenium intermittent camp, the last 3 miles or so was all big rock steps and my poor knee made itself known. After a very, very long day, I plopped into my tent and slept like a log.

Sunrise on the glacier from just above Stella Point

Day 7- Mweka Camp to Mweka Gate (5,300′)

A much more gradual decent today, made my knee was thankful but my calves were definitely burning in the end. After 14,000′ of decent in 2 days, my legs were pretty done. It only took me about an hour and a half to descend 6 miles. It was foggy and rainy at the bottom and made for a cool, spooky atmosphere in the rain forest. After packing up the vehicles at the gate, we headed about 5 minutes down the road to where we would eat lunch and celebrate outside the souvenir shop. I was glad to be done. Tired, sweaty, and ready for a much needed shower!

Overall, I enjoyed Kilimanjaro. I kept catching myself comparing notes to my Nepal trek to EBC last year and felt like Kili was significantly easier than Nepal. Mentally I was also in a much stronger place and we all know that climbing something like this is always more mental than physical. Swahili is easier to learn than Nepali as well, I felt I took away more of the language, but unfortunately not as much culture as I would’ve hoped. Moshi town is fairly modernized so I would have loved to visit a village out in the grasslands, and meet tribesmen and I did not get to see anything of that nature. I definitely recommend knocking this one off your bucket list if you have interest in climbing Kili. I also recommend the Lemosho route. it shares much of the popular Machame route but I think is more picture-esque in the first few days before the trails merge.

What you REALLY need to pack for an expedition climb.

We all get them every time we sign up for a guided trip, “The Packing List”. And after some experience you get the hang of things but if this is your first trip like this, then read on because I am going to show you what ACTUALLY needs to be in your duffel conpared to what many standard gear-lists will tell you.

Why? What’s the difference?

Well, it depends.

Some companies have learned to list necessities and are pretty spot on, others give you a novel, despite the weight limit that will be required. It helps to just know what you ACTUALLY need and why vs what is reccomended add-ons, what is available for rent, whats optional luxuries, and what’s not nessisary so you can budget gear purchases and pack appropriately.

Weight Limits:

First off, all international airlines have a weight limit on bags and any guided expedition that has available porters will give you a 15kg (33lb) weight limit as well to protect the porters. You would be surprised how heavy your stuff can be. It all adds up fast! So one key thing to remember while packing: WEIGH YOUR BAGS!!!

Sidenote, weight limits can vary:

Take climbing packing vs a trek for example: a trek, anywhere in the world, can easilly be packed to under 15kg. But if you are headed to climb a technical peak, you have A LOT of gear. You can’t always physically fit everything into 15kg, especially if You are on the mountain for 2 months! You may need a down suit, climbing gear, etc etc. All you need to know for now is in a climbing expedition there will be multiple duffels to carry your stuff, but they still can’t weigh more than 15kgs each.

What to ACTUALLY pack:

This list is gonna start out with you basics for a trek because even if you add technical climbing, you are still going to have the same basic trekking gear. This list is a base that works for any trek, anywhere in the world.

The obvious:

  • Your 70-90L duffel
  • A 25-35L day pack
  • Trekking poles (even if you think you dont need them you want them. Downhill at the end a long trek is brutal on the legs and knees)
  • Good, broken in, hiking shoes
  • Multiple pairs of hiking socks (rule of thumb. 1 pair for every 2 days)
  • Liner socks (only IF you feel like you need them… I never use them.)
  • 1 pair thick wool or ski socks (for sleeping/summit)
  • 0° sleeping bag (especially for high elevation camping)
  • Lightweight compactable Sleeping pad with R rating of 3 or higher (R rating is temperature compatibility)
  • Sunglasses (+glacier glasses if there is snow and going above 10,000′)
  • Water bottles (2, 32oz Nalgenes MINIMUM, bladders are useful too… Until they freeze)
  • Headlamp/extra batteries

Layers:

  • Underwear/bras (1 pair every day if trek is roughly a week or less, 1 pair for every 2 days if its longer. You can wash them and hang them to try on your backpack while hiking! Sounds wierd, is totally normal tho.)
  • 1 moisture wicking T-shirt
  • 1 pair trekking pants
  • 1 pair modest shorts (ONLY in hot regions and where cultrally appropriate. Examples: Kilimanjaro=ok, but Nepal=NO shorts!)
  • 1 long sleeve moisture-wicking layer
  • 1 long underwear top
  • 1 long underwear bottom
  • 1 fleece layer top
  • 1 fleece or sweatpant bottom
  • 1 puffy jacket
  • 1 winter coat with hood (down jacket is best if possible when climbing high, it can be rented in many areas of the world if your particular company requires it)
  • 1 rain shell or poncho

Sidenote, Why only 1 of each? You will wear the same thing every day. Sounds gross but saves space and weight. What I like to do is have one long sleeve as a hiking layer and then the long underwear and fleece become loungewear in camp. You can change out of your sweaty clothes and you are much warmer while hiking but you will be cold once you stop moving. On summit night I keep the long underwear on under my trekking pants combined with the winter coat and I am plenty warm.

For heads and hands:

  • Sun hat
  • Winter hat/beanie
  • Thin gloves
  • Waterproof Winter gloves
  • Balaclava or face mask (shield wind/dust)
  • 1-2 bandanas (multipurpose: snot catchers, face masking, sweat bands, wet cloths to cool hot heads, etc)

Accessories:

  • Gators (if theres snow)
  • Yak-traks or micro spikes (if minimal snow)
  • “Camp shoes” (comfy easy slip on and off)
  • Quickdry lightweight camp towel
  • Stuff sacks/dry bags to keep gear organized
  • 1 garbage bag (for stinky/dirty laundry! The plastic of the garbage bag will lock in odors so the rest of your stuff doesnt stink!)
  • Gallon sized ziploc for trash (food wrappers and TP. Pack it in, pack it out!)
  • Personal snacks and electrolyte gels or powder mixes (not optional, a MUST! Foreign food is hard on the stomach if you are new to it. Altitude kills your apetite. Having multiple snack favs to keep energy up makes a massive difference and electrolytes can help prevent altitude sickness!!!)
  • Toiletries: camp soap, toothpaste, toothbrush, deoderant
  • Toilet paper (thank me later)
  • Ladies, feminine products (altitude screws with your cycle. Just be prepared)
  • Water purification tablets (backpack filters wont kill everything. Always boil water First THEN purify it)
  • Sunscreen (SPF 30+ minimum)
  • Lip balm with spf
  • Insect repellent with DEET (various infectious diseases in rural parts of The world. Protect yourself. Your “organic lemon bug spray” wont work on these bugs. Unless you have a severe allergy, suck it up, use the deet. Its better than Malaria)
  • Basic first aid kit (bandaids, blister kit, tweezers, is plenty. Guides have full med kits)
  • Wet wipes (when you cant shower for 3 weeks, these will make you feel better)
  • Hand sanitizer!
  • Camera
  • Portable chargers/extra batteries (keep in sleeping bag at night or they will drain in the cold!

Important documents:

  • Passport
  • Travelers insurance paperwork
  • Visa paperwork
  • Immunization paperwork
  • Credit card for emergencies
  • Cash: depending on your trip depends on how much to bring. You will need to tip your guides, porters and cooks for each day of the trip. In Nepal you will be staying in teahouses where you can purchase snacks and bottled water. Suvenier shopping is in cash in most rural parts of the world. Cash economy. You are gonna need to look up what is appropriate for tips and math out the legnth of your stay and how much you expect to spend on suveniers and other things. I can’t tell you an exact number because everywhere is different. I pull out what I think will be too much just to be safe and I can put back whatever I dont spend when I get home.

Medications: (vary based on location)

  • Regular Percriptions
  • Diamox (for altitude)
  • Malarone (for Kilimanjaro, Africa in general, central America, and other at risk countries. This drug has least amount do side effects compared to other malaria meds)
  • An antibiotic (incase of travelers diarrhea. Specific drugs are required for specific regions)
  • Ibrpofen (your new best friend)
  • Pepto-bismol tablets (helps prevent travelers diarrhea. Take this first before it gets incapacitating then take antibiotic)
  • Dayquil/cough drops (cold air, bew germs, new people.. Your probably goning to get sick at some point)
  • Daily multivitamin (can help prevent sickness as well as provide nutrients that may be missing from eating trekking food.)

Luxury items: (really just optional comforts if you have room to fit them.

  • Journal
  • Card games
  • A Book
  • Earplugs (for sleeping… trust me.)

Climbing add-ons:

  • Mountaineering boots
  • Crampons
  • Harness
  • 5-6 slings
  • Jumar
  • 3-4 caribiners
  • Climbing helmet
  • Mountaineering axe
  • Snow pants
  • Down suit (if climbing in temps below 0°F)
  • Down mittens rated 0°
  • Warm waterproof Fingered gloves
  • Prussets

Climbing gear can be heavy so spread it out and dont pack it all in the same duffel. A lot of gear is provided for you such as tents, ropes and sometimes even backpacking stoves/fuel for high camps. Much of the gear can also be rented for a small fee. Check with your guide service for their “provided gear” list.

There you have it! It may look like a really long list but don’t forget I added in all those notes, and I promiae you can succeed in meeting that under 15kg weight limit with everything on this list (minus the climbing add ons of course). I take it from personal experience.

I am currently packing for Kilimanjaro which I leave for in just a couple days! I have noticed how similar my list is compared to Nepal but I am packing less now that I know what I used and didn’t use, what I wish I had more of (snacks, all the snacks!), and since I’m not planning in a technical climb, I get to leave all the heavy climbing gear home which makes meeting the weight limit much easier.

Stay tuned over the next few weeks for trip reports from Tanzania!

How the Mountains Continue to Save My Life

Report from 11/9/18

The outdoors really is the best kind of therapy available to us. Yes, it is critical that we seek professional help in times of need, but as a general coping mechanism nature is the best. Hands down. This week, I needed the mountains more than ever.

Without going into great detail of my living hell growing up, let me just give you the basics of my backstory…

  • My sister passed away when I was 10
  • An unusual number of friends around me passed away from various causes
  • I was emotionally abused, and sexually assaulted on numerous occasions
  • I was dealing with untreated depression
  • I tried to kill myself… twice.
  • I dealt with an eating disorder
  • …but most of all, I felt worthless, unloved, undeserving of love, ashamed, and a waste of space. 

It wasn’t until I passed out at the wheel from malnutrition and totaled my car during my eating disorder that I was able to finally get some help. I have spent the last 8 years in therapy trying to sift through all of the crap. I have put a lot of pieces together over the years, but nothing hit me like a brick wall more than when I found out about a week ago that one of my abusers, nay the first… was recently released from prison. 

Looking back all those years ago, I didn’t think anything was wrong until after the relationship was over. I was blind to the manipulation, the emotional mind games, and the damage he was causing. He made me feel like I was nothing more than an object… When he dumped me for not getting “his way” it all really began to sink in. This was when I REALLY lost myself. I didn’t care anymore. I was worth nothing to myself, or anyone in my mind. My childhood dreams were long forgotten, I was never going to be good enough anyway… because how could I, this worthless, disgusting piece of trash, every be able to live or go after those dreams?

That fire eventually was rekindled through therapy and literally getting back outside where I belong. I was able to work up enough love for myself to be able to taste my dreams and I finally made it to Nepal! But hearing he was out of jail brought up all those horrific feelings: the fear, the anxiety, the disgust in myself, shame for not having the hindsight, the self-loathing, self-doubt, and worthlessness…. they came flooding back. The fight began. Tears, and panic attacks were all of a sudden a daily occurrence, all while the “smarter self” I have spent so many years working on was patching holes at every turn. At first, I slept… A LOT. After a couple days, I finally had some time where I could head up the canyon, take in the snowy views and the cool breeze and try to recenter myself in my element. I was able to just sit for a while, take in the view, think, and process everything that has just happened, as well as other questions my life was trying to throw at me.

Trying to work through the overwhelming amount of feelings going through my head this week I realized a few things. I am NOT, nor will I ever be that person again. I have grown and worked so much, I refuse to let my past try to drag me back down into that hell. I have learned what is truly important to me in my life and am constantly working to make sure my life goes in that direction. I may doubt myself all the time, and feel like I’m not good enough, and question every move I make, but that is because I want to make sure it is the right one. I tell myself all the time, I want to inspire others, and be someone who goes after there dreams and succeeds because those people are amazing inspirations to me. What I have to remind myself is that I already am that person. I have students and people tell me all the time, but being my own worst enemy, by brain would tell me not to believe it, or that I am still not good enough anyway. The one belief system that I haven’t been able to shake…

But it is time. It is time to tell myself that I AM that Badass I have always wanted to be! The one who is training to climb to the top of the world, doing circus tricks in her backyard, and inspiring others to conquer their own dreams, whatever they may be. 

Because after all… (excuse the cheese)

“It’s not the mountain we conquer, but ourselves” 

                                                                -Edmund Hillary 

5 Ways to Motivate Yourself to Train (when you really don’t want to)

When browsing social media and see professional athletes hard at work for their next big “thing”, I sometimes feel discouraged thinking “How is it that they always seem motivated to train and workout?!”

There are about a hundred different things in life that can try to drag us down. It is true that some personalities are naturally more accustomed to self-motivation, but the rest of us are constantly influenced by things in our daily lives. Studies have shown for a while that many of us in various parts of the world are over worked, underpaid, and way too stressed out. This makes motivation to train hard for particular dreams and goals difficult. How many of you have been in the situation where after working all day, all week, all you want to do after coming home is sleep, veg out, and decompress? How many of you end up in that situation far too often to where a month later you noticed you’ve gained 5 pounds, and feel like you haven’t accomplished anything?

SO, how can we break that stride? 

One critical piece many of us constantly forget is that exercise IS therapeutic, releases endorphins, and helps us feel better. Getting outside is also therapeutic, releases endorphins, and helps us feel better. But when we are in a motivation rut, we are simply “too tired” or feel like we can’t put forth the effort, it helps to take baby steps. Here are a few ways to start:

Simply get out of the house:

Go for a walk around the block, sit out on the porch, lay in the grass, go to a park, no matter how small, just getting some fresh air and sunlight can make a huge difference.

Do a quick at home workout:

It doesn’t have to be long, even like 10 minutes can help boost your mood. Just shut yourself in your bedroom alone and away from anyone who might bug you, turn on some music and do some push-ups, sit ups, yoga, whatever you feel like, as long as its active and distracting.

Go for the smoothie instead of the ice cream:

How many of us are guilty of eating comfort food after a long day? It is totally natural for us to crave sugary treats when we are upset or stressed out. But making even the smallest change to a healthier food choice can make a big difference. The reality is, eating junk food will only make you feel crappier. But getting vital nutrients that you need (and are probably missing after a stressful day) can help give you a better boost. 

Watch a motivating movie:

If you are really having a hard time getting off the couch or feel like you just need the rest, watch something that will re-ignite that flame inside. The Secret Life of Water Mitty is one of my personal favorites. It really brings out the wanderer inside. Everest may be a sad story about the ’96 disaster, but it the views and scenery will remind you what you of your goals! Free Solo is another great example. It is about Alex Honnold’s free solo climb up El Capitan is absolutely amazing and beautiful to watch. (I have seen it like 8 times.)

Review your goals:

Sometimes we need to remind ourselves what we are fighting for. By going over your plan and reevaluating your goals, you can remind yourself of what is important and why it’s important. It will help re-align your priorities, and maybe you will be able to make adjustments to your busy schedule to help better fit in training. 

Whatever you decide to do, be honest with yourself. No one else is going to care if you workout today or not. No one else is counting on you to live out your dreams and goals but yourself. If you start saying things like “Oh, I’ll just do it tomorrow” to yourself, you are going to find that tomorrow never comes. Nothing worth having in this life ever comes easy…. even when we wish it would. So start now, and you will be taking the first step in the right direction.

Mental Space for the Climbing Mind

Everyone is different. Everyone has different fear and anxieties. A non-climber might ask someone who does climb how they could possibly do it, might even call them crazy. The reality is, we kind of have to be in our own way. We have to be able to conquer our fears and anxieties enough to be able to succeed.

How do we do it? How do we get into the mental focus and space required to successfully top out on a wall or a summit.

Well, again, everyone is different. The best I can do is share my experience. In reality, I have incredibly severe anxiety. Sometimes I feel like a bit of a mess and it is a wonder how I am able to conquer it for the sake of climbing. The truth is, climbing and mountaineering is one of the very few ways I can focus my mind and I know many other climbers that feel the same way. I like to compare it to those who use yoga as a meditation practice. When you do yoga, you have to focus on balance, posing, breathing, and it is nearly impossible to think about anything else that is bothering you in your life. Climbing does the same thing for me. I hone in and focus on my moves, each step I take, each hold I grab, always looking onward and upward.

I had an experience this week on an incredibly easy wall that tested my mental space. This is a wall I have done so many times I have lost count, a route so easy, I honestly could free solo it. I am not sure exactly what it was, but on this particular day, my head just wasn’t in it. I set up the top rope, and I normally repel down from the top, no fear, no big deal… I couldn’t do it. I psyched myself out. Later, climbing the route I got about 3/4 of the way up and froze. I ended up pushing past it, but the thoughts going through my mind were a complete lack of trust in my rope and my gear which NEVER happens. Why on earth was a suddenly freaking out? What was it about that day or that climb that made me so nervous despite doing it dozens of times in the past?

Reflecting back on it, I realized I was not focused, and I wasn’t in my right mind set, I wasn’t climbing for the right reasons that day. I climb for me. I have always climbed for me. It is my therapy, it is how I am able to get an escape, it is a spiritual experience and place for me to be, and it is how I am able to find a sense of peace and calm in my chaotic world. That day, I was not climbing for me…. I am not even sure what I was climbing for… Attention maybe? Showing off to my husband? Embarrassing as it may be, I am quite irritated at myself. It reminds me that no matter how simple the task, I need to be focused on it, and not let other things in my world cloud my judgement. It might not be a big deal on a simple top rope route, but say I am climbing up a Himalayan ridge, that mental space is crucial for success as well as safety. If I got too distracted that I panicked, I could put my life or someone else’s in jeopardy…

I reflect back on my trip to Nepal, and there were a lot of factors that wreaked havoc on my mind. Getting food poisoning early in the trip put a lot of doubt in my mind. It wasn’t until I started feeling better that I received a surge of confidence, that is until I got sick again. The day I climbed Kala Patthar, I was not mentally where I really needed to be at the start of the climb. It was cloudy, and I was more focused on “What if the clouds never move? If I get to the top of this thing and I can’t even see the view I’m gonna be so pissed!” I then began to panic because I wasn’t getting enough air. It was my first experience at 18,000′ and I was beginning to doubt if I could even climb this stupid hill in front of me. About 2/3 of the way up I stopped for a little while, I had to refocus my mind, and get “out” of my head. Focus on my steps, focus on getting to the top regardless of what the weather does. I had to remind myself that whether the view is cloudy or not, it is still a massive accomplishment and I would hate myself if I turned back. I took about 10 minutes to gather my focus and continued onward. I climbed, I made it, and luckily the clouds parted just long enough for me to snap a picture of Everest.

It takes practice to focus the way I need to to be able to successfully climb a wall of summit a peak, and I am only human… some days just aren’t my day. The key is learning to push past whatever is holding you back to be able to focus when it really counts. If I really want to climb Everest and the other Seven Summits, I need to be 100% focused. I need to remember WHY I am doing it and I think the same can be said for anyone who has a goal they want to accomplish in life. Why do you want to do it? Hold onto that, focus that, and don’t let anything else get in your way.

7 Things to Remember When Planning an International Trip

Wanderlust is in the air!

It is all over the internet: Reddit, Instagram, Facebook, you name it! People are seeing beautiful photos from around the world and we are all trying to find ways to budget and save to live the traveler life.

Here are some things you need to know to begin planning your international trip!

What is your budget?

It took me significantly longer than I wanted to finally make it to Nepal. Most of that had to do with the lack of funds. There are a variety of different trips and expeditions out there but I needed to find one that I could afford on our tight budget. First thing you need to do is math out your budget and decide how much you can afford to take out every month and give a timeline of when you want to go on your trip. Your next step is going to be researching flights, places to stay, guides, things to do, sites, everything you want to do! You are looking at prices, expenses to math out exactly how much your trip is going to cost. From there you can adjust your trip accordingly to fit your budget! Last but not least: spending money. You NEED to give yourself a good amount to just play with because you will want it and use it. You are on vacation after all!

Flying Internationally:

It is important to check airline prices frequently, and on various days of the week to look for patterns in price changes. Below is an easy graphic of how many days in advance typically have the best price on international flights. Google flights is an easy resource for getting general ideas but Hopper and SkyScanner tend to have the best prices and deals and there are many other platforms out there as well. MOST IMPORTANTLY: The key is to compare prices on various platforms before choosing your flight is to be sure to look for consistency!!! If you find one flight exists on one platform, but doesn’t on the others, it is very possible that flight doesn’t actually exist anymore. Airlines cancel and change flights all the time, and unless you book straight through the airline, you may not be able to get a refund if a flight changes. Many platforms connect you to a travel agency and it is nearly impossible to get a hold of the correct people if something goes wrong. (take it from someone who dealt with this first hand and learned this the hard way).

Passports/Visas:

You NEED a passport to go anywhere in the world internationally and in most countries you also need a tourist visa. Here in the US, you can fill out a passport application at select Post Offices, and City Halls. Just look up where you can obtain a visa in your area. you will need to do this at least 3 months before your departure to ensure it arrives on time.

Every country has different requirements and depending on what country you are from can also change the requirements you need. You are going to want to research tourist visa requirements for a citizen of your country of origin to country of travel. If you are traveling to multiple countries, be sure to look up each individual countries requirements. Sometimes you need to fill out visas well in advance, so make sure this is one of the very first things you do in planning your trip!

Plan, Plan Plan!

This will be your key to keeping to your budget, and not wasting a day while you are out seeing the world! Even if you plan to do nothing on certain days (like spend time at a beach or something) they key is to have a plan for the big ticket items. Specific sites you want to see, specific things you want to do. Guided tours, and activities require advanced appointments. You want to be sure those are in your schedule before you plan your relaxation time.

Packing:

Know where you are going and what you NEED to bring and pack the bare minimum. Tropics typically have the lightest packing since you will live in a swimsuit most of the trip, trekking and climbing trips have a lot more since you are packing gear and layers of clothing. Every flight has weight limits, you will be paying extra if your bags are over the weight limit. Typically when you fly international, you are allowed one checked bag for free unlike flying stateside. This is because the airlines know you are traveling farther and typically for longer and need more luggage. Be sure to double check with your airline on baggage limits. It is good to pack up and weigh in a couple of weeks before you leave if you are worried about going over the weight limit.

Emergency Cash:

Things happen, it sucks when they do but it is important to always be prepared so you aren’t stranded in a foreign country somewhere. When I went to Nepal, we were stuck in Lukla for 3 days trying to get out and back to Kathmandu but the weather kept us socked in. We finally decided to call in a helicopter and I had to pay an extra $350 for that flight but it was completely worth it. I don’t regret that decision at all. I had to pay for it in CASH and I am glad I had it. I also had my credit card with me for bigger emergencies and luckily did not need to use it but it is good to have every back up available.

Dot all the i’s and cross the t’s:

As you get close to departure date, double check EVERYTHING! Make a list. Is your flight booked and still on schedule? Your passport and visa ready? Everything you planned booked and reserved? Work scheduled you off? Packed? Be sure to ask yourself every question that applies to your trip! The more you can do to prepare before you leave, the less terrifying it will be to be in a foreign country, and you will hopefully have a stress free vacation!

Happy Travels!

What I Learned About Myself in Nepal

Report from 7/7/18

There are dozens of articles out there on trekking to EBC, reguarding “do’s and don’ts”, “things I wish I knew”, etc.

The reality is, none of that can really prepare you for the experience itself. I myself, have been dreaming of the day I could finally see Everest since I was about 9 years old. I studied everything. read every article, every forum, every blog….. and there were still surprises.

First off, the reality:

It seems like everyone always says they wish they trained more. I thought so too, but physically I did really well. My body and legs felt very strong. I didn’t have any issues with altitude sickness, but breathing up high (especially with asthma) is incredibly difficult. The trick is to just find your pace, and stick to it. It’s OKAY to go slow!

Also, if this is you’re first trip to Asia, or a developing country, you are almost guaranteed to get sick. Be prepared to eat the same half a dozen “safe” dishes in every teahouse… I watched my trekking partner eat whatever he wanted with no issues, but he had much more travel experience than me and was living in Bangkok where he was used to the bacteria common in Asia. I on the other hand, got food poisoning 3 different times. I was able to pinpoint which foods where the most likely culprits and I avoided them the rest of the trip. I was trying to play it safe eating vegetarian up there, but cheese was a bad idea, even vegetables themselves can be a risk if not cooked or washed properly. If you are a first timer, stick to pasta dishes, oatmeal, ramen, rice dishes, popcorn, and dal bhat (a traditional dish of rice and lentil soup). You will get incredibly tired of eating the same thing for 2 weeks, but it is the safest option.

Another piece of advice I once read about was to take multivitamins with you to make up for the lack of nutrients. I felt like this was helpful and I think this strategy also helped keep me from catching the “khumbu cough”.

This was my first time out of the country. I went from 1st world luxuries in the US, to the vastly different world of Nepal. My first night in Kathmandu was complete culture shock, and took some getting used to. (Read more about when I first arrived in Kathmandu here.) There were a lot of emotional ups and downs on this trip. I learned a lot about myself on this trip… particularly things I didn’t expect.

I learned that dreams take more work than initially planned. It took me a lot longer to finally get a chance to trek to EBC than I wanted but in reality, I would not have been ready before now. This was step one in my complete dream to climb the Seven Summits. But when I finally got to see the Himalayas in person, that felt absolutely daunting. I began to realize how glorified, and “easy” documentaries and movies make Everest look. Everest is HUGE!! The mountain is scary, dark, and looming. The reality of the darkness this mountain carries really begins to sink in once finally seeing it in person. SO much death, pain, misery, and despair. Out of those who summit and live, many go through a personal hell to achieve that goal. They come home 30+lbs lighter, sun damage on their face, and may even lose a few fingers or toes to frostbite.

During my time in Nepal, I experienced only a small fraction of this and it was a lot harder than I expected. I lost close to 15lbs in total just in the 2 weeks I was in the mountains due to both traveler’s diarrhea and hiking 5-6 hours a day. Despite putting on sunscreen nearly every hour, I still maintained a pretty severe sunburn on my face. And on days I felt sick and exhausted, separation anxiety kicked in. As a kid, I spent a month each year at a summer camp in Colorado, happy to get away from my family and never had a problem with homesickness. This time I was leaving behind a husband, who is my rock in everything. Not being able to contact him when I was having a hard time was incredibly difficult. I began to really wonder if Everest and the rest of the Seven Summits was what I really wanted. It would mean spending money on years of training and climbing, surviving miserable trips full of pain, and discomfort, all for just one shot at the summit…. is it really worth all that trouble? Do I care enough? The answer is yes, however it is going to be A LOT harder than I expected… And honestly I’m a bit terrified.

On a bit of a lighter note, there is a special feeling and spiritual connection that has developed over the years for me when it comes to climbing high peaks; the Himalayas were no exception. I have known for years that I always felt closer to my deceased sister in the mountains, but I also just feel connected to mother nature and the beauty around me. Being alone in the Himalayas gave me a much larger perspective on the matter.

On the summit of Kala Patthar with a photo of my deceased sister Brooke

My favorite day of the entire trek was not the day we climbed Kala Patthar or went to EBC, it was the day we trekked from Dingboche to Lobuche. We had 360 degree views of the mountains that surrounded us, and we visited the Sherpa Memorial field. The mountains were the most beautiful I had ever seen, and I could feel how the memorial field was a very sacred place on the mountain. This was the day I could really feel that connection, but that wasn’t the only one. There were a lot of moments throughout the trek where I felt like I was really able to be myself in a spiritual way which was something I had been craving for a long time.

Growing up in a religious family brought up a lot of issues over the years. I felt like I couldn’t be myself. I felt like I was being forced into living expectations I couldn’t possibly live up to. Fear caused me to unfortunately hide how I felt for years, which contributed to depression, and my eating disorder after high school. I never really had the chance to come into my own until I was able to work through many of those issues through therapy and I began to look inside myself to figure out what I even believed in.

This trip really helped me cement some core beliefs on my spiritual side that had been lost nearly my entire life. I believe that personal spirituality, and your personal relationship with whatever you believe is far more important than the religion itself. A belief I personally feel like has been lost in many common religions today. This is not to bash on anyone that belongs to a religion and practices regularly, there is nothing wrong with that! There are a lot of genuine people that are members of a church. However, I have personally found a lot of hypocrisy in religion growing up, and I know I am not the only one who has felt this way. Religion is made up of people. People are human. Nobody is perfect. Therefore, no matter the religion, you can always find flaws. This is why your personal relationship with your spirituality is the most important. Being responsible for your actions, holding yourself accountable, no matter what they are, and just working on being a better person all the time is the best thing you can do, with religion in your life or not.

One thing I really loved about Nepal is that it is an incredibly spiritual country. You can find every type of person on the religious spectrum, such as monks praying at the stupas, non-practicing, and everything in between. But no matter who they are, everyone is nice, helpful and genuine. This has a lot to do with the Buddhist belief in Karma, but more than that, it is their culture and it was probably the most real place I have ever been in a spiritual sense. Simply put, people just want to help, and are trying to be good, whether they are Bhuddist, Hindu, Christian, Muslim, or something else. This is how everyone should be, this is how our would should be, and this was the best thing to learn about myself on my trek to EBC.

The 14er Quad: Democrat, Lincoln, Cameron, Bross

Report from 6/30/18

I’ve been home from Nepal less than 2 weeks and the high altitude fever was already killing me! time for some more high peaks! 4 in a day to be exact.

Located South of Breckenridge, CO and North of Fairplay lies a series of 14ers in the Mosquito Range. Some of these got checked off my list on Thursday.

We left Littleton around 3am to drive the 2 hours to South Park. the trailhead for this quad is located up a dirt road Northwest of Alma. My partner and I started hiking at 5am. After reading various forums on the internet, we decided to take the advice of many and do the loop backwards, starting with Bross. The trail is steep with slippery scree and many have mentioned that it is much easier going downhill on Democrat, especially if you have bad knees. So, with that advice, we started with Bross. As we neared 14,000′, we ran into 2 mountain goats who were surprisingly chill with us hanging out with them. After a few selfies with the goats, we moved onward to the summit. Within 2 hours we were on top of our first out of 4 fourteeners for the day at 14,172′.

**A little note about Bross: Mount Bross’s summit is located on private property, so technically, you are not legally allowed to go to the summit. The trail scoots right along 14,000′ so if you do not feel comfortable trespassing, then you still at least hit 14k. The mountain itself lacks structural integrity. It is an old mining site and has not been maintained so with the summit trail closed it is a “climb at your own risk scenario. Also, NEVER EVER enter one of the mines as they all risk collapse. Other people have reported that on occasion there will be someone monitoring the fork in the trail on Bross to keep people off the summit. We didn’t see anyone on our ascent. My guess is because we started with Bross instead of Democrat and no one was monitoring the mountain that early.

After spending about 20 minutes enjoying the summit, we moved on to your next peak. Headed down the saddle, following an old mining path past Mount Cameron, we soon arrive at our highest point for the day. after 50 minutes of traversing, we were standing on the summit of Mount Lincoln at 14,295′.

A short 10 minutes of pictures and smiles, we move on to Mount Cameron. Since Cameron’s prominence does not meet the 300′ minimum, it is not an official 14er, and is listed as unranked. It is basically an extension of Lincoln’s shoulder. Regardless, it is named and still a peak in my book, and the trail goes across the summit so after maybe 20-25 minutes of hiking, we were standing on Mount Cameron at 14,238′.

We spent a good amount of time resting on the summit of Cameron knowing we had a large obstacle ahead. The downside to doing the loop backwards is the fact that Democrat is last, and it is the hardest of the 4. After dropping over 800 feet in elevation, we then had to re-ascend 700 of that within a half mile. it was slow, steep, rocky, and exhausting in the hot sun. After what felt like forever, we finally stood on the summit of Democrat at 14,148′. We are 4 for 4 on this fourteener loop!

Car to car, including our summit breaks, it took us 8 hours. We arrived back to our car at 1pm, and headed into South Park for lunch!

Definitely recommend this loop as you can check off 4 peaks of your 14er list. Be sure to acclimatize well before doing this climb as it is a long day above treeline. Bring lots of water and always be prepared for weather!

TRIP REPORT: Everest Base Camp (17,600′)/ Kala Patthar (18,519′)

Report from 6/20/18

Here it is!

I planned to get this out sooner, but I got home to find out I had caught a head cold  from the guy sitting next to me on one of my connections home and have also been struggling with the jet lag pretty bad. I have been pretty miserable the last few days. But without further ado, here is my trip report of my Everest Base Camp Trek!

First, I shall answer a question which may have arisen for those who frequent my blog and may have noticed a “typo” in the title. Yes, I was supposed to climb Island Peak as well. Originally, this trip had 2 parts: trek to EBC, and climb Island Peak (Imja Tse) at 6189m (20,305′). Long story short, Island Peak did not happen, but that will be explained.

Most of what is written below is actually fragments from my travel journal. This is strictly just the trekking portion of our trip. I am not going to spend time on talking about my day in Singapore, or when I first arrived in Kathmandu because I have already discussed them but if you missed it, you can click the links to read about them! So to begin, we are going to start with our first day in the Himalayas:

DAY 1: LUKLA TO PHAKDING- 2,860m (9,380′) to 2,610m (8,560′)- 5/30/18

The morning started out in Kathmandu, misty and cool from rain the night before. Monsoon season is near, as we are at the tail end of may, and reports of many Everest climbers and crew had been stuck in Lukla for almost a week due to flights not being able to access the mountain. We head to the airport, hoping and praying skies are finally clear enough for us to get there. We are scheduled on the first flight out at 6am. We arrive, weigh our bags, and wait in the domestic terminal at Tribhuvan Airport for news, any news. Before we know it, we are on a little shuttle to take us to our small propeller plane, we board and we are off! On the plane, I had a giant smile on my face I could not erase, and tears coming to my eyes. Hazy skies make it difficult to see the tall mountains in the distance, but soon, we can see a hazy peak out the window of the plane, standing well above all others off in the distance. It’s Everest!

Landing in Lukla, at the world’s most dangerous airport, was not as terrifying as I anticipated. We had a very smooth landing, and was off the plane an instant later. Immediately we could already see Nupla, standing at 5,885m (19,303′), dominating the background. I nearly cried. I could not believe I was finally here! By a fun coincidence, my tent-mate from Rainier happened to be in Lukla at the same time! After catching up with her, we headed off. We have a small group. Gadul is our local guide and I am accompanied by one other, Juan from Bolivia, who is currently living in Thailand. The road to Phakding was downhill, and quick. We passed dozens of rocks, prayer wheels, stupas, and memorials covered in Sanskrit writings from the Monks of the monasteries. I learned that all of these sacred monuments must be passed on the left, or in a clockwise direction out of respect. These are the most peaceful mountains I have ever been to. Bells and chimes from prayer wheels ring, and chants in the distance can be heard from the Monks up the hill. The spirit of this land is something I have wanted to experience for years. I was in disbelief of the awe and wonder around me. Within a short 2 1/2  hours, we arrived in Phakding, got settled into our first teahouse lodge and enjoyed some downtime.

DAY 2: PHAKDING TO NAMCHE BAZZAR- 2,610m (8,560′) to  3,440m (11,283′)- 5/31/18

Day 2 was long, steep, and hot. The trail was very up and down, and there were stairs, so many stairs!!! I started the morning off feeling pretty good! As we started walking I could hear birds that sounded just like the Mockingjay from the Hunger Games. We passed plenty of porters bringing down stuff from base camp now that the season is over and I began to realize something; many of these young boys looks just like my high schoolers! When people think “Sherpa” there is a stereotype that comes to mind. A short man, wearing flip flops, smoking cigarettes, while hiking with up to 100 kilos on his back with a head strap used for balance. While this is seen sometimes, the reality is most porters are young teenagers. Some are wearing skinny jeans, Adidas, a flat rimmed baseball cap, and playing music on their phone while they walk. I asked Gadul how young some of the porters typically start and he said some can be as young as 14, working weekends while they’re not in school.

We stopped for lunch about 2 hours into our hike in a village called Monjo, where the official entrance to the National Park is located. We crossed 6 bridges on the way to Namche. The last bridge is known as the high bridge. you hike up a steep hill to get there, as it’s suspended around 100 meters in the air. The last 2 hours of the climb is up a steep cliff side. It was extremely slow going, especially in the hot sun. It did not help that whatever I ate for lunch was beginning to not sit well. By the time we got to Namche I was pretty wiped out and my stomach was killing me. I had a difficult time eating dinner because I was so nauseous, and then it hit me in the middle of the night… my first bout of traveler’s diarrhea. I knew it was not altitude sickness because of the simple fact that I had been training above 10,000′ for months. Plus, I had altitude sickness once before, this was different. I could nearly pinpoint that the goat cheese on my potatoes at lunch was the most likely culprit.

DAY 3: REST DAY IN NAMCHE- 6/1/18

After a “fun” morning in the bathroom, I joined everyone for breakfast where I tried to force down some oatmeal. The initial plan was to hike up to Khumjung, a town at 3780m (12,398′), but we woke up to heavy rain and clouds in the area. (I was pretty thankful for that) A few hours later, Juan knocked on my door to announce they were going to head up for a short walk now that the weather was clearing. After spending the morning lying in the fetal position, and taking some antacid medicine, I decided to join them to at least get out and stem some boredom.

We walked up to the Sagarmatha Visitor Center, (Sagarmatha is the Nepali name for Everest) and toured around enjoying the Tenzing Norgay Memorial statue (the real MVP), as well as the various boards and displays inside the visitor center. On a sunny day, you can see Everest from this point, however, because of the clouds, we couldn’t see anything. As the clouds were beginning to move and disperse slightly, we decided to hang out on top of that hill to wait and see if the clouds would part enough to see Everest. After about 10 minutes of waiting, we could finally see Lhotse peering from behind the clouds, and moments later, Everest. I literally cried. I had been waiting for this moment for so long. to finally see Everest in person! I realized this was no longer a dream, but totally real. Despite being unbelievably sick, I had a rush of adrenaline.

DAY 4: NAMCHE TO DEBOCHE- 3,440m (11,283′) to 3,820m (12,529′)- 6/2/18

Feeling slightly better the next morning, We set off on our way to what was originally going to be Tengboche. We hiked down a steep hill to the small village of Phunke Tenga near the river, then back up another steep hill to Tengboche and the Tengboche Monastery. We toured the grounds, taking in the beautiful artwork inside the monastery. I absolutely LOVED the detail and the colors. It was very warm and inviting. I only wish we had been there for a Puja ceremony. That would have been incredible to see.

Then came time to find our lodge. Due to the fact that we were trekking in “off season”. Many teahouses close as families head to Kathmandu for the summer. The teahouse we meant to stay in was closed, so we hiked down into the rhododendron forest to the small village of Deboche. The bright colors of the flowers were incredible! Pinks, yellows, and white, colored the trees and the ground.

DAY 5: DEBOCHE TO DINGBOCHE- 3,820m (12,529′) to 4,410m (14,464′)- 6/3/18

We woke up to a beautiful view of Ama Dablam as well as Everest, Nuptse and Lhotse. The hike was fairly gentle in incline compared to the steep hills I had been climbing before. What was predicted to be a 5-6 hour hike, we did in 4 1/2! At this point in time, I was officially the highest I have ever been. at 14, 464′ I was higher than any peak in Colorado, higher than Mount Rainier, and almost as high as Mount Whitney, the tallest mountain in the contiguous United States at 14,505′. But, it didn’t feel like I was over 14,000′. I was acclimatizing very well and my stomach was improving.

DAY 6: DINGBOCHE TO LOBUCHE (My favorite day)- 4,410m (14,464′) to 4,910m (16,104′)- 6/4/18

Words cannot describe the awe, beauty, and spiritual nature of what I had seen this day… I like to think that I have a very good eye for pictures, especially outdoors, and I still don’t think I did it any justice. I came here, not only to reach a lifelong goal, but to also go on a spiritual pilgrimage of sorts and this day fulfilled a big part of that spiritual side.

To start, we climbed up the tundra hills above Dingboche. The clouds parted and we had 360 degree views of the Himalayan peaks that surrounded us. I am officially convinced that Ama Dablam is the most beautiful mountain in the world. Everest may the the highest, but it’s not “pretty”. Ama Dablam was stunningly gorgeous. I literally stopped and told myself “don’t sit down or you will never leave.” We took our time in those hills taking dozens of photos. The clouds sweeping by below us added an element like we really were in heaven. I have never seen anything more beautiful in my life.

After a quick lunch in Tulkla, we climbed a steep rocky hill to the Sherpa Memorial field where tombstones and stupas of climbers who died on Everest and other nearby peaks cover the hillside to remember those who have fallen. The spirit of this mountain is unreal. You could really feel how sacred of a place this had become.

Walking onward, the view opened up to the Khumbu region where Pumori dominated the view, Nuptse stood out infront of Everest, and You could see over the ridge into Tibet where Changtse is visible at 7,543m (24,747′). (You can literally see China!)

DAY 7: LOBUCHE TO GORAK SHEP AND EVEREST BASE CAMP!- 4,910m (16,104′) to 5,140m (16,859′) and 5,464m (17,600′)- 6/5/18

My lungs were definitely beginning to feel the lack of oxygen but my body felt like a freaking amazon warrior! Hung out at base camp for over an hour, playing around in the glacier and I was amazed at how well I felt. From Lobuche, we walked along a fairly flat path to Lobuche Pass which led to the surprisingly intense Changri Glacier crossing. Navigating the crazy rocks was all over the place. Finally, we made it to Gorak Shep, where we would be spending the night.

 After a quick cup of tea and dropping off our bags, we continued onward to Base Camp. Nuptse dominated our views and it was massive. The tip of Everest’s summit was peering out behind it, and below it all was the Khumbu Glacier. A mix of rocks and ice, like nothing I had ever seen before. We could hear shifting, creaking, and cracking as if the mountain was alive, trying to speak.

When we arrived at EBC, it was like a playground of ice and rock. Climbing season is over so it was completely empty and there were no tents left, but I can imagine sleeping on the wet rocks and having the ice and water constantly moving beneath you. How do you sleep?! The Khumbu Icefall is MASSIVE. in photos, movies, and documentaries don’t show how steep it really is.

After Playing in the glacier, we headed back to Gorak Shep to rest, and get some sleep before our early morning ahead of us.

DAY 8: KALA PATTHAR SUMMIT AND BACK TO DINGBOCHE- 5,644m (18,519′)- 6/6/18

The morning started out very cloudy and socked in. We started climbing Kala Patthar at 5am from Gorak Shep. I hit a wall pretty early into my climb. It was incredibly steep and the lack of oxygen was finally catching up with me in the sense that I would begin to feel a sense of panic whenever I had trouble catching my breath. I would have to stop, calm down, and let my breathing regulate. Part of me wanted to turn back on multiple occasions because of the crappy weather. I didn’t want to make it to the summit and not be able to see the view. But I kept pushing and near the end, I was having to take nearly 10 breaths for every step I took. 

Luckily, during the last 20 meters or so to the summit, all of the sudden the clouds began to open up and I managed to see an amazing view of Everest, Nuptse, and the Khumbu Glacier just long enough for a few photos before the clouds closed back in on us. I was exhausted, and out of breath but glad I completed my goal. I had finally seen Everest and Base Camp, and that’s when it began to sink in that I didn’t think that I had it in me for another summit. Island Peak was a bonus, an add-on to my original goal and at this point, I felt like I bit off more than I could chew with my first trip to the Himalayas. I was exhausted, hungry, homesick, and really just kind of done at this point of the trip. I no longer had the desire or even felt the need to climb Island Peak anymore. However, we were headed in that direction anyway, so I kept it in the back of my mind, and was still open to the possibility. After Kala Patthar, we ate breakfast at Gorak Shep then headed all the way back down to Dingboche. A long day for sure, but it was nice to breathe the thicker air.

DAY 9: DINGBOCHE TO CHUKKUNG- 4,410m (14,464′) to 4,730m (15,514′) 6/7/18

My second bout of food poisoning began this morning. I woke up feeling a little nauseous, had trouble eating breakfast, but not thinking much of it initially. but as we began our ascent to Chukkung, it hit me like a wall. I thought I was gonna puke. Was it the vegetables in the spring rolls I had for dinner? or the hot chocolate I had before bed? Either way, I was back to boring foods… Despite wanting to throw up with every step, The hike to Chukkung was pretty short. I spent the rest of the day in bed, trying to let my stomach subside, and then it was time to make a decision. The next day we were supposed to head to Island Peak Base Camp, but I had the option of staying behind while Juan and Gadul joined another guide to make a summit attempt. I felt weak, burned out, sick enough that it seemed like the right decision.

DAY 10-11: WAITING IN CHUKKUNG- 6/8-9/18

The boys left at around 9:30am for base camp which was actually fairly late. We spent the morning waiting out heavy rain before they decided to leave. My stomach was still a mess, and I was still struggling to force down any food. Entertaining myself all day was a struggle, and by the time I went to bed, the doubt began to creep in… “Should I have just gone and tried? Am I giving up?” I had to remind myself how sick and weak I really had become. Even Gadul mentioned he could tell I had lost a lot of weight, and was worried. There is no way I would’ve been able to endure a 16 hour high altitude climb in the condition I was in. By morning the next day, I could FINALLY see Island Peak. towering 5,000 feet above me was a giant wall of ice. I confirmed with myself, there was absolutely no way. Reports from Gadul and Juan talked about waist deep snow from the night before and hidden crevasses EVERYWHERE under the snow. Due to the late season conditions, melting was causing the route to be extremely unsafe, especially near the end so they turned around about 200 meters or so from the summit.

DAY 12-16: DOWN WE GO- 6/10-14/18

The downward crawl had long days. Both Juan and I reminisced on foods we missed back home and miles seemed stretched as our tired legs headed back down from Chukkung to Deboche, Deboche to Namche, and Namche to Lukla. We then spent the next 3 days in Lukla due to weather. We were scheduled to fly out on the 13th, but no planes came at all that morning. We then booked new tickets for the next day in a second attempt however, weather closed in quickly and before our plane was scheduled to take us back to Kathmandu.

I was scheduled to fly home the next day, and after checking the weather for Friday, it was safe to assume no flights would come the next morning so we looked at our second option: paying $500/person to fly on a helicopter. We decided to go for it, and even that was an anxious waiting game as clouds were even to thick for the helicopter much of the day. They were finally able to land to pick us up and take us back to Kathmandu. It was worth it.

Overall, I loved Nepal. I loved the culture, the people, the mountains, and I would do it again in a heartbeat. It had it’s ups and downs, but for a first trip to the Himalayas I felt like it was a successful endeavor. I hope you enjoyed my long winded report. I know it was a lot to read through. Be sure to read What I learned About Myself In Nepal as well!

What You Need to Know About Traveling to Kathmandu, Nepal

Report from 5/29/18

I woke up this morning feeling a bit better than I did when I first arrived. The excitement returned, and I slept off some of the anxiety that accumulated. However, that does not mean that anything changed Kathmandu is honestly a city that is very loud, dirty, and traffic is absolute nonsensical chaos. I knew all this going in, but it doesn’t matter how much prep and research you put into it, nothing will really prepare you for your first time alone in a 3rd world country. And that is exactly what I am going to debrief you on today: The ugly, and the beautiful.

This morning I met my one other climbing partner that signed up for the same date block as I did. I do feel better that I’m not alone. Besides us two, our team will consist of 2 guides and 1 porter. There will also be a cook and staff up at Island Peak Basecamp. After our briefing meeting this morning at the Himalayan Glacier Office, our awesome guide took us to a few iconic sites. (I will tell you his name when I figure out how to spell it).  As excited as I was walking through the beautiful streets of Thamel that morning, here is where it gets interesting and my blood pressure probably shot through the roof: We had to take a taxi… in daytime Kathmandu traffic…

First off, I would like to say that after what I survived today, climbing a giant mountain is going to be easy! Now, you’re probably asking yourself “wait, what?!”. Let me explain… I am a very anxious person. I like the mountains because of the solitude. I hike alone most of the time because I like the quiet, and peace that comes from being in those mountains. I love that I live with trail heads in my backyard. I HATE going into the city. It’s stressful, fast paced and crowded. I’m not a fan. Anytime there is some sort of event, or party or something that forces me to go into downtown Salt Lake, I cringe, I complain, and I get stressed out. I deal with it, and I’m just thankful I don’t live somewhere like New York City or LA. Kathmandu is a very crowded, and very densely populated city. For those at home Kathmandu Valley is much like Salt Lake Valley… only half the size and double the population.

So, I put a crazy amount of faith into this taxi driver as he drove us all over town. This is what I learned about Kathmandu Traffic:

  1. There are no rules of the road… not really anyway. There are lines on some streets, and there are these weird giant pillars in the middle of certain intersections, and occasionally you will see traffic cops helping move things along on the busiest streets, but really, there is nothing like you see back at home. No street signs, speed limits, not even stop lights! Everyone just kind of goes. 
  2. Nepali drivers are probably the best drivers in the world, and Utah drivers really are probably the worst. Despite the seemingly organized chaos on the streets of Kathmandu, Nepali drivers have mad skills. They have to be extremely attentive. It’s like you’re driving through a neighborhood and kids on both sides of the street are accidentally kicking their balls into traffic, constantly. They are also incredibly aggressive and assertive drivers. Now, I don’t mean angry or road rage-y, I mean they find any window of opportunity and take it. There is CONSTANT honking, flashing brights at each other and weaving around cars and bikes, but non of it is with hostility, it’s all done as almost like a note of “hey I’m here” to bigger cars or pedestrians. 
  3. Traffic RARELY comes to a standstill. In rush hour in Salt Lake, there are several areas of the Valley that come to a complete standstill. In Kathmandu, because everyone is forcing there way around everyone, traffic is always moving.
  4. Car accidents are rare and if there ever is a car accident, it’s usually not a big deal. We have a max speed limit of 80mph in Utah. People die… all the time. Wrecks at home are often horrific. Because of the attentiveness of everyone on a bike or in a little Suzuki driving around Kathmandu, nothing really ever happens. There appear to be close calls everywhere to the untrained eye, but once you figure out how it all sort of “works” you realize that’s normal traffic for them. 
  5. Cows chill in the road. So do goats and monkeys. 

Now for the cool part. The part everyone scrolls down past all the other stuff to read right?

First we went to the infamous Shree Pashupatinath Temple. This is the giant, iconic and recognizable Bhuddist Temple in Nepal. Back in 2016 when the earthquake hit, the top of the temple completely crumbled. They have since rebuilt it and the site looks as if there never was an earthquake. 

We circled around the temple taking a million pictures before heading to our next stop, Swayambhunath, also known as The Monkey Temple. This is where the internet sometimes gets confused. This is because the sites look very similar however the monkey temple is much, much smaller and has more architectural features. Many mistake Shee Pashupatinath for Swayambunath and vice versa. In fact, I myself thought that was the case. But names aren’t important, all that matters is the beauty that comes from these sites. It is indescribable. I had seen pictures of both, and for years I dreamed about it, but nothing compares to the real thing. The smell of incense in the air, prayers being offered, and despite the crowds, it is a peaceful place and completely worth the crazy drive.

A question I’m sure some are wondering, as I wondered myself, how is Nepal doing since the earthquake? Well, they are healing, but there is still a lot to be done. I’m sure I will see in the mountain villages later, as I have heard the status it is much worse , but in Kathmandu, the buildings that took the most damage were old, brick, and poorly structured. most of the city still stands. However, there are signs of damage and hurt everywhere still. as we drove around, there were lots that were still a pile of rubble that have yet to be rebuilt. Some sites were still in the rebuild process, many sidewalks and roads are still damaged, and there is a huge homeless problem. as we drove buy these beautiful temples, on the outside were dozens and dozens of people seeking sanctuary and refuge begging for rupees. It is a hard, sad, and humbling site to see, especially as I am there for leisure. The one thing to avoid is feeling guilty. Nepal thrives on tourism. By traveling to this country to visit, and showing interest in the historic sites, paying entry fees, paying permit fees for climbing, and buying local fare, that money helps their economy get back on track. I remember when the quake first happened, I wanted to jump on the first plane out here to help, but it wasn’t even aloud. Planes were grounded for days and no one was allowed into the country. Now, they appreciate the help, but they also just appreciate people coming to visit and taking an interest in their home country. Nepali pride is evident everywhere and as much as I enjoyed the temples in town, I cannot wait to see the mountains I came here for.