Climbing Priorities: Back to the Beginning

When I was in 3rd grade, we did a report on a hero in history that interested us. I chose to do my report on Edmund Hillary. I vaguely knew who he was as my dad knew a lot about Everest. As I researched Edmund and learned more about him and his expedition myself, I became very interested in Mount Everest. I wondered if it would be possible for someone like me to climb one day.

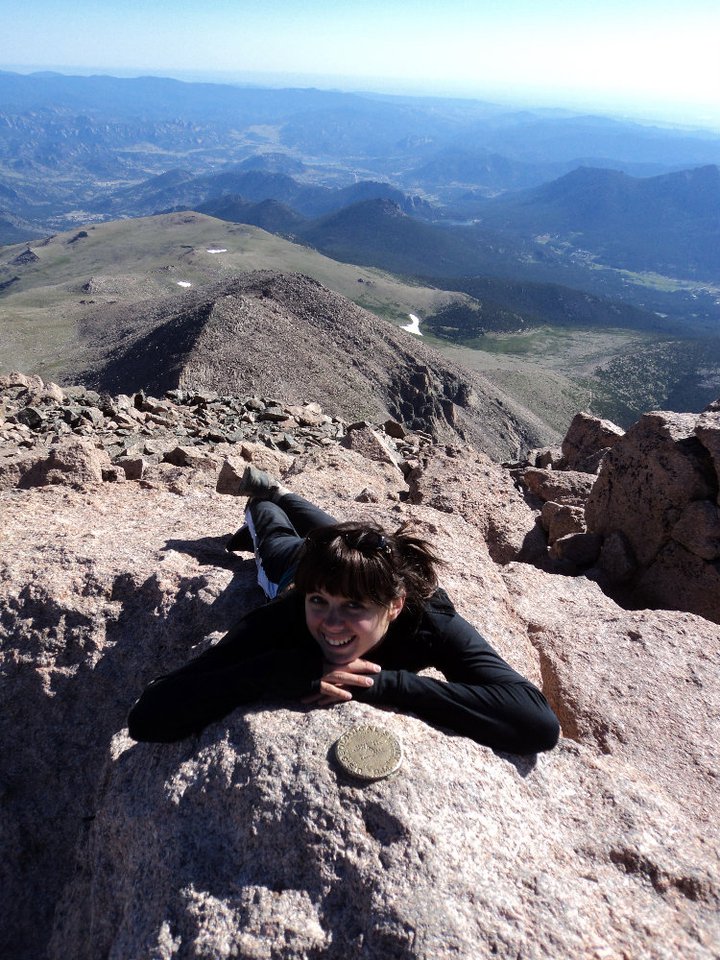
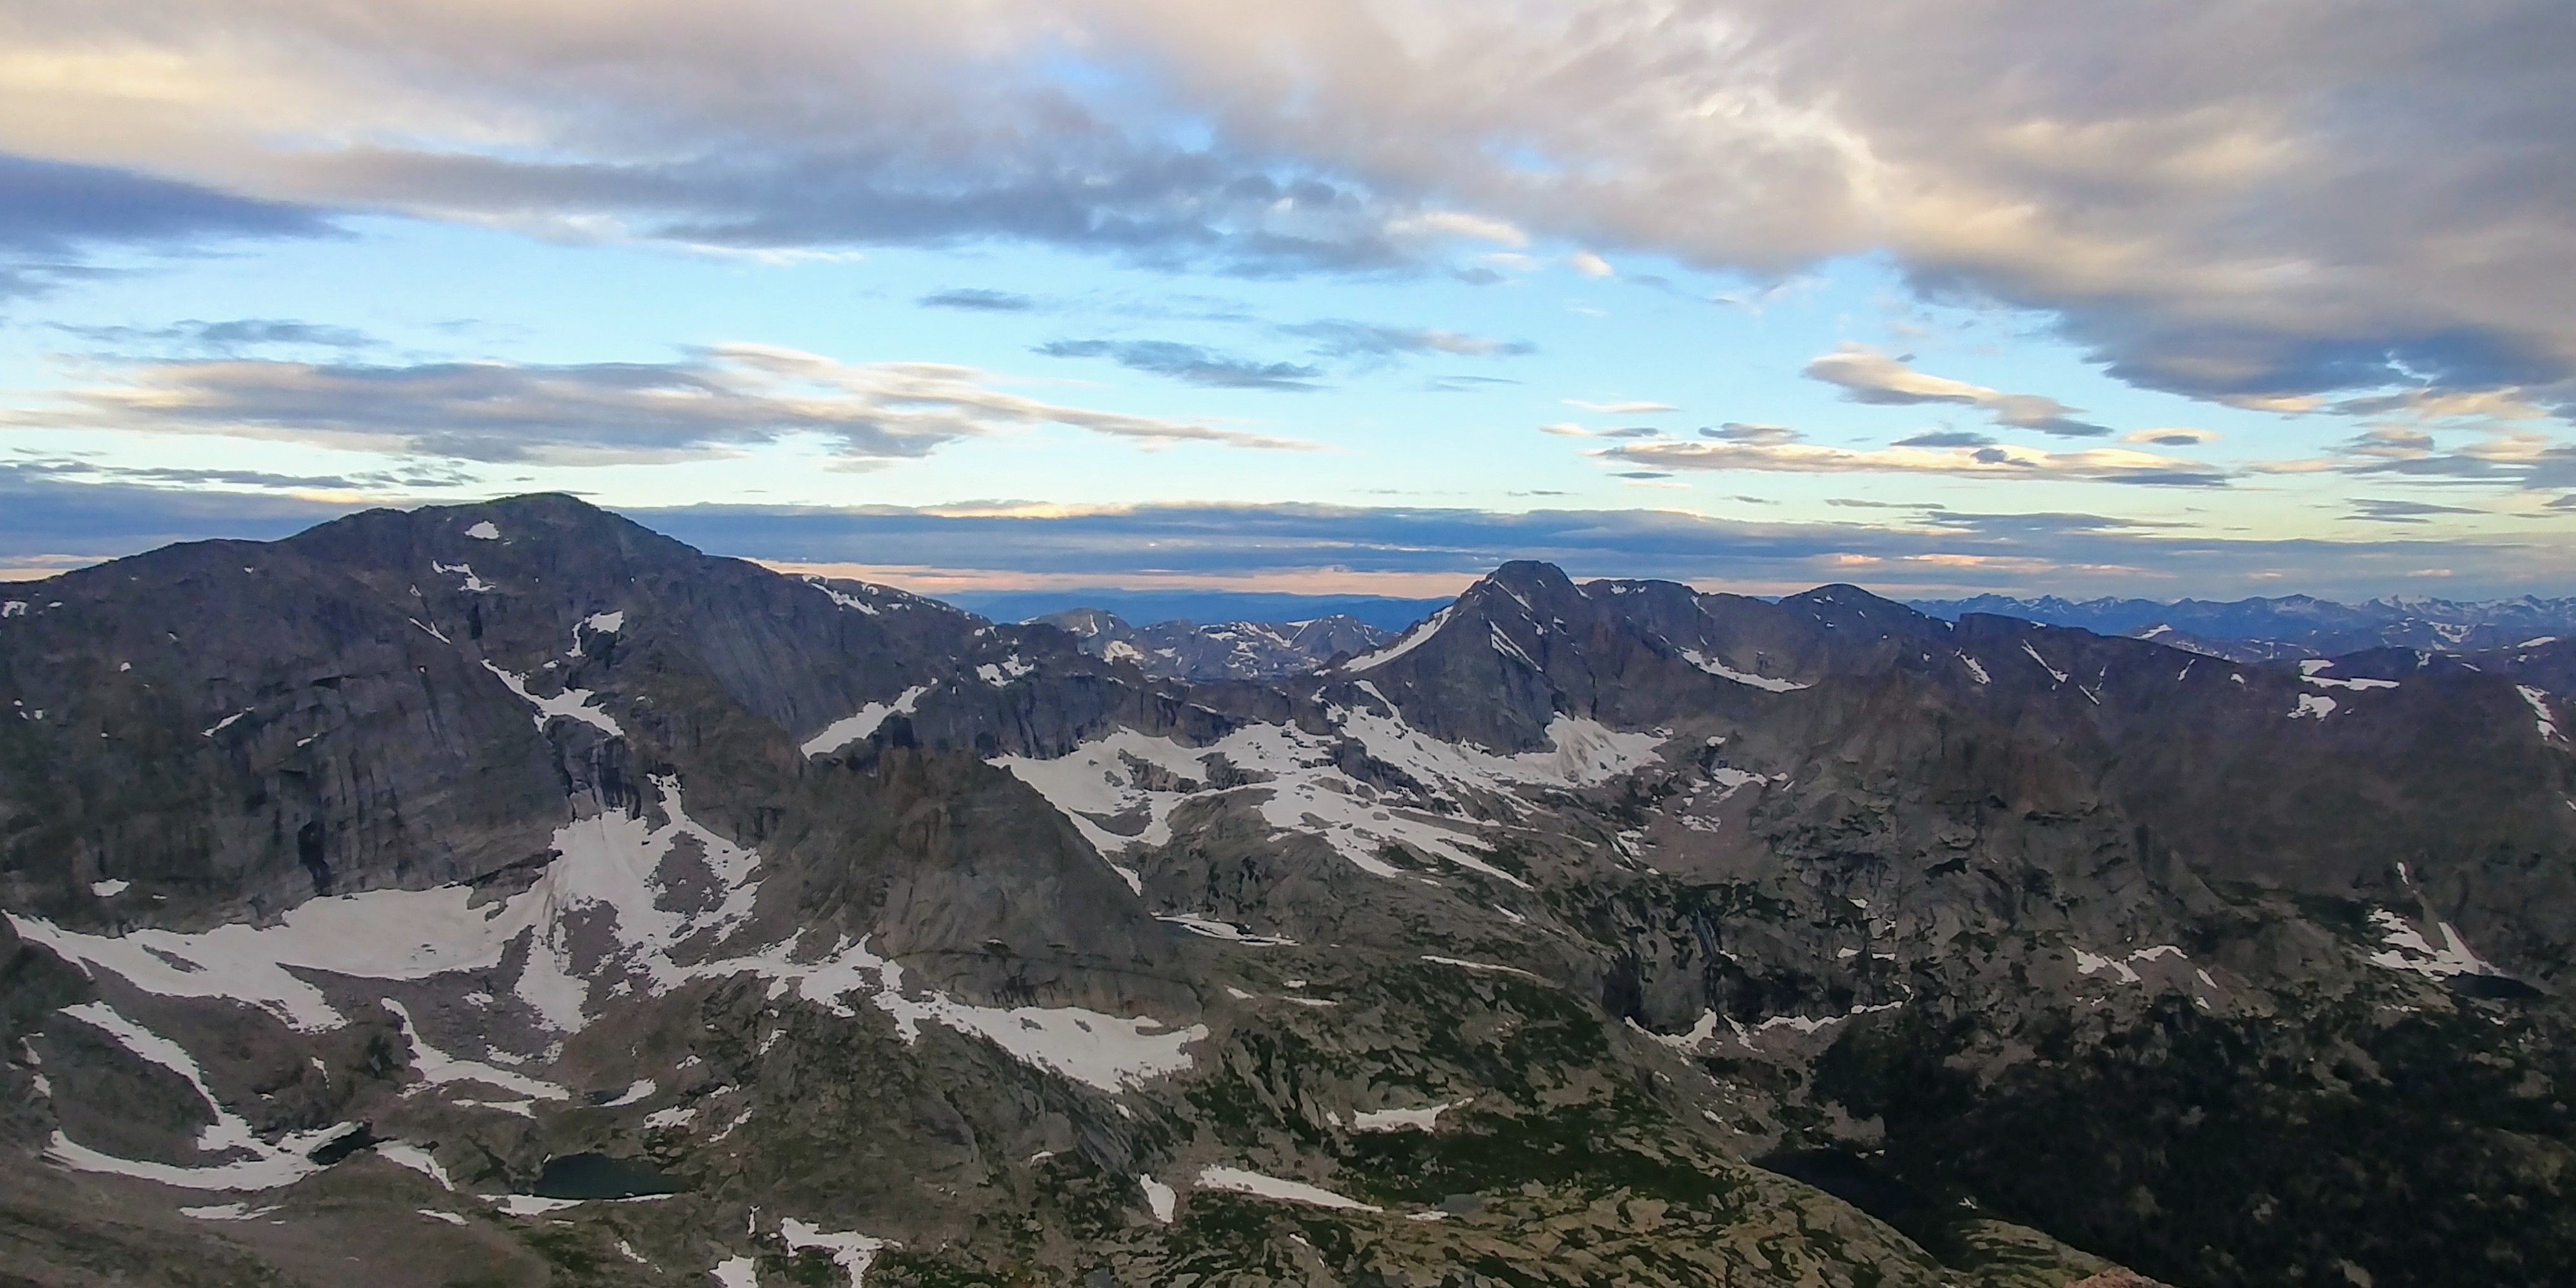
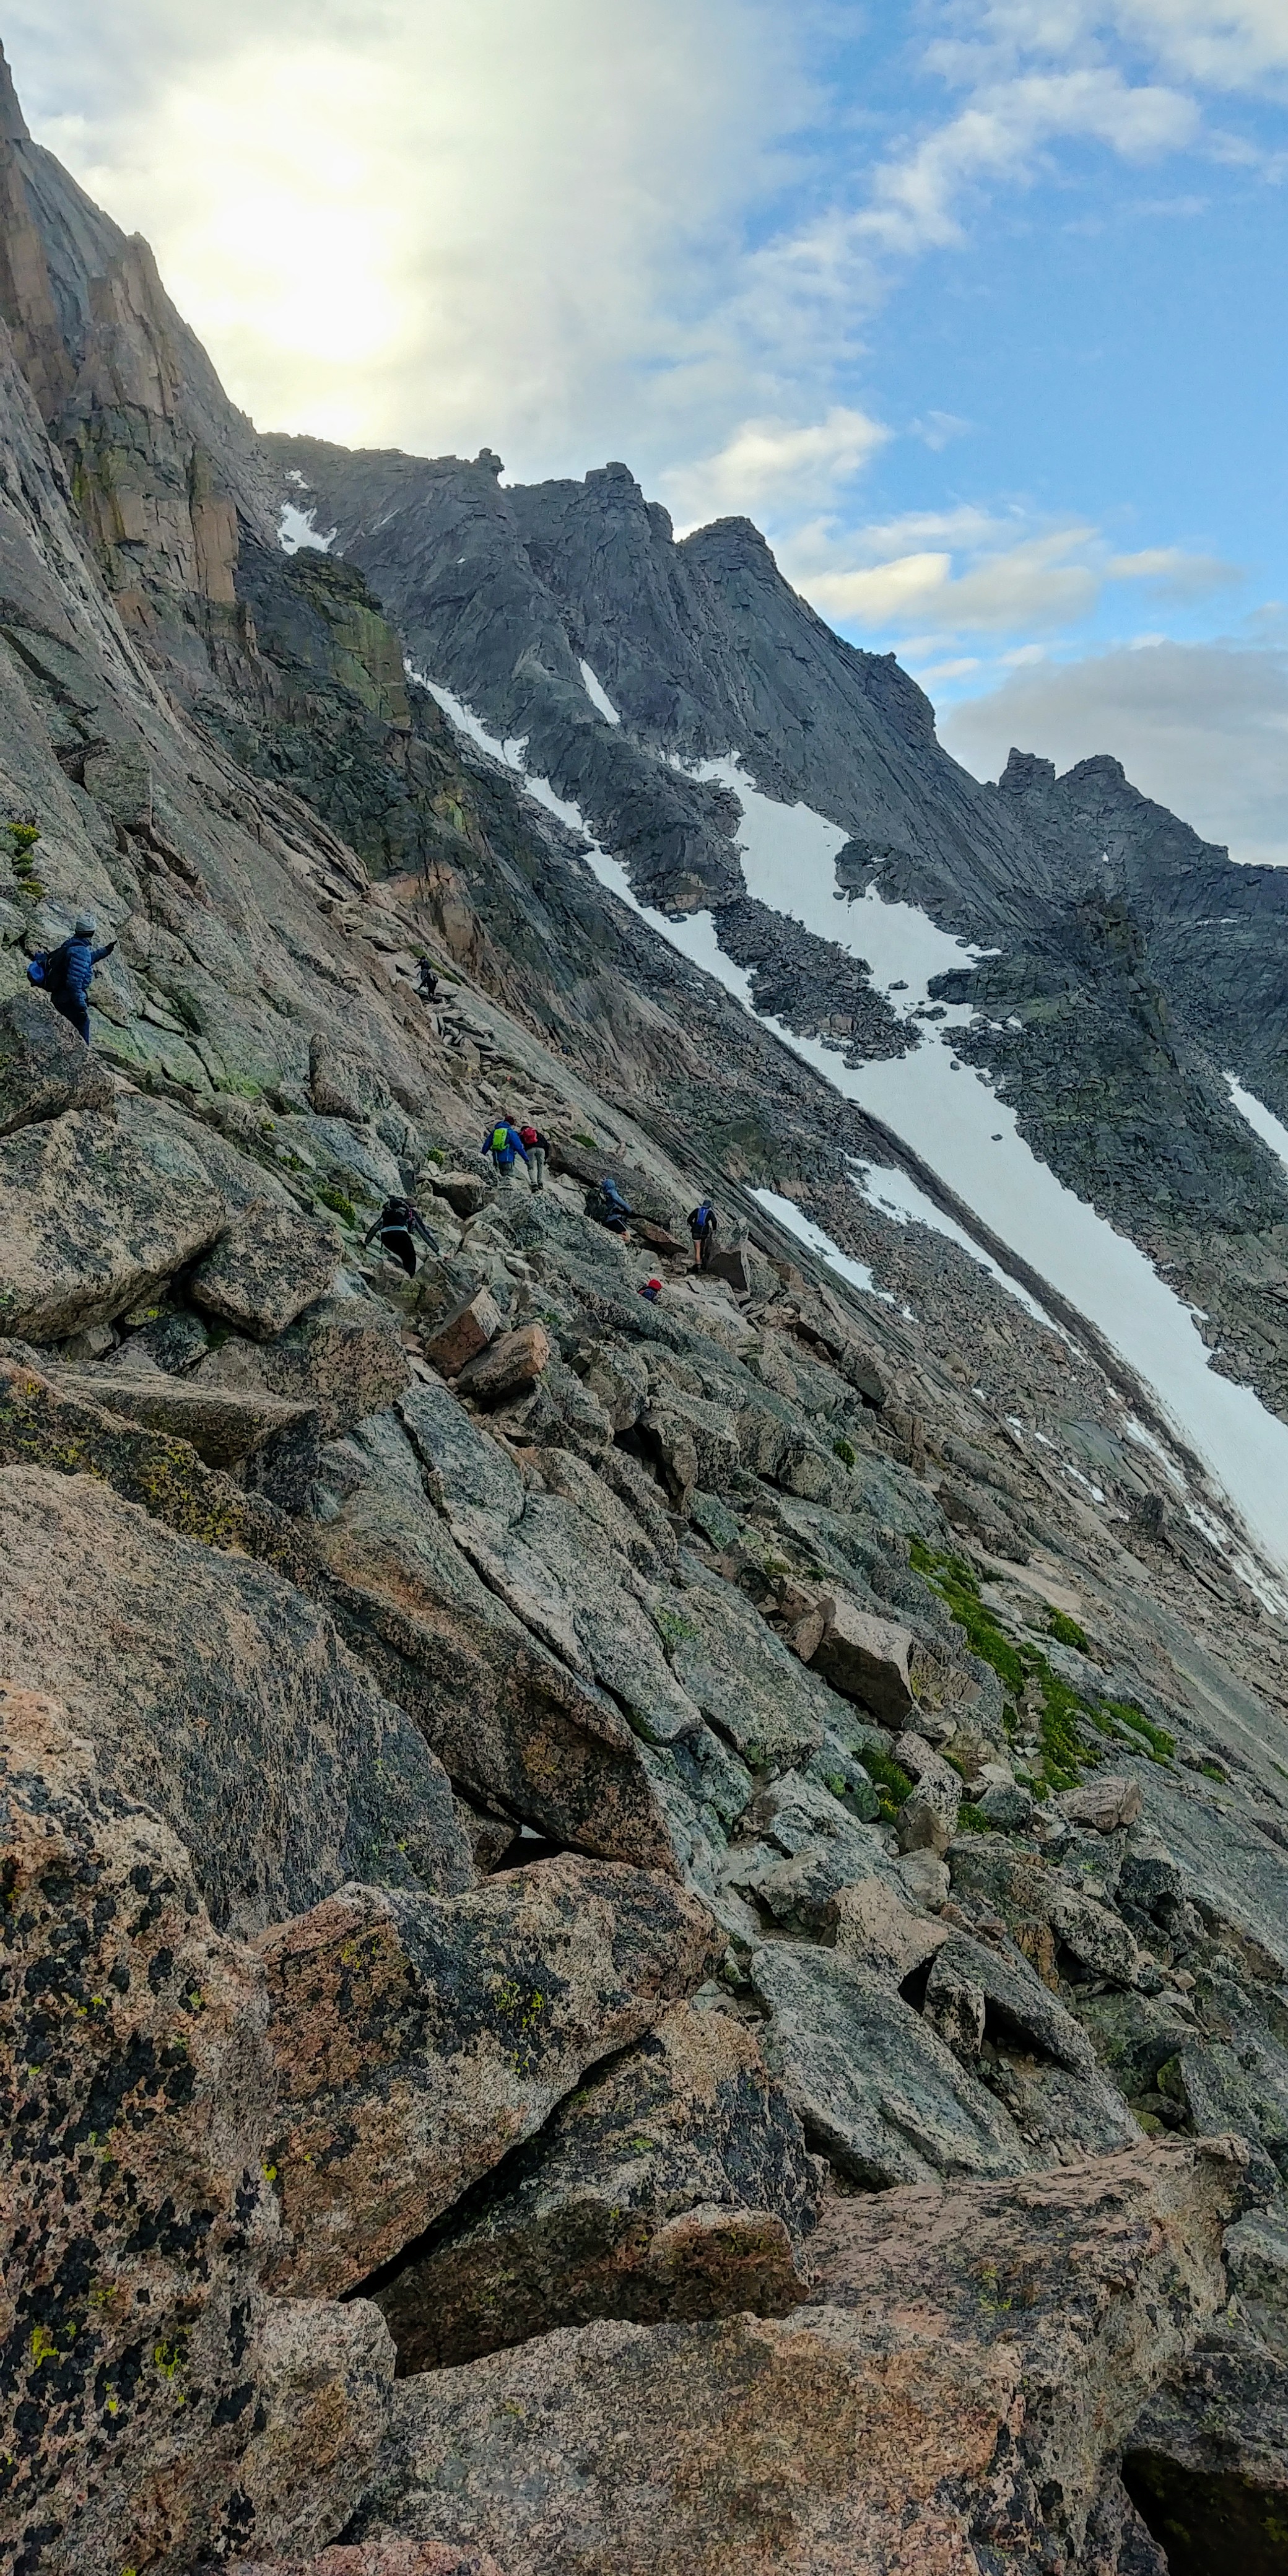
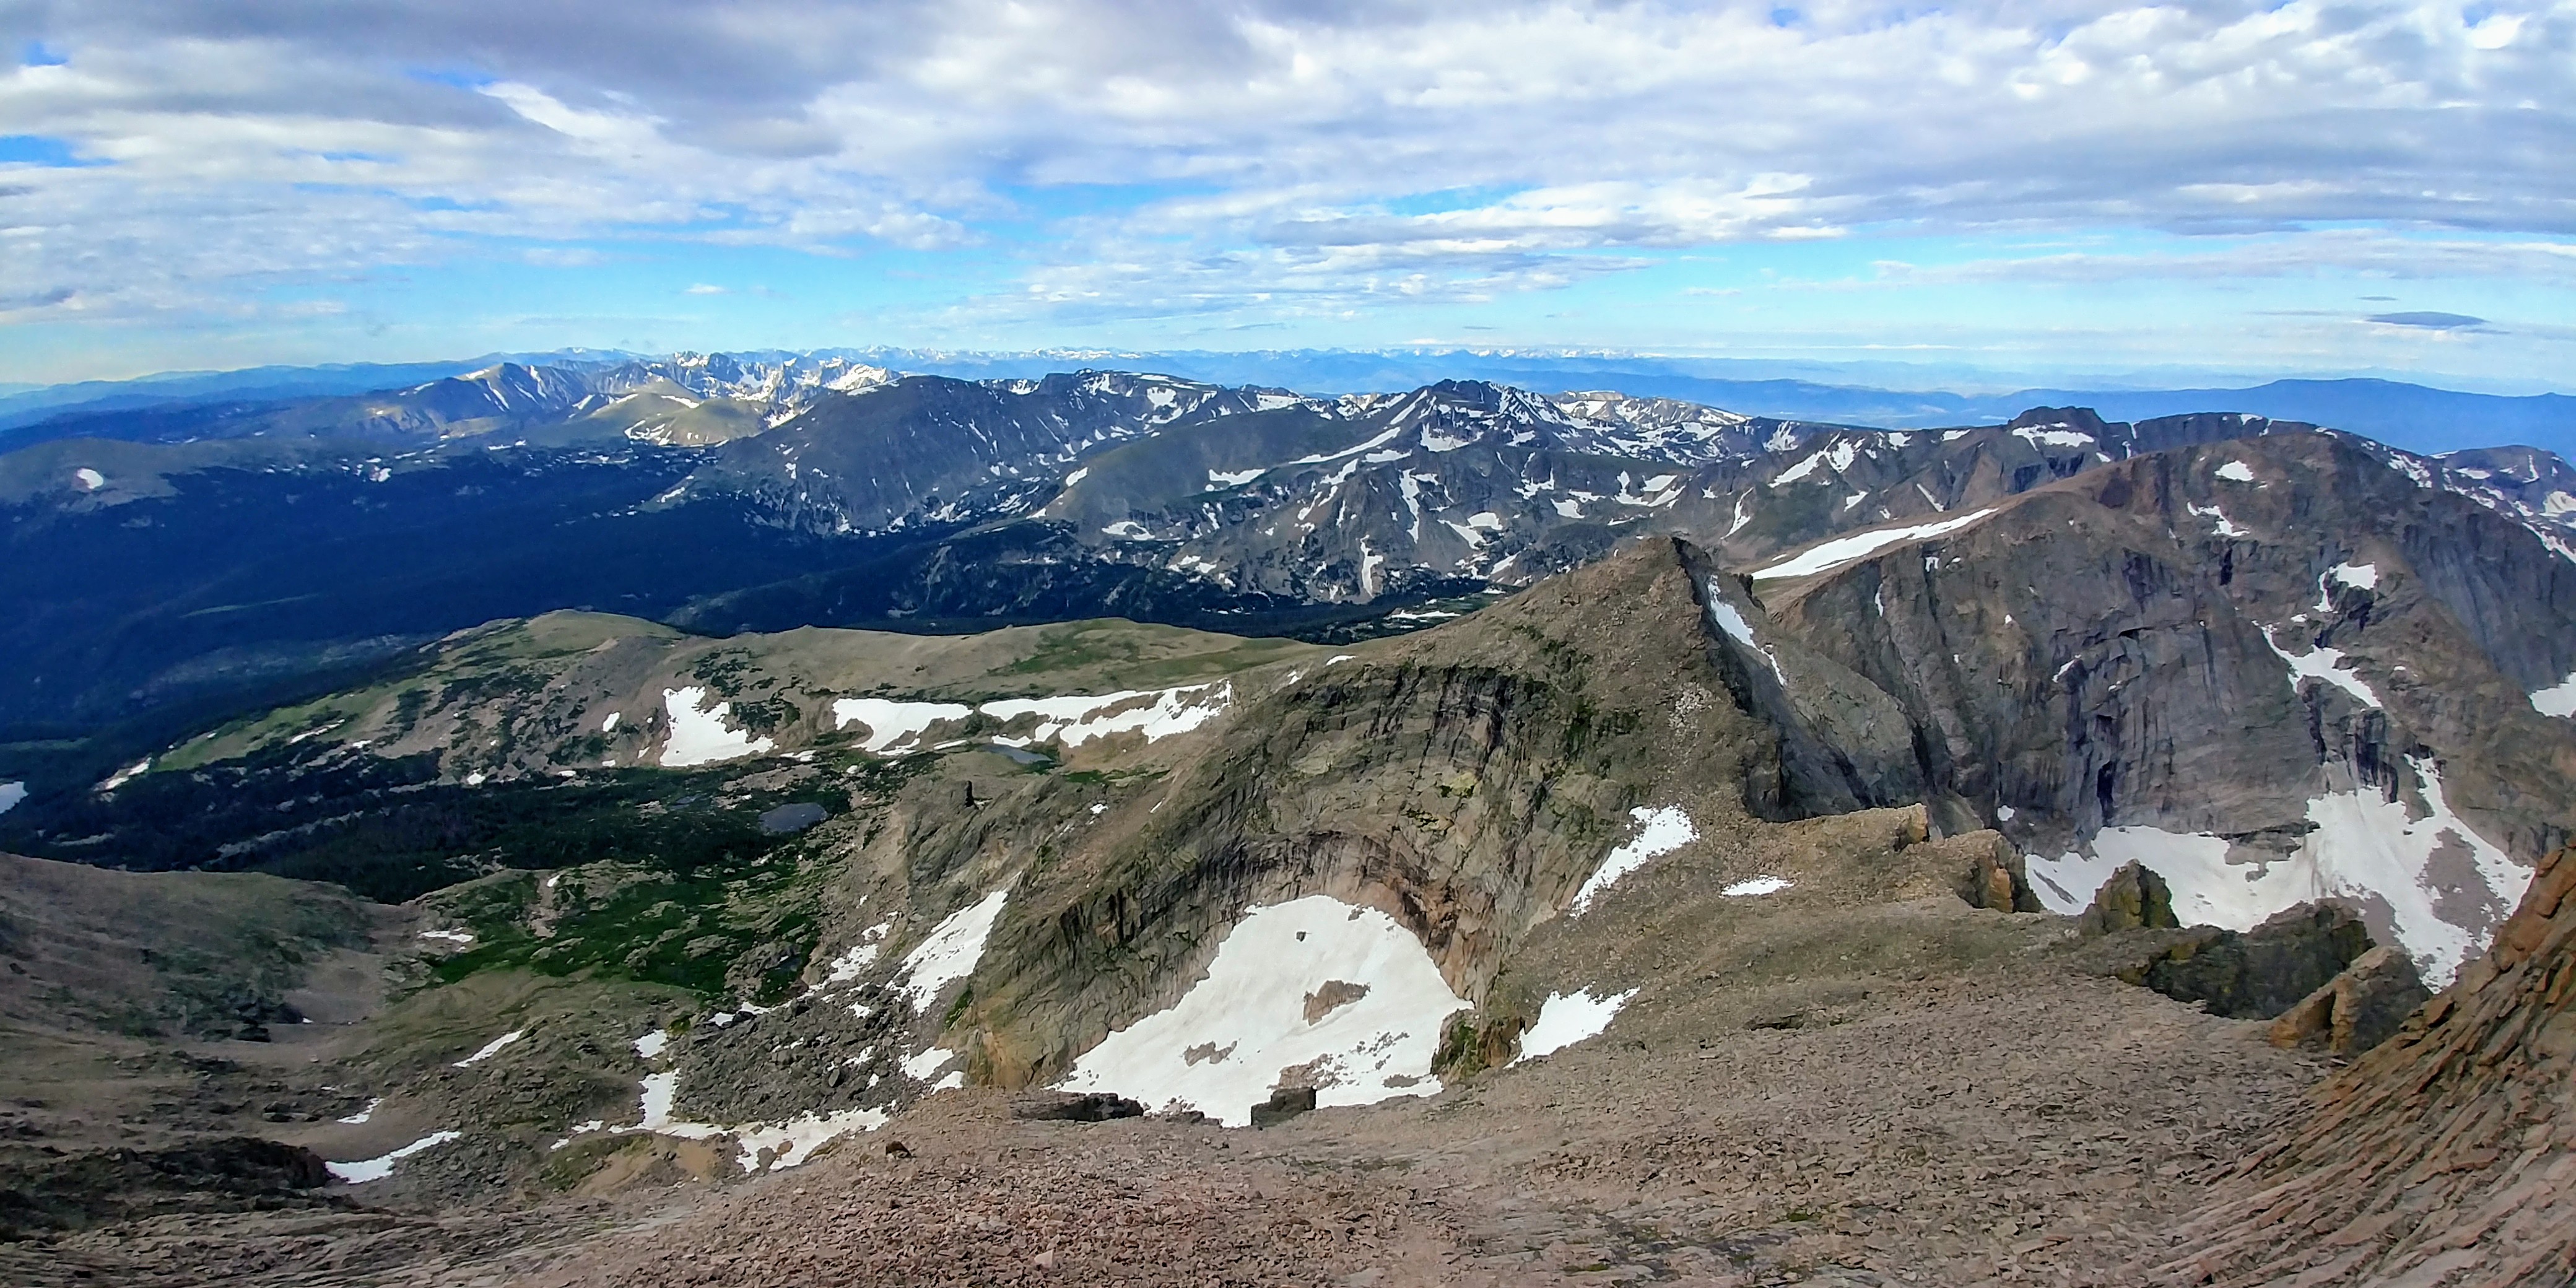
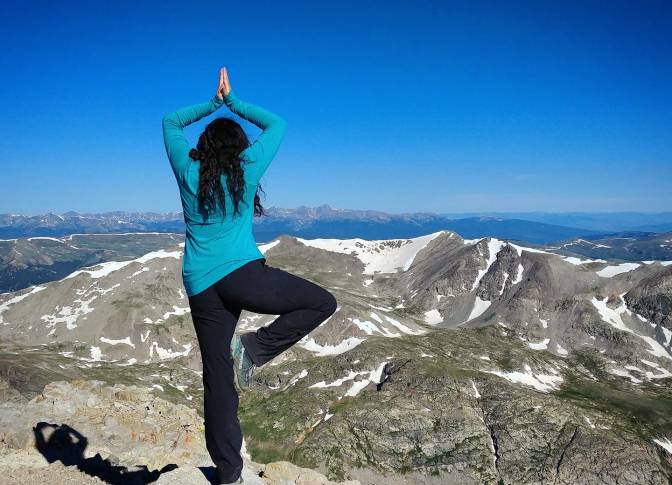
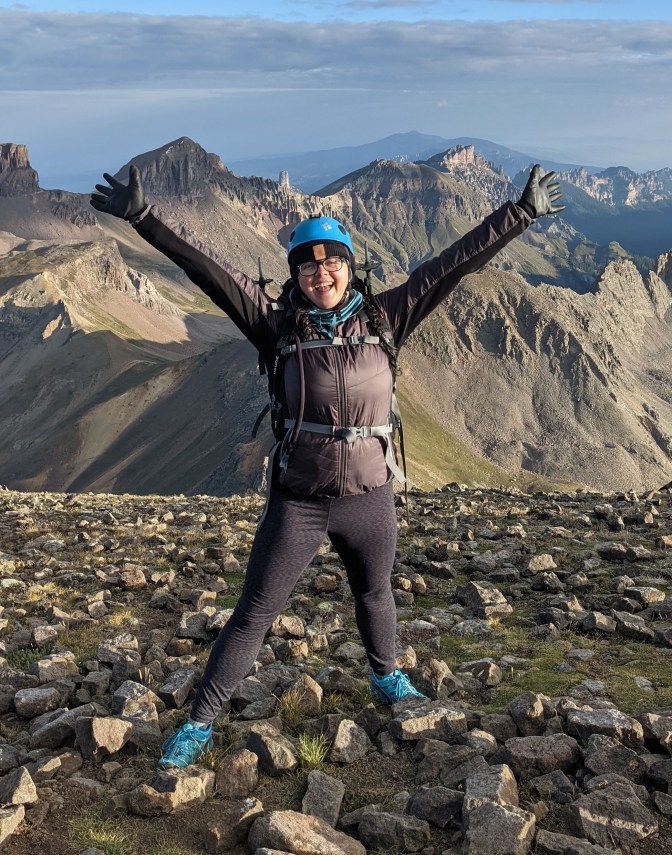
At 13 years old, I had the opportunity to summit my very first Colorado 14er with Cheley Colorado Camps. On the summit that morning, my camp counselor suggested we dedicate this climb to someone important to make this climb even more special. I decided to dedicate my climb to my baby sister who passed away when I was 10. Longs Peak became a very special and sacred place for me from then on out. I have summited it 3 times, climbed Mount Lady Washington for it’s epic Long’s Peak views, hiked to Chasm Lake more times than I can count, and just get unbelievably excited whenever I see mountain any time I drive into town. After that first summit was also the first time I really began thinking, and dreaming about the possibility of one day summiting Mount Everest.

Longs Peak was my first real connection with the mountains. The meaning placed on the summit that day gave me a truly spiritual connection to that peak. Before that I honestly hated hiking. As a kid, it was always a miserable experience. It wasn’t until I was able to find my own genuine connection to the mountains and nature that I was able to truly feel that sense of calm and peace I continue to experience in the mountains today.

Longs Peak helped me heal. When I was 21 years old I was in recovery from my eating disorder, I had already made a goal in the back of my mind to work up to the ability to travel to Everest Base Camp, but I didn’t quite yet believe it was possible due to years of self-doubt. Summiting Longs again gave me the confidence to realize that it was not only possible, but really got the ball rolling on working towards making it actually happen.

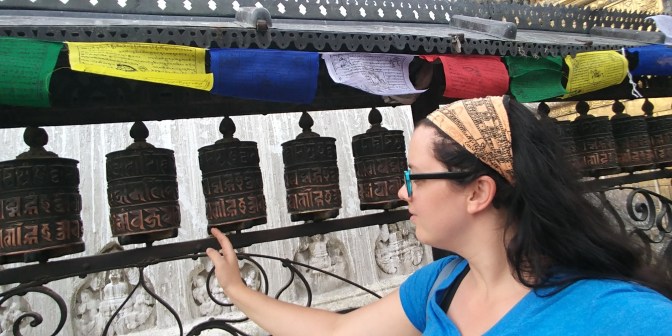
When I eventually got to go to Nepal and see Everest for myself in 2017, that became the most profound and defining experience of my life. My spiritual connection with the mountains grew stronger than ever before. I was already at a point of transitioning away from the religion I was born and raised in, and Nepal really helped me in my journey. I found more peace and serenity in those mountains than I had ever felt in any church building. I met the most genuine, kind, and loving people in Nepal, more than any Christian I have ever met. I was not focued on the persuit of a summit, rather the journey and the experience.

I believe in the magic and power of Mother Earth. This planet is magnificent. When you are able to truly connect with nature, your eyes are open to all the cycles of life this planet has to offer. When I am able to connect, I feel completely in sync. I feel calm, and completely present in the moment. The anxieties, stressors and worries of life completely melt away. I feel… at home. That is the only way I can think to describe it. I feel like I belong. That feeling is indescribable no matter how hard I try. I feel like I can fly when I’m skiing. I feel like I’m on a cloud when I stand on top of a high peak. I feel serenity sitting next to a calm lake on a sunny day. I feel awe and wonder when I watch the magic of a sunset or sunrise.

Much of the time, I have been able to get that warm bubbly feeling anytime I’m out in nature. However, in the last couple years, persuits of some big climbs have left me in a rut where I have had a harder time connecting. Anytime I had to do a “training hike” with a heavy pack, or go just for the sake of getting miles on my feet and altitude for my body, or anytime I felt like I was just checking off a list I have been lacking that connection. It was burning me out and I wouldn’t want to climb.

Last summer, I developed a stress fracture after climbing Mount Whitney. I was forced to take 2 months off and it really gave me time to think and re-prioritize a bit. My first 14er after my foot healed was Wetterhorn and it was the most fun I have ever had on a 14er ever! I wasn’t climbing it to check it off a list, I wasn’t climbing to “train”. I was climbing it just for fun, with my friends and to enjoy the beauty of the mountains and it was a reminder of why I climb in the first place. I told myself from then on, I was going to really try to make sure I was always climbing for the right reasons. It was then that I also decided I was no longer going to focus on the Seven Summits. Everest was always the main goal, anything else was a bonus.

When my best friend passed away at the end of December, it broke me. That desire for my natural connection became even more important. Rowan and I met at Cheley and climbed mountains in Rocky Mountain National Park together every summer as we were growing up. She was just as connected to nature, if not more so. I feel closest to her in those mountains, and in nature in general. I spent much of the first half of the year battling my mind. I would try to make sure anytime I would go out into nature to make sure I was going for the right reasons, but I was also still once again trying to train for Rainier. Motivation to train was completely non-existent as I battled a cycle of grief and depression. Getting out in general was incredibly difficult so I would try to really listen to my body and mind.

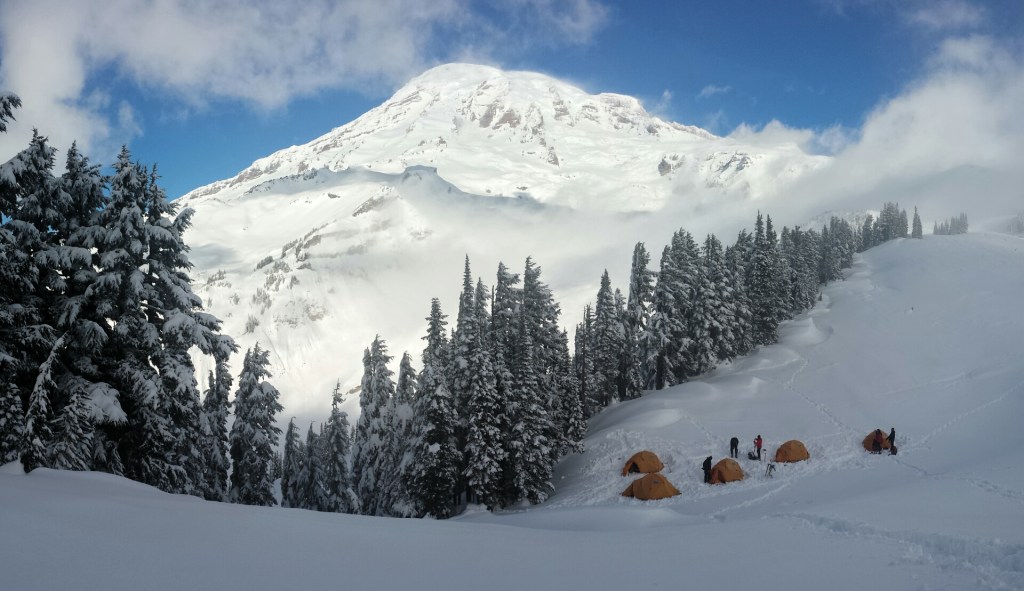
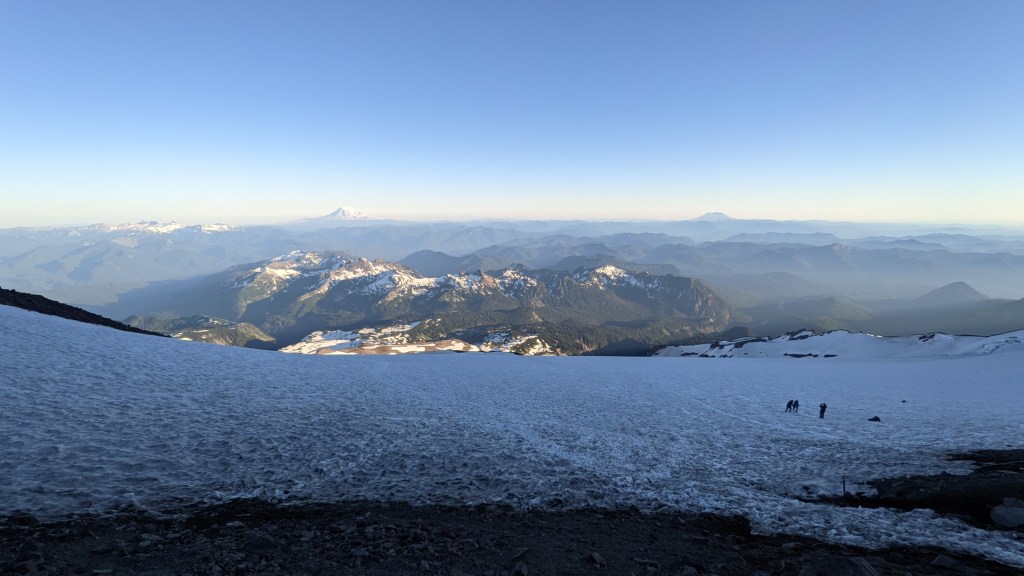
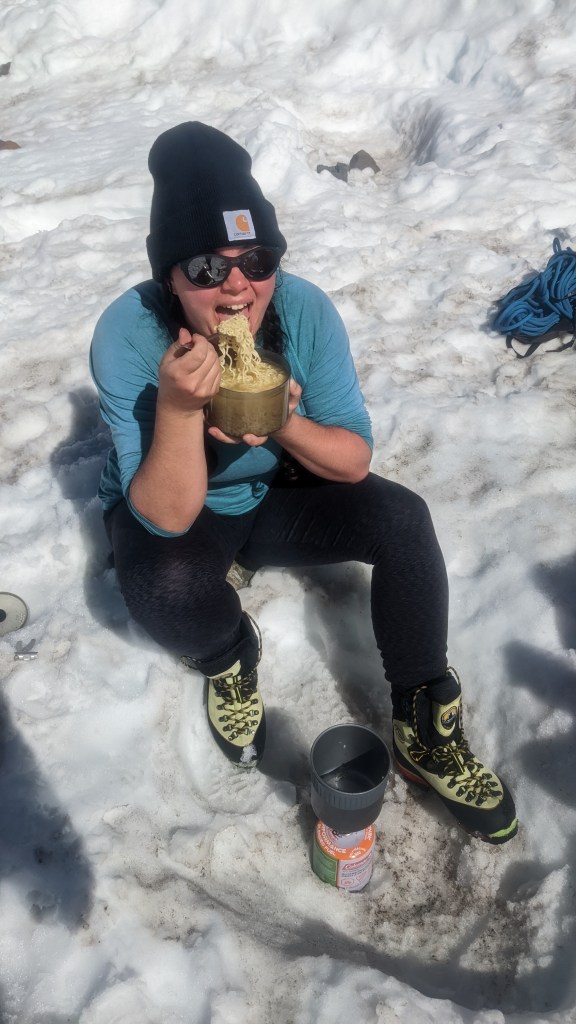
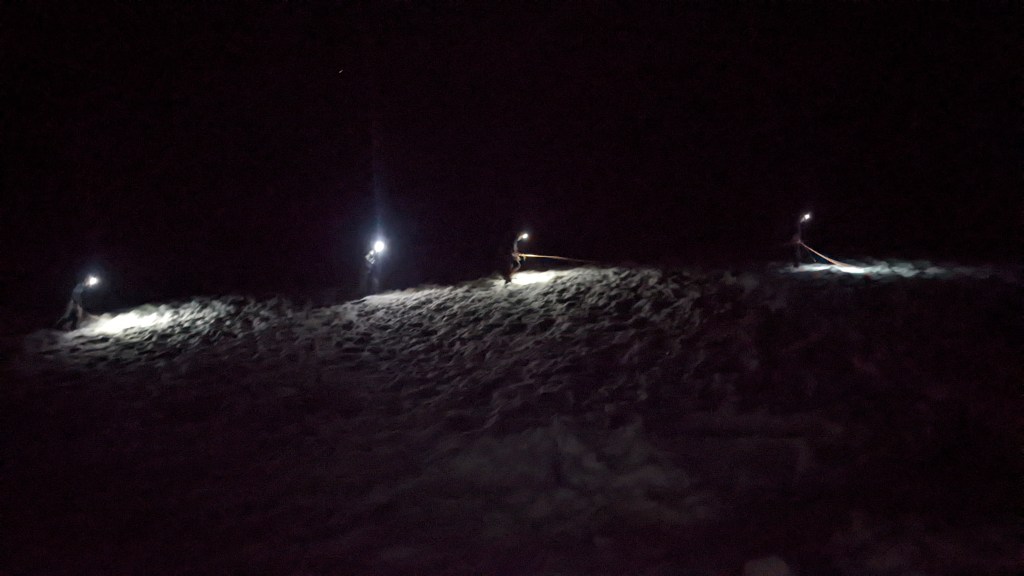
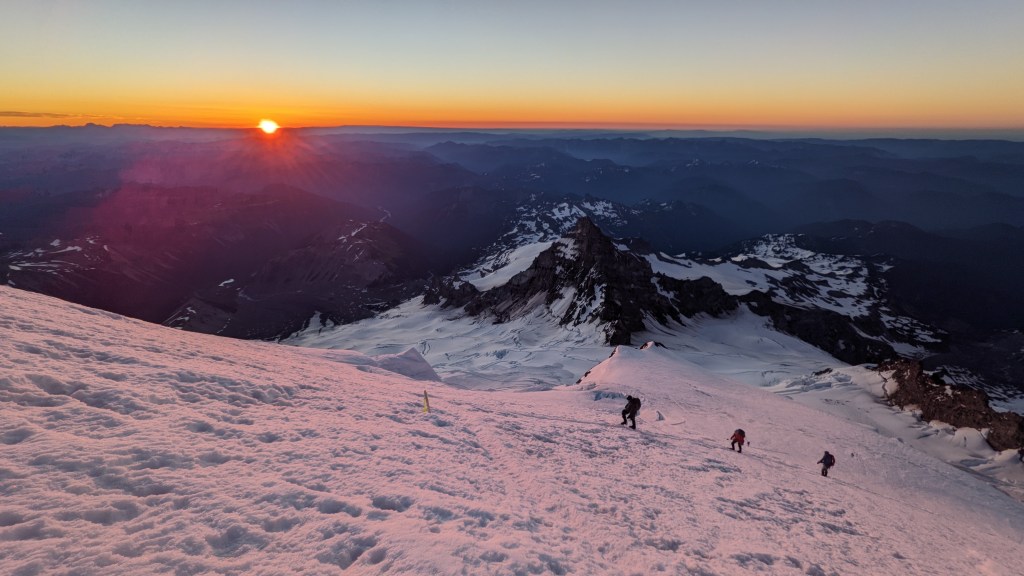
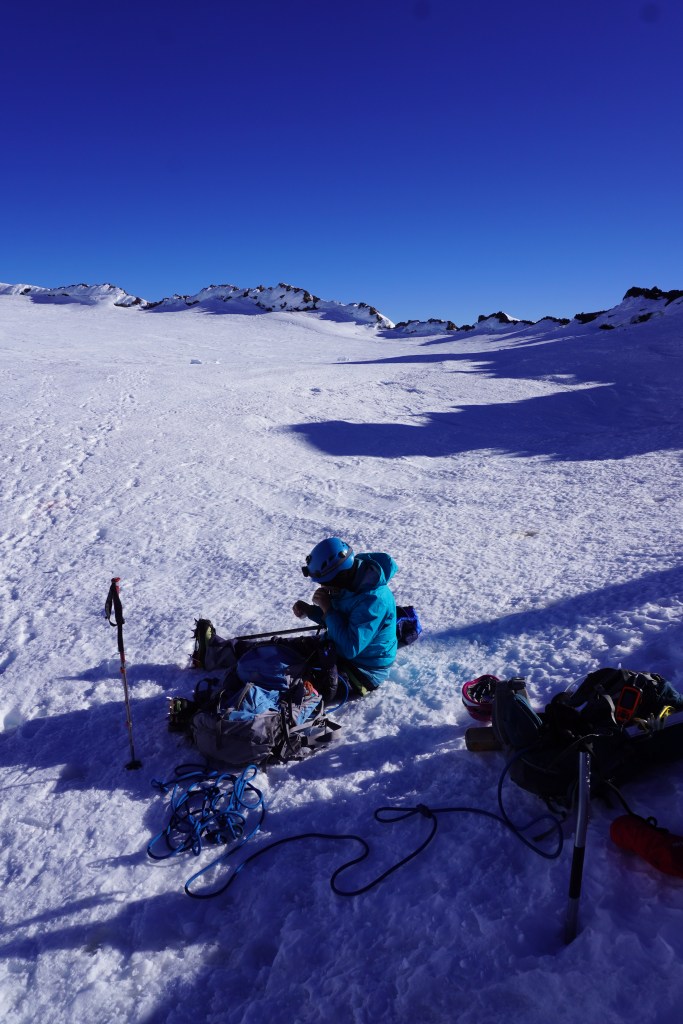
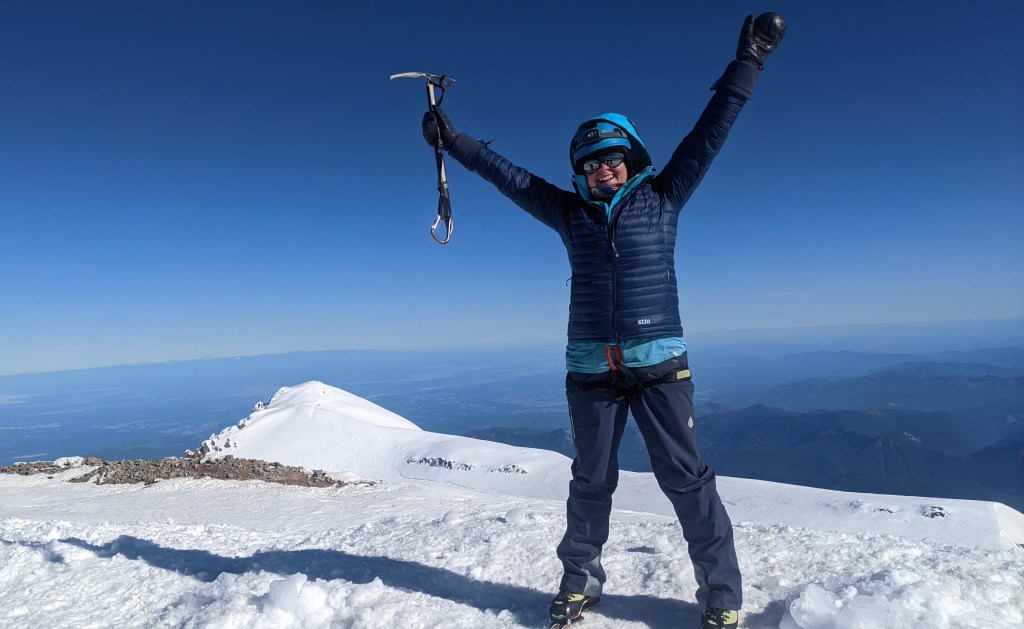
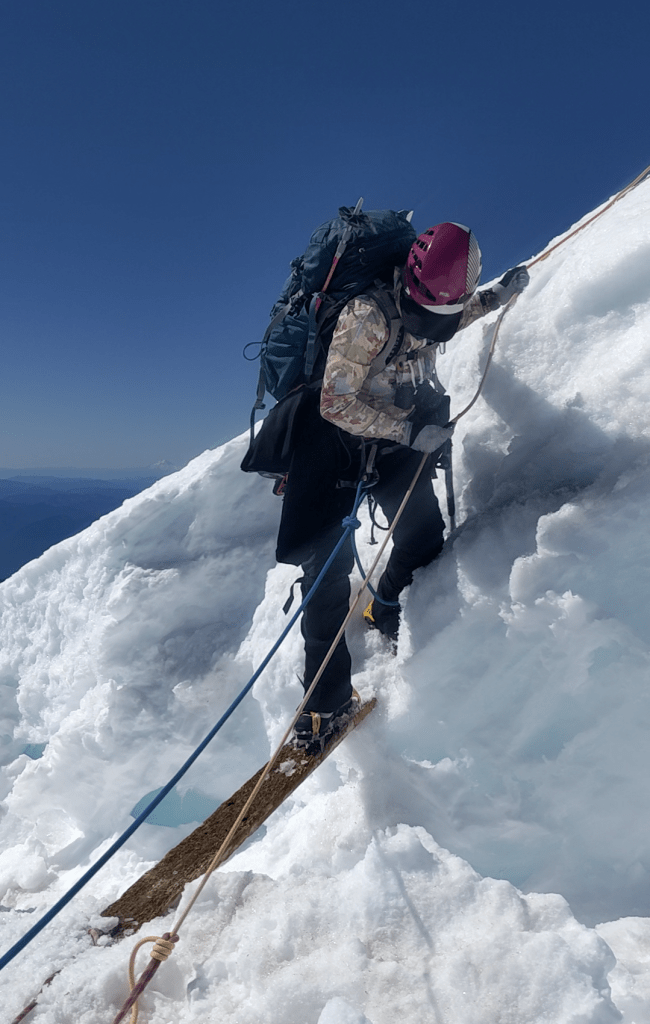
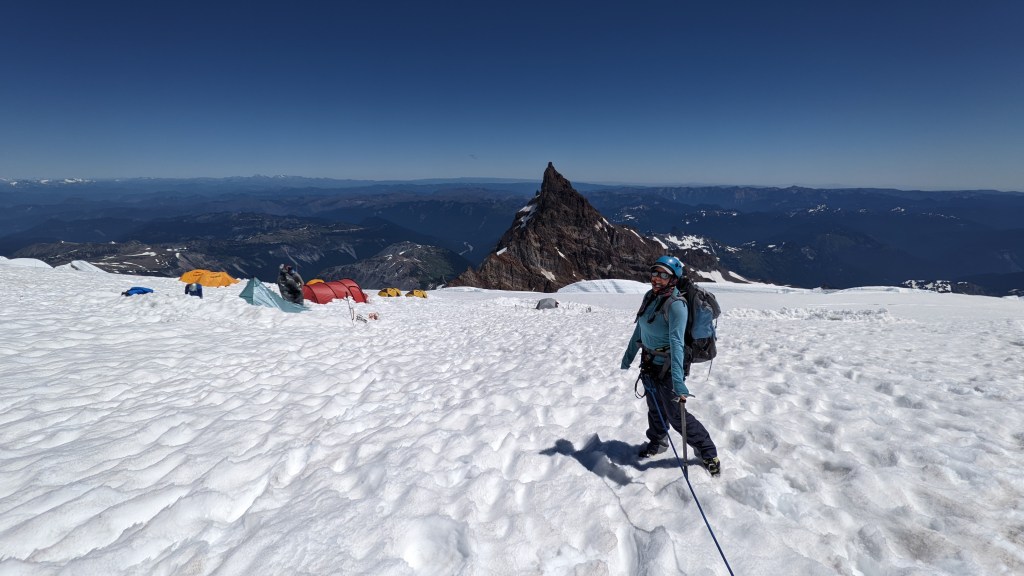
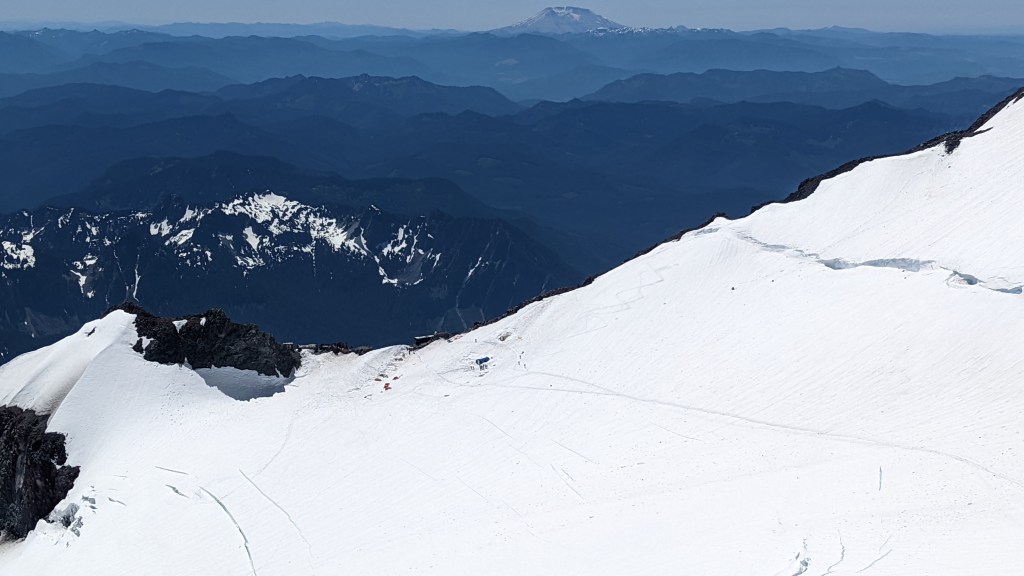
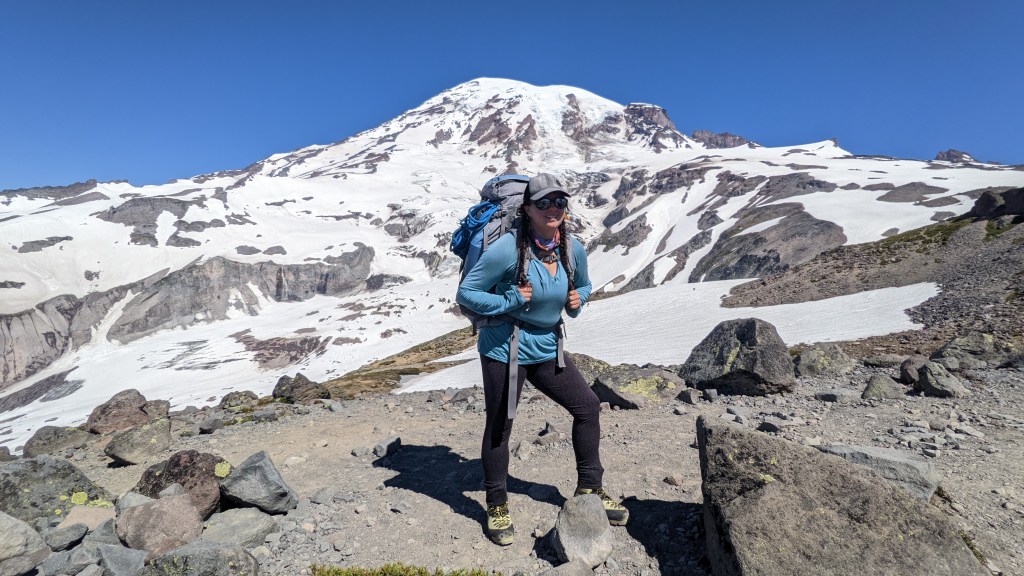
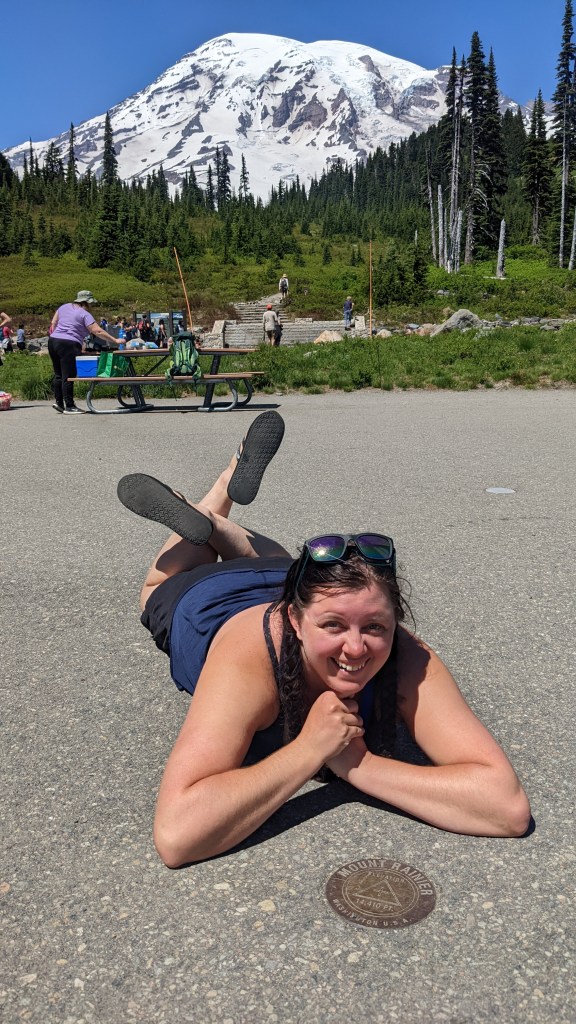
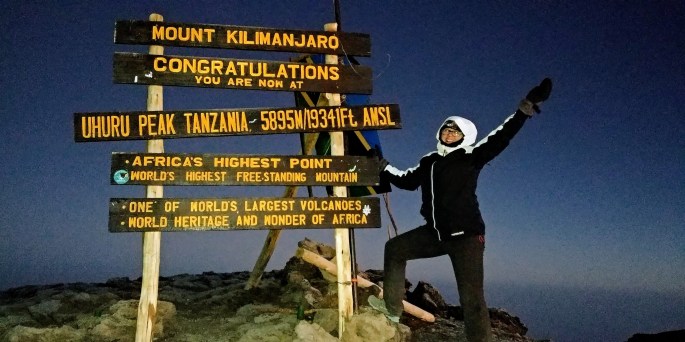
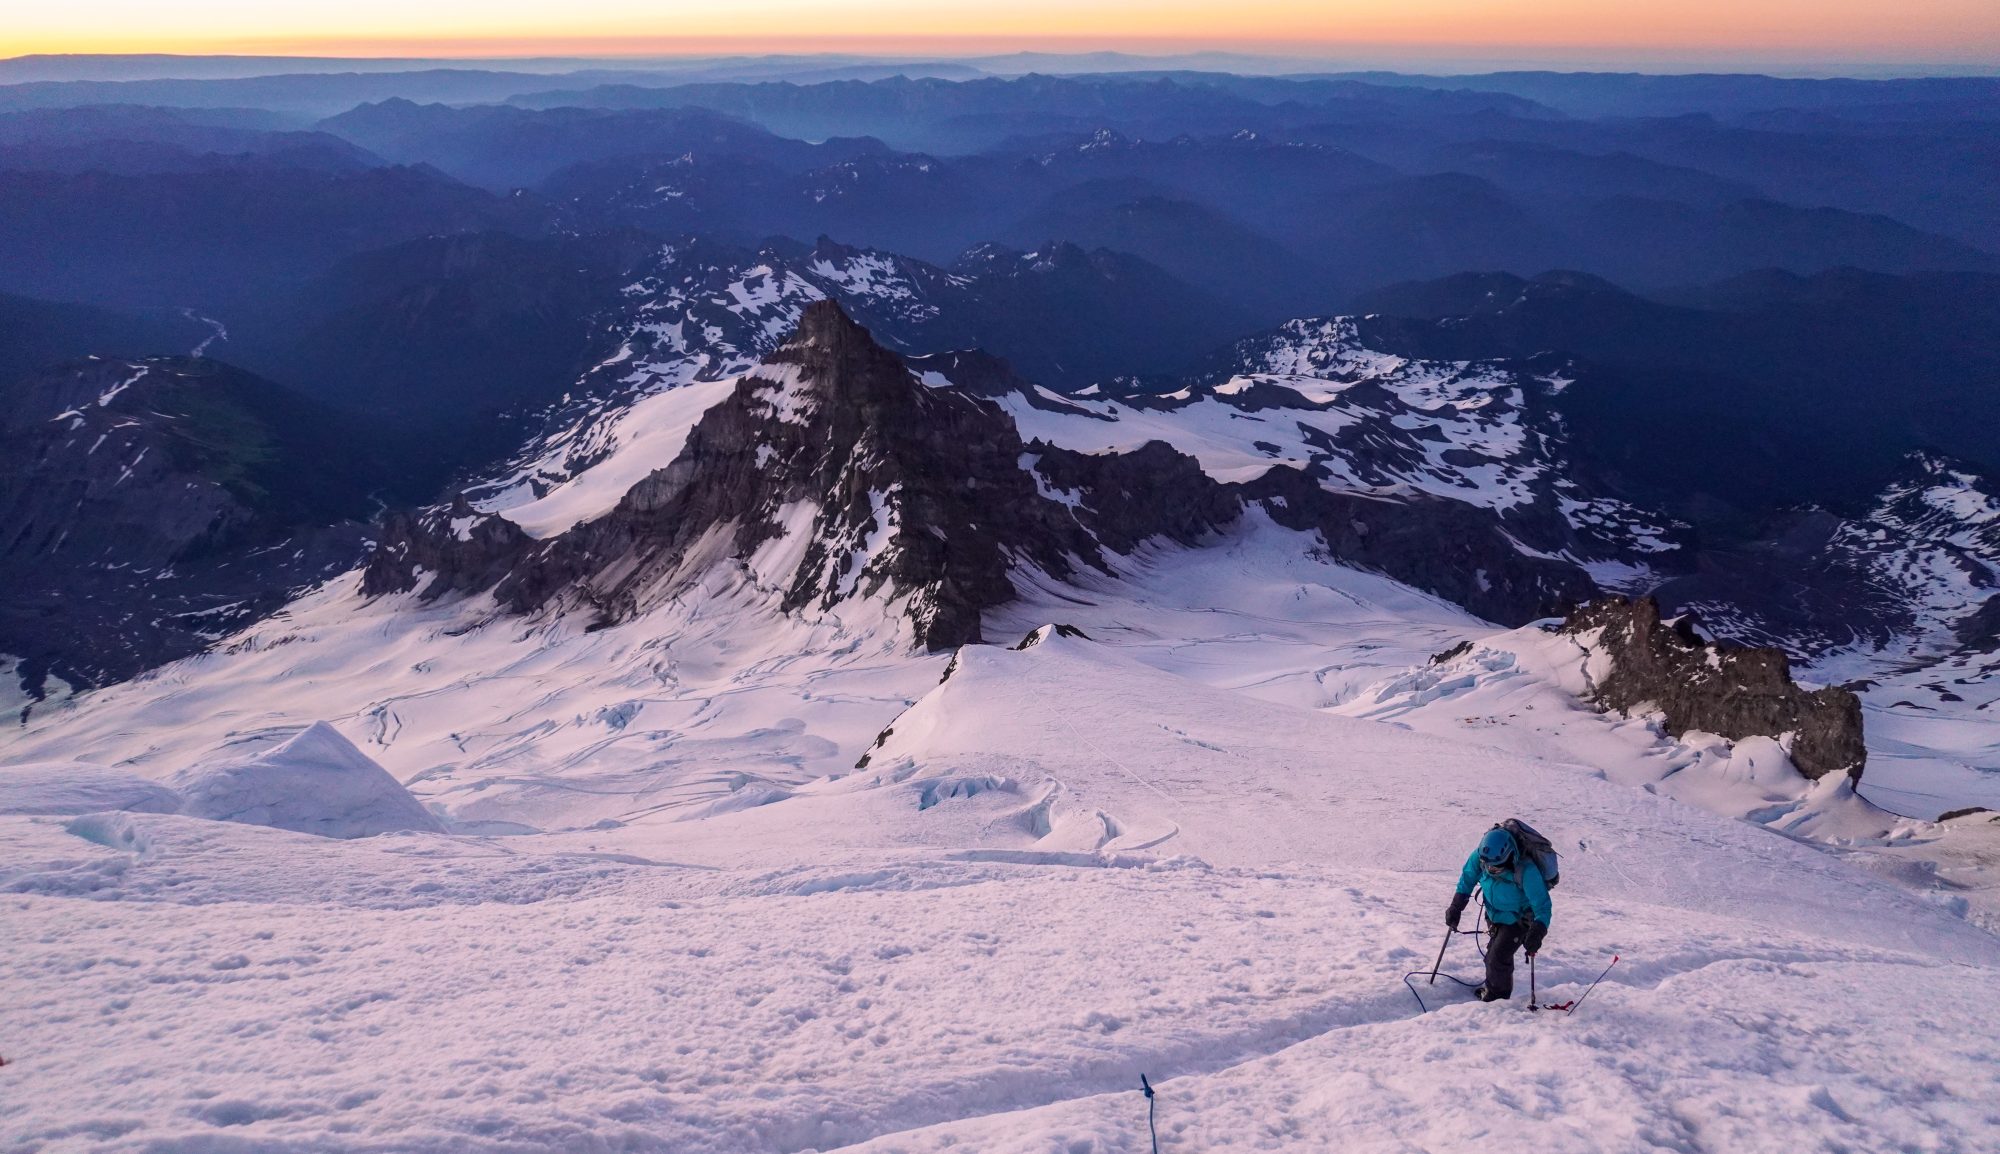
Rainier finally came along, and I finally got to check that mountain off my list. It had been a long time coming and it was such a weight off my shoulders to not have to train every year and not have it happen. I had fun on Rainier, I had moments of connection, but I also struggled mentally. It was beautiful, and magnificent, but it was also the hardest climb I have ever done so far… Harder than Everest Base Camp and Kala Patthar, and harder than Kilimanjaro. Because of how difficult this year has been on me mentally, I was much more suceptible to those intrusive thoughts of negative self-talk and fears. But looking back with hindsight I know it really wasn’t that bad, but at the time it was incredibly difficult. Overall, it really fueled the fire inside me and I felt more ready than ever to tackle the next big step towards Everest.

Shortly after Rainier, it was a rollercoaster of figuring out my next move. I had a new teaching position that was definitely going to be difficult in working around for getting time off to go climbing. I was debating on Aconcagua over my Winter break but flights were out of control expensive and there was no guaruntee I would get the time off approved around my Winter break. After talking with some climbing friends that went to Everest this last season, I decided maybe Denali would be a better option as climbing season is in June during summer break, and much more teacher friendly. It is a mountain I am much more interested in for one, it is incredibly physically and mentally demanding and would be an excellent test for Everest. However, it technically does not meet the 6500m requirement for Everest permits. I was not really worried about the altitude as I have never had a problem, and naturally acclimatize pretty well. I had hope that maybe it would still allow me to climb Everest without having to meet the 6500m requirement but I would be taking a huge gamble.

Just when I was about to do my Denali paperwork I finally got covid after 2 1/2 years of avoiding the plague, and it did a number on my asthmatic lungs and immune system. My asthma became much more sensitive and my allergies got much worse. I was dealing with a lot of wierd long-hauler symtoms which eventually lead to a near fatal asthma attack. The attack was then followed by an anaphalactic reaction to the prednisone I was perscribed to help with my asthma inflammation. That allergic reaction was then followed by another severe asthma attack. I felt my worse fears coming to fruition… “what if my body fails me and keeps me from going after my dreams?” I put Denali on hold while I dealt with my health, but it also gave me time to rethink my climbing priorities a bit. Everest is my #1 priority at this point when it comes to my bigger climbing goals. As much as I would love to eventually do Denali as well, I really want to try to get to Everest as soon as possible, as efficiently as possible and I shouldn’t risk gambling whether or not my expedition leader will let me climb Everest with Denali as my highest point. I need to climb something high enough and technical enough to meet the requirements for Everest, and to help me feel confident and ready.

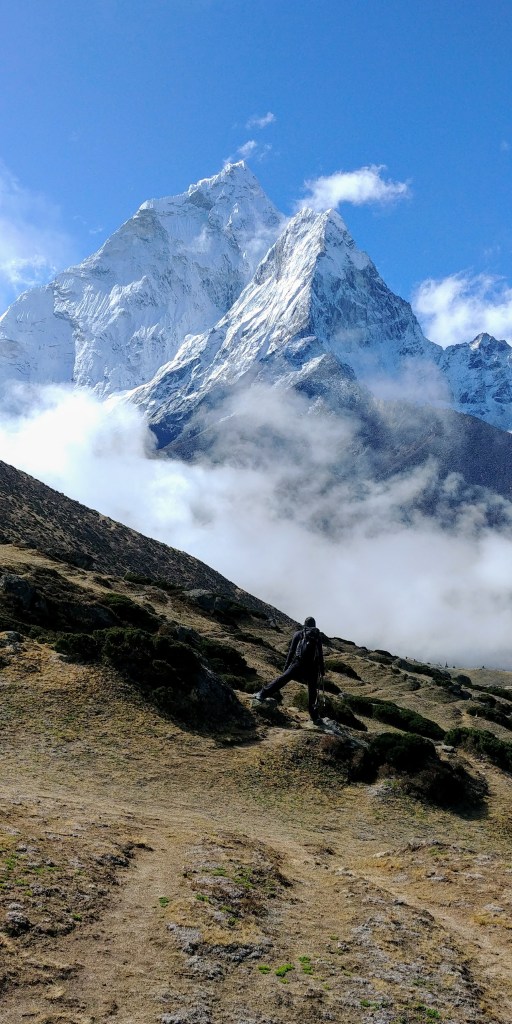
The more I thought about it, the more I also realized I want to again ensure I am climbing everything for the right reasons and focusing on that connection with the mountains, and not just checking something off my list. I thought back to my first trip to Nepal, and how I felt there. I wanted to feel that again. In reality, I have wanted to go back to Nepal ever since I first returned. Ama Dablam is a mountain that gave me incredible awe while I was there. I have never seen anything more beautiful in my life. I told myself, in those fields above Dingboche as I stared up at those magnificent walls, that I would climb that mountain some day… and that is exactly what I am going to do.

After Everest Base Camp, I got lost in the checklists, I got caught up in the Seven Summits, and got burned out on the endless training. I would occasionally feel ambivalent on certain summits, bored on others. I lost the spark. I want EVERY mountain to feel special and meaningful to me. I want to do it right. I don’t want to get to Everest and feel that ambivalence… I want to embrace the awe and wonder of standing on top of the world that first intrigued me as a kid. I want to climb the mountains that inspire me, that give me wonder, and help me feel grounded and connected. No more lists.

I am aiming and hoping for Ama Dablam Fall 2023, however there are some hurdles to jump over first. Physically, I need to ensure my body can get back to where it needs to be. My asthma has been much better the last couple weeks and I have been slowly re-introducing cardio and weights. I still fatigue quickly and lack endurance, but I have had some successfull ski tours and am feeling confident that I can be ready to hit up some Colorado 14ers for altitude come summer. I also need to figure out my next move with work. Climbing season for Ama Dablam will be October-November, and teaching and climbing in Nepal aren’t exactly cohesive… I’m figuring it out, but when I want something, I will make it happen. Ama Dablam WILL happen. I have never felt more calm and condifent about a climb in my life.

I’m ready.

Climbing for Campers:

In honor of my best friend, Rowan Meredith, I am planning on climbing Everest in her memory. In congruence with my climb, I am raising money to send kids to camp through the John Austin Cheley Foundation. This scholarship program helps kids who couldn’t otherwise afford it have the opportunity we had to grow confidence in themselves, build lasting friendships, and create memories to last a lifetime. Camp meant the world to Rowan and I, and I want to share that opportunity with others. 100% of the proceeds raised will go to the foundation. If you are willing to support this cause, you can donate here.

TRIP REPORT: Mount Rainier (14,411′)

I have been waiting a VERY long time to write about this one. I can’t believe it’s finally done! This mountain has always been about timing, and that rang true even for this climb.

In January of 2016, I ventured to Mount Rainier for the first time to attend a glacier mountaineering course hosted by Dan Mazur of SummitClimb. We were not able to go for the summit due to weather conditions but it was a great learning experience. From that point on I was hooked and knew I needed to come back asap.

Rainier views back in January 2016

I planned to return that summer with a friend, unfortunately they weren’t able to commit. So we postponed to the following summer, and again the next year and the next. Eventually I decided I needed to find other partners who were interested. I gathered a group of friends who were ready to go and committed, and then COVID hit. We waited and watched for the government to lift restrictions. In June 2020, Washington began to move to their “2nd phase” of opening from the pandemic, and the rangers announced the upper mountain of Rainier was open and we were stoked and ready to go.

However, within that first week of opening, 2 climbers died. About a week later, right before we were about to get our plane tickets, the park service announced the DC route was not established. Guide services were not yet taking clients up the mountain due to covid restrictions and we would have to do our own crevasse navigating… something I wasn’t super comfortable with while taking glacier newbies up the mountain.

We ultimately postponed. In 2021, I contacted each of my friends from the 2020 group and everyone had circumstances keeping them from climbing that summer. I found another partner and we planned for Labor Day weekend. Unfortunately, I fractured my foot in June and then Washington had massive heatwaves shutting down the upper mountain completely by the end of July… It just wasn’t our year.

This year I knew I need to make it happen. I have bigger fish on my list and I wanted to get Rainier over with and out of my brain. I established a group early, plenty of time to plan and prepare and then my best friend suddenly passed away and I was really struggling. I still planned on Rainier and we applied for a permit for the 1st of July. However, I was not really training much as I struggled with depression and grief. As we got closer, conditions were complete opposite of last year. The wettest spring in like 75 years. “Juneuary” literally hashtagged. Full blown winter conditions in the summer season. Guide groups weren’t summiting as avalanche danger was insanely high and the snow just kept on coming. On top of all that, our group slowly fell apart and it was debate of what to do.

Eventually things calmed down. We had already decided not to go for July 1st due to conditions but I knew if I had the chance I still wanted to make it up there. I didn’t have much time as I have to go back to work first week of August, so I watched, I waited, I asked around for anyone willing to just sporadically go for it should a weather window open. That’s when I met Mandie, she tried to summit in the heatwave last year and had to turn around due to rapidly deteriorating conditions as things melted out like crazy. We met up and took a hike together, talked shop and came up with a plan. We had a tentative window of time and decided to watch for the weather and pick the best day and hope for luck with walk-up permits.

It was game time! We had our dates, and luckily last minute cancellations opened up spots online for Camp Muir. We booked them and on Sunday July 17th, we took a LONG drive to Paradise.

We camped in the parking lot and woke up Monday morning to a foggy, misty scene. Webcams showed sunny skies at Muir while the lower mountain was socked in with clouds. We packed up, checked in, and officially headed up the mountain.

Our plan was simple, take our time. Go as slow as we need to, and do whatever we needed for the best chance of success. Our initial plan was 2 days (with a third day on reserve), hike to Muir, take a power nap and then head for the summit come midnight or so. We were both feeling great at first. I was even giddy and surprisingly confident (usually anxiety wins). I was never more excited to climb a mountain. We felt strong, and steady until pebble creek, then we headed up the Muir Snowfield, a 3000′ slog to say the least. That snowfield kicked our ass, and definitely slowed us down. It felt never ending and was painfully slow with our 50+lb packs.

We made it to Muir at 6pm, much later than anticipated. There wasn’t much time to get settled to we set up camp as fast as we could and started melting snow for water. We finally settled in, and ate what we could. Mandie was feeling headachey, tired, and nervous about immediately getting back on foot. We decided to try to sleep and see how we felt come 11pm when we planned to get up. 11 came, we didn’t get any sleep, and the ultimate question loomed, do we go for it or wait a day? Monday night to Tuesday morning was predicted to be calm, perfect weather. Tuesday night to Wednesday morning was a bit more of a gamble with winds. For me personally, an extra day also meant I was more likely to get anxious. I felt good, a little tired but overall I felt very much like I could push for the summit that night. Mandie was less sure. She didn’t want a repeat of last year (where she did push in 2 days and struggled) and she was suffering from mild altitude sickness. For the best chance of success we decided the smart thing to do then is wait. Rest up, acclimatize, and go for it the next night.

It truly is all about the right timing.

We had a lazy day in camp, slept in, are, drank water, lounged around, I did feel a little antsy but overall I was feeling better about having to wait an extra day. It was the smart decision and it gave time for our legs to rest. We went to bed early, attempting to get a couple hours of sleep and then the alarms went off.

11pm getting up and ready to go. A headlamp snaffu caused a bit of a delay but we still started off just after midnight.

Slow and steady in the conga line with guide groups that left at the same time we worked our way to Ingraham flats. A couple mild cravssses to hop over but nothing crazy. Feeling good so far, just taking it all in stride. Up through the bowling alley and that’s when the real adventure began: the Disappointment Cleaver.

Fixed ropes were set up to help traverse the rocks, and not that we could totally see but there was a good amount of exposure below. Those fixed lines worked their way into an insanely steep ascent up the snow covered spine. As we worked our way up the Cleaver we heard a pretty massive avalanche slide down the glacier below (which was rather unsettling). Off the lines, steep switchbacks through snow and rock continued our ascent. Panic attack ensued. The snow conditions were slippery and sugary, making the steep exposed conditions even freakier. Slowly but surely we worked our way to the top of the cleaver. I knew with the heat of the day, this would be the worst part coming down (spoiler alert: it was).

Views opened up as dawn approached and we could see the ascent ahead of us. My initial impression was we could see all the way to the summit from there. I was very wrong. It was a much more mild incline up from the top of the cleaver and less terrifying. We worked our way up and eventually things got steeper. More crevasses made themselves known. The sunrise was absolutely gorgeous and I was feeling better.

As we worked our way up, every time I thought I was getting close to the crater crest, more of the mountain would appear and crush my spirits. This happened at least 4 or 5 times. The false summits were starting to really get to me. We hopped over a few more crevasses, and crossed a small crevasse bridge. When we approached the last crevasse crossing, a guy coming down explained how close to the crest we were. With his description I was thinking it would be fairly quick. Assuming it was the ridge above me, I had high hopes we were nearing the end.

But as we worked our way up, yet another false summit appeared, the real end to it all seemed like another like 5000′ away. I was out of gas after going nonstop for 4 straight hours without a break (because I kept thinking I’ll just break at the crater crest thinking it was closer than it was.) Slowly but surely we made it to the crater and I collapsed and cried. Relieved we made it but also knowing I needed to finish the last 400′ to the true summit. We dropped our packs, ate and drank a bit and then worked our way across the crater.

Windy but a sigh of relief. I did it. FINALLY.

It may have been a slow night but we summited at 8:30am.

After snapping some photos we headed back to our packs, ate another quick snack and loaded up for the descent.

This is when things got even more interesting. Things heated up in the sun FAST. The crevasse bridge melted out twice that day, by the time we crossed it, it was a slushy mess and coming down it was definitely sketchier than on the way up. The further down we went, the slipperier things got. Steep switchbacks we’re a challenge to keep from slipping, and then we approached the top of the cleaver.

Nervous knowing what was ahead of us, we carefully worked our way down the cleaver. Everything was slippery slush, rocks were falling, we kept post holing and slipping, it was a giant mess. We spent maybe half of that cleaver descent on our butts, carefully scooting down steep pitches, meanwhile a sharp dropoff was right next to us. We finally made it to the fixed lines where we could at least clip in with backup protection, adding a little later of comfort in the sketchy conditions. It also symbolized nearing the end of the most dangerous part of the route. We worked our way down the lines and finally we were off the Cleaver. A quick walk past the bowling alley and we were officially out of the most danger.

We stopped at Ingraham flats to take a breather, get some water and process what we just survived. After 3 hours of descending sleep slippery snow, we only only about 45 minutes left to camp Muir. Homestretch. 

The remainder of the route was fairly easy and straightforward, but complete mashed potatoes. Step, slip, step, posthole, step was the name of the game. Camp was in sight, it was finally over.

Well mostly. 

My partners knees were totally shot, and my feet were killing me from pounding on them for 13 1/2 hours. She did not think she could get back to Paradise today, and as much as I want to sleep in a bed and shower, I also really didn’t think my body would appreciate another 4500′ descent with a heavy pack.

We decided to wait until the next morning to head down and give our bodies some much needed rest. We packed up camp and took a glissade trip down the Muir Snowfield. It only took us an hour to get down the 3000′ of snow to pebble creek. From there it always a self explanatory follow down the trail back to Paradise. Getting to the parking lot was bittersweet. My feet were killing me, my legs, back and butt all sore. But we did it. We finally did it. Rainier was finally complete!

On the way out, we stopped in Ashford for some much needed real food. We decided to take a bit of a scenic route on the way home so we could pit stop at a waterfall we both had really wanted to see. Multomah Falls was absolutely stunning and it was a great way to end our adventure.

Overall, I am very relieved and proud to have finally checked this mountain off my list. It has been a LONG time coming. It may not be the tallest mountain I’ve climbed, but it most definitely was the most physically and mentally demanding climb I’ve ever done. It is definitely an accomplishment worth celebrating.

TRIP REPORT: Wetterhorn Peak (14,015′)

What a cool peak! Wetterhorn was a blast. This might be my #2 favorite fourteener now because it was so much fun! My favorite part was definitely the infamous final pitch and would do it again in a heartbeat.

This was an all nighter adventure for most of us and we were all feeling it by the end. That Friday evening, I drove from Salt Lake, my climbing partners drove from Denver, and we met up in Lake City and headed immediately to the trailhead aiming to summit by sunrise. We parked at the 2WD trailhead before all loading in my friend’s 4Runner to climb the super sketch 4WD road to the upper trailhead. (High clearance vehicle DEFINITELY needed) We started hiking by about 3am and while we were taking our time, we were still making great time as the first 2 miles breezed by in less than an hour. The trail was very well marked and easy to follow in the dark.

Navigating the boulder field on the way up to the saddle was a bit trickier to follow in the dark, but easy in the daylight. The trail is still fairly visible and easy to see in light as we came down, but we did get off track a tiny bit on the ascent in the dark as it was harder to see. Once on the ridge, the trail heads up a steep sandy section before entering the class 3 section. Navigating the class 3 section felt a little like a choose your own adventure. There were a small handful of cairns sparsley laid out, but getting up to the flat spot really was up to you as long as you stayed infront of the rock rib. Some of us tried to climb the rock rib thinking we were already at the notch… Not Reccomended. Ended up in some class 4 territory for a second and had to backtrack.

On the class 3 ridge with the Notch and summit above us.

After navigating the ridge for some time and watching the sun begin to rise behind Uncompahgre, we made it to the flat spot just before the notch. This signifies you are like 10 minutes from the summit and you can see it right infront of you. After climbing the notch, and butt-scooting down the slab, you come to the base of the final pitch which has super solid holds and feels like your climbing a natural ladder. This was definitely the coolest part of the route. Comparitively, I would say this was steeper than the homestretch on Longs Peak, but easier and shorter as the homestretch gets SUPER slippery and feels way more exposed. As steep as this pitch on Wetterhorn is, it feels a bit enclosed as you climb and you don’t feel as exposed as it looks.

We came up on the summit at 7am, just in time to see the sun finally come up over Uncompahgre. The morning views were spectactular and we even found out later, a nearby climber on Matterhorn snapped a photo of us on the summit!

Heading down that final pitch wasn’t as nerve wracking as one would think. It is so fast and you’re done before you know it. Navigating the remainder of the class 3 section was much easier to follow on the downhill as we could see the route below us. After that, the trail was once again easy to follow back to the car.

Us on the summit of Wetterhorn! Photo by Todd Field

Overall, I freaking loved this peak. It was such a fun climb! Highly reccomend for those new to class 3 peaks, I thought this was a fairly mild class 3 and would be a great first one for those working on their fourteener climbs and working into more technical climbs. 4WD and high clearance definitely needed to get to the upper trailhead (we were nearly sideways at one point). If you must start at the lower trailhead, it will add a little bit of extra mileage.

Happy Climbing!

6 Resistance Band Exercises Climbers Can Do at Home

Here we are…. Well over a month into quarantine (some maybe even longer) and some of us are going crazy! I know for me I am dying to get out and climb. Spring is IDEAL ski mountaineering conditions. Yet here I sit. In my house dreaming of peaks, hoping and praying this all ends soon. We do what we can during these uncertain times. So to keep those climber muscles from getting weak, try these 6 resistance band exercises climbers can do at home.

Bicep Curls

Stand on the center of the band. Tuck in elbows in, palms up. Curl arms up nice and controlled.

Lateral Raises

Stand on one end of the band and hold the band out to the side. Raise arm to a “T” position.

Tricep Extension

Stand on the center of the band. Slight bend in the knee, and bend over slightly. Tuck in arms and extend behind you.

Overhead Tricep Extension

Stand on the handle on one end of the band and hold the band behind you. Tuck in your core so your spine is aligned. Extend arms straight back.

Bicep Row

The best way to do this exercise would be by wrapping the center of the band around door handles or around a post. Stand back and sit back slightly. Draw elbows in palms facing toward each other.

Chest Row

The best way to do this exercise would be by wrapping the center of the band around door handles or around a post. Stand back and sit back slightly. Draw elbows back with palms facing the ground. Think about squeeze your shoulder blades together.

Create a Routine

Try putting these exercises together into supersets! For example:

3 sets of 15 Bicep Curls, and 15 Tricep Extensions back to back. Rest 30 seconds between sets.

3 Sets of 15 Lateral Raises and 15 Overhead tricep extensions. Rest 30 seconds between sets.

3 Sets of 15 Bicep Rows and 15 Chest Rows. Rest 30 seconds between sets.

Don’t forget to stretch those arms when you are finished!

Want more?

If you enjoyed these 6 resistance band exercises climbers can do at home then check out my FREE Quarantine Workout Plan!

TRIP REPORT: Longs Peak

My 3rd successful summit of Longs Peak is in the bag!

Before I give you the details, let me take you back a little: My first summit was in August of 2003. I was 13 years old, and it was actually my second attempt. The previous year I made it to the bottom of the homestretch and turned around. I had the worst nerves and threw up at the trail head that morning and was miserable the entire climb. Despite making it like 95% of the way to the summit, I just couldn’t go any further. I was completely depleted. It haunted me for a year, so the following summer I completed my first summit. It was the first time it really solidified my interest in climbing Everest in the future.

My second summit was in 2011. I was in the throws of recovering from an eating disorder and working through major depression and anxiety. I had been in a dark place for a long time and had completely lost my passion for climbing in the midst of my mental illness. Summiting Longs again with a friend of mine was the perfect way to rekindle that fire as I was working on my recovery.

Now here I am, 8 years later, growing and chasing my dreams! I went to EBC last year, I climbed Kilimanjaro a week ago and I come home and lead a few friends up Longs Peak only days after returning! So, without further ado, here is a little synopsis of my most recent summit!

We had some weather in the forecast for today so we started at 2am. We made it to the boulderfield before sunrise and began climbing up the rocks to the keyhole as the sun rose. We were moving quickly but slowed to a crawl as we navigated the boulders and the trail moved from a class 1 to a class 2.

As we crossed over to the other side of the keyhole and began navigating the ledges, taking our time to navigate, and help my friends through the rocks as the route became a class 3.

Next came the dreaded trough. I hit a mental wall at the bottom of the trough. A combination of jet lag and still recovering form Kili made me realize how much I did not want to climb up the trough once I came up to it. It has always been my least favorite part of the climb. It is a slow exhausting crawl up to the narrows. But it just comes one step and climb at a time. This winter was one of the snowiest and so there was still a decent amount of snow in the trough. It was off most of the route, however the very top of the trough had snow on route and we had to climb around it. Once that was navigated, we climb the last final 15′ rock up and out to the narrows.

A sense of relief for me as we popped out into the narrows, and a sense of panic as my friends saw the exposed view. low clouds began to build and I knew we had to be quick. We carefully climbed through the narrows and made it to the base of the homestretch in no time.

Some crowds navigating up and down the most technical part of the the climb slowed us down. We pushed to try to keep moving to the summit as we were now in a race with building clouds. There were patches of wet spots of recently melted snow, but before we knew it we were on top at 14,259′!

Our time on the summit was short. As soon as we started back down the homestretch we actually started to get a sprinkle of snow. It made the rocks slippery and slowed us down as we cautiously made out way down the homestretch. I will say this was the scariest Longs Peak decent I have ever had out of the number of times I’ve been on this mountain. The wet slippery decent continued into the trough as the mountain became enclosed in the clouds. Exhaustion definitely set in as we made it to the bottom of the trough and began to traverse the ledges back to the keyhole. Relief hit us as the keyhole came into view. After much needed snack break, the sun came out and we descended from the keyhole to the boulderfield. Back on class 1 trail, we cruised back down to the trail head. We lucked out and didn’t get the heavy rain, hail and thunderstorm until we were about 10 minutes from the bottom.

Our total time was about 12 hours and it was definitely the slowest I have ever climbed Longs. I definitely attribute that to the slippery slick conditions on our way down. If you EVER decide to climb Longs, start early, know your limits, NEVER go off route, check the weather conditions, and re-evaluate them constantly. As soon as it started raining/snowing up top, people were turning around despite being so close to the summit which was the smart thing to do. The mountain will always be there, you can always come back. We witnessed a helicopter rescue of a 15 year old that slid about 300′ down the loft on the other side. Good news revealed later that he was OK and somehow managed no broken bones, but it shows you how sketchy the conditions became as soon as those rocks got slick. My friends asked me to lead because of my experience on the mountain and my experience with class 3 climbing. If you have never been class 3 climbing before you NEED to go with someone who has experience with that kind of technicality and exposure. And of course, NEVER climb alone.

Despite my words of caution, Longs is a classic. It is my favorite peak in the world for a number of reasons. Don’t let the exposure scare you out of trying to do it, just make sure you are 100% prepared and know the risks. Longs may be one of the most famous of the Colorado Fourteeners and is definitely one for the books!

Kilimanjaro: Lemosho Route

Many people may not realize there are 7 different routes up to the summit of Kilimanjaro. Lemosho has been rated the most beautiful, and most successful route with about 98% success in an Uhuru Peak summit from this route. It is also the longest which gives more time for acclimatization which is why more people are so successful in summiting. The Lemosho route is typically climbed in either 7 or 8 days.

On July 18, 2019 I completed my first of the Seven Summits! I arrived to Moshi, Tanzania with an 8-day itinerary for the mountain which ended up being 7 because I’m a bad-ass. Before even leaving for Africa, I kept asking myself why I signed up for the longest climb when physically, because of my experience at altitude and the amount I have trained this year, I could have totally done the shortest route, but nevertheless, I was climbing Lemosho, and was and ready to go.

Day 0Materuni Waterfall

My cultural shock was little-to-none compared to Nepal. Maybe it is because I had already immersed myself in a 3rd world country once before, or maybe it’s also because my hotel in Moshi looked like a tropical island resort. Either way, I woke up ready for whatever adventure awaits. For my rest day in Moshi, I decided to check out the infamous Materuni Waterfall. It is a short hike from the Materuni Village. You are surrounded by tropical plants and trees that grow incredibly in the fertile volcanic soil. Coffee plants, Banana, Avocado, Mango, and Pineapple trees all surround the trail as you begin. The trail is fairly flat and only takes about 45min to an hour to get to the falls. With overcast conditions in the rain forest, you feel like you are on a tropical island rather than a giant mountain. The falls are gorgeous and continue to make you feel like you are in a tropical paradise. On the return you have the option of the “coffee experience” where you pick your own fresh beans, grind them by hand and drink your handmade espresso. I do not like coffee so I opted out of this adventure but overall, Materuni is a MUST see if you have spare time in your trip.

DAY 1- Lemosho Gate to Big Tree Camp (9,000′)

We started the morning by driving from Moshi town to the Londerossi Gate (not Lemosho). Londerossi is where the registration office is and we ate lunch there as well. I made some friends from the other camps that I would continue to see sporadically during the climb, and we all headed out and down towards the Lemosho Gate entrance. Finally time to start hiking! all of the camp and gate signs give estimated times of travel to the next camp. It was estimating 4 hours for a short 7km to the Big Tree Camp. It barely took me 2 hours to get there. Many guides stress going “pole-pole” which means “slowly-slowly” and it will be very slow going if you are in a large group. But it was just me so I got to set the pace! A couple other girls were supposed to be with me but they switched to the September climb. I found that in July, it is busy season but not quite peak busy season, so there were a lot of tiny groups of 1-3 people, but only a few massive groups. I would pass a majority of these larger groups on the way up since it was just me. I saw a bunch Colobus Monkeys in the rain forest on the way to camp, and could hear them chatting and hopping between trees; super cool to see out in the wild. I did not sign up to do a safari after the trek so this is the extent in wildlife I would get to see. We arrived at camp with plenty of time to spare. They feed you incredibly well to make sure you have enough calories for the mountain but I was convinced I was going to gain weight there was so much food! Day 1, easy. Done.

DAY 2- Big Tree Camp to Shira I and Shira II Camp (12,700′)

Today I skipped a camp because I am such a bad-ass. We started a little later than nearly all the other groups and I passed almost all of them on the way up to Shira I. Any of the groups that do Lemosho in 7 days instead of 8 usually skip Shira I camp. As I passed these groups, many of the other guides were asking if we were also skipping. Internally I was hoping but was almost afraid to ask if that was even a possibility. It wasn’t until we stopped at Shira I in time for lunch that my guide asked me if I wanted to and I was ecstatic to say yes. It was only 11am and there was no reason I needed to spend an extra night on the mountain at this point. I felt great, and wanted to keep going. So my 8-day climb now became a 7-day climb and we continued across the plateau and up to to Shira camp II. As for the hike itself, starting from Big Tree, it was very up and down for the first mile or so until leaving the rain forest into the Moraine vegetation zone. Once above the forest, the trail steepens as you follow a ridge up to the Shira plateau. The plateau is pretty flat between the camps I and II. Right before Shira II it steepens as you officially begin to climb up what is officially considered part of the Kibo (Kilimanjaro) Volcano.

FUN FACT: The Kilimanjaro mountain is made up of 3 volcanic cones: The Shira Caldera, Kibo (Uhuru Peak), and Mawenzi. By climbing the Lemosho route, you get to climb Shira and Kibo, and view Mawenzi from summit base camp!

Meru peak (left) and the Shira Caldera as viewed from about 14,000′

DAY 3- Shira II up to Lava Tower (15,000′) and down to Barranco Camp (13,000′)

A steady climb from camp II up to the Lava Tower warrants excellent views of the Shira Caldera below. the Lava Tower gets you up close and personal with the southwest side of the mountain. A quick stop for lunch and it’s all down hill from here. The decent to Barranco camp is decently steep in spots, so knees beware. You can see the camp below pretty immediately and just watch it get continuously closer on the decent. if the clouds haven’t rolled in, you should have a fantastic view of “The Breakfast Wall” that will be climbed the next morning. Many get intimidated by the near 800′ of climbing that is required first thing in the morning but don’t worry, it looks much worse than it is.

DAY 4- Barranco Camp up “The Breakfast Wall” (13,775′) and down to Karaga Camp (13,200′)

A roller coaster of emotions today on this climb almost perfectly reflect the roller coaster in altitude. I was feeling a little down when I woke up, missing my husband and was just kind of tired and cranky honestly. We start with the infamous Breakfast Wall. Which includes some mild scrambling. Non-climbers might be intimidated by this wall but don’t be. The trail is wide and well marked. There is only one “skinny” section nicknamed the “kissing rock” because you have to hug it to walk by, I did not feel the need to do so. It was still a wide enough path that I felt just fine. I never felt like I was straddling any crazy exposure, granted I have climbed much scarier climbs. After the scramble is over, you think you are nearing the top of the wall, but take my warning: there are like 5 false summits! think of it like a stack of books lined up shortest to tallest. you climb up the side of the short book and top out, but now you have to go up over the next ridge, and the next one, and the next one. I was legitimately getting pissed off. We finally top out for real and the views are incredible. You get a front-and-center view of Kili, and an ocean of clouds down below. I instantly felt better… for now. The way down to Karanga camp is mostly downhill, but it involves jumping one more ridge line as well as dropping into the Karanga Valley before climbing back up to the camp. The last steep pitch before Karanga is hands down the hottest, steepest pitch you will do the entire climb. I felt like it was steeper then the Breakfast Wall! Its about a 200′ climb straight up to camp. Not a fan. However, overall this hike is pretty quick. they estimate 4-5 hours for most groups; didn’t even take me 3. So after lunch, it is time for a nice relaxing chill. You can hike around nearby for more acclimatization, but my knee needed a break if it was going to be in tip top shape for the summit.

Day 5- Karanga Camp to Barafu Base Camp (15,250′)

It is customary for the guide companies to give you a songful introduction to the crew at some point on your trip. Most try to do it earlier in one of the first days on the mountain, in my case it got delayed until this morning because I had skipped a camp that second day which is when they originally wanted to do so. I actually liked it better waiting for today since it is the day before our summit attempt. It was the perfect encouragement and wish of luck to the summit I needed. After singing some songs we headed upwards. A steady incline at altitude, only took me about 2 1/2 hours to get to Barafu. A long time to rest and prep for the next day although my attempt to sleep early failed miserably, I felt good and ready for the summit attempt!

Day 6- SUMMIT! Uhuru Peak (19,341′) and down to Mweka Camp (10,000′)

We started at midnight. I felt pretty good and although we were going what felt like a snail’s pace, we were still passing massive groups. It is a long night as you crawl your way slowly up to the summit although it felt shorter than I thought it would. As we got closer and closer to Stella Point, the wind began to pick up and the cold from the early hours of the morning were freezing my Nalgenes. At just after 5am, we came up over the crest of Stella Point. it was still incredibly dark and the wind was coming off the crater. It was Brutal. Weather reports later indicated that it was a low of 17 degrees Fahrenheit at the summit, with winds up to 15 knots which makes for windchill well below zero. The pace is set and designed to summit by sunrise. However, because I was moving so quickly, we hit Stella point well before dawn and Uhuru Peak at 6am (sunrise wasn’t until 6:30). It was too cold to honestly enjoy much time on the summit, we spent maybe 5 minutes tops, snapping quick pictures in the dark and heading down the crater rim back to Stella point. The sun finally rose as we got there, and the long decent began down the way we came. The decent from the summit involves some glicading on volcanic ash and sand in spots. It only took maybe 2 hours to get back to base camp. After a quick break and some food, we continued down to Mweka camp. Initially the decent was fine, and then the rock steps began….. after passing the Millenium intermittent camp, the last 3 miles or so was all big rock steps and my poor knee made itself known. After a very, very long day, I plopped into my tent and slept like a log.

Sunrise on the glacier from just above Stella Point

Day 7- Mweka Camp to Mweka Gate (5,300′)

A much more gradual decent today, made my knee was thankful but my calves were definitely burning in the end. After 14,000′ of decent in 2 days, my legs were pretty done. It only took me about an hour and a half to descend 6 miles. It was foggy and rainy at the bottom and made for a cool, spooky atmosphere in the rain forest. After packing up the vehicles at the gate, we headed about 5 minutes down the road to where we would eat lunch and celebrate outside the souvenir shop. I was glad to be done. Tired, sweaty, and ready for a much needed shower!

Overall, I enjoyed Kilimanjaro. I kept catching myself comparing notes to my Nepal trek to EBC last year and felt like Kili was significantly easier than Nepal. Mentally I was also in a much stronger place and we all know that climbing something like this is always more mental than physical. Swahili is easier to learn than Nepali as well, I felt I took away more of the language, but unfortunately not as much culture as I would’ve hoped. Moshi town is fairly modernized so I would have loved to visit a village out in the grasslands, and meet tribesmen and I did not get to see anything of that nature. I definitely recommend knocking this one off your bucket list if you have interest in climbing Kili. I also recommend the Lemosho route. it shares much of the popular Machame route but I think is more picture-esque in the first few days before the trails merge.

What you REALLY need to pack for an expedition climb.

We all get them every time we sign up for a guided trip, “The Packing List”. And after some experience you get the hang of things but if this is your first trip like this, then read on because I am going to show you what ACTUALLY needs to be in your duffel conpared to what many standard gear-lists will tell you.

Why? What’s the difference?

Well, it depends.

Some companies have learned to list necessities and are pretty spot on, others give you a novel, despite the weight limit that will be required. It helps to just know what you ACTUALLY need and why vs what is reccomended add-ons, what is available for rent, whats optional luxuries, and what’s not nessisary so you can budget gear purchases and pack appropriately.

Weight Limits:

First off, all international airlines have a weight limit on bags and any guided expedition that has available porters will give you a 15kg (33lb) weight limit as well to protect the porters. You would be surprised how heavy your stuff can be. It all adds up fast! So one key thing to remember while packing: WEIGH YOUR BAGS!!!

Sidenote, weight limits can vary:

Take climbing packing vs a trek for example: a trek, anywhere in the world, can easilly be packed to under 15kg. But if you are headed to climb a technical peak, you have A LOT of gear. You can’t always physically fit everything into 15kg, especially if You are on the mountain for 2 months! You may need a down suit, climbing gear, etc etc. All you need to know for now is in a climbing expedition there will be multiple duffels to carry your stuff, but they still can’t weigh more than 15kgs each.

What to ACTUALLY pack:

This list is gonna start out with you basics for a trek because even if you add technical climbing, you are still going to have the same basic trekking gear. This list is a base that works for any trek, anywhere in the world.

The obvious:

  • Your 70-90L duffel
  • A 25-35L day pack
  • Trekking poles (even if you think you dont need them you want them. Downhill at the end a long trek is brutal on the legs and knees)
  • Good, broken in, hiking shoes
  • Multiple pairs of hiking socks (rule of thumb. 1 pair for every 2 days)
  • Liner socks (only IF you feel like you need them… I never use them.)
  • 1 pair thick wool or ski socks (for sleeping/summit)
  • 0° sleeping bag (especially for high elevation camping)
  • Lightweight compactable Sleeping pad with R rating of 3 or higher (R rating is temperature compatibility)
  • Sunglasses (+glacier glasses if there is snow and going above 10,000′)
  • Water bottles (2, 32oz Nalgenes MINIMUM, bladders are useful too… Until they freeze)
  • Headlamp/extra batteries

Layers:

  • Underwear/bras (1 pair every day if trek is roughly a week or less, 1 pair for every 2 days if its longer. You can wash them and hang them to try on your backpack while hiking! Sounds wierd, is totally normal tho.)
  • 1 moisture wicking T-shirt
  • 1 pair trekking pants
  • 1 pair modest shorts (ONLY in hot regions and where cultrally appropriate. Examples: Kilimanjaro=ok, but Nepal=NO shorts!)
  • 1 long sleeve moisture-wicking layer
  • 1 long underwear top
  • 1 long underwear bottom
  • 1 fleece layer top
  • 1 fleece or sweatpant bottom
  • 1 puffy jacket
  • 1 winter coat with hood (down jacket is best if possible when climbing high, it can be rented in many areas of the world if your particular company requires it)
  • 1 rain shell or poncho

Sidenote, Why only 1 of each? You will wear the same thing every day. Sounds gross but saves space and weight. What I like to do is have one long sleeve as a hiking layer and then the long underwear and fleece become loungewear in camp. You can change out of your sweaty clothes and you are much warmer while hiking but you will be cold once you stop moving. On summit night I keep the long underwear on under my trekking pants combined with the winter coat and I am plenty warm.

For heads and hands:

  • Sun hat
  • Winter hat/beanie
  • Thin gloves
  • Waterproof Winter gloves
  • Balaclava or face mask (shield wind/dust)
  • 1-2 bandanas (multipurpose: snot catchers, face masking, sweat bands, wet cloths to cool hot heads, etc)

Accessories:

  • Gators (if theres snow)
  • Yak-traks or micro spikes (if minimal snow)
  • “Camp shoes” (comfy easy slip on and off)
  • Quickdry lightweight camp towel
  • Stuff sacks/dry bags to keep gear organized
  • 1 garbage bag (for stinky/dirty laundry! The plastic of the garbage bag will lock in odors so the rest of your stuff doesnt stink!)
  • Gallon sized ziploc for trash (food wrappers and TP. Pack it in, pack it out!)
  • Personal snacks and electrolyte gels or powder mixes (not optional, a MUST! Foreign food is hard on the stomach if you are new to it. Altitude kills your apetite. Having multiple snack favs to keep energy up makes a massive difference and electrolytes can help prevent altitude sickness!!!)
  • Toiletries: camp soap, toothpaste, toothbrush, deoderant
  • Toilet paper (thank me later)
  • Ladies, feminine products (altitude screws with your cycle. Just be prepared)
  • Water purification tablets (backpack filters wont kill everything. Always boil water First THEN purify it)
  • Sunscreen (SPF 30+ minimum)
  • Lip balm with spf
  • Insect repellent with DEET (various infectious diseases in rural parts of The world. Protect yourself. Your “organic lemon bug spray” wont work on these bugs. Unless you have a severe allergy, suck it up, use the deet. Its better than Malaria)
  • Basic first aid kit (bandaids, blister kit, tweezers, is plenty. Guides have full med kits)
  • Wet wipes (when you cant shower for 3 weeks, these will make you feel better)
  • Hand sanitizer!
  • Camera
  • Portable chargers/extra batteries (keep in sleeping bag at night or they will drain in the cold!

Important documents:

  • Passport
  • Travelers insurance paperwork
  • Visa paperwork
  • Immunization paperwork
  • Credit card for emergencies
  • Cash: depending on your trip depends on how much to bring. You will need to tip your guides, porters and cooks for each day of the trip. In Nepal you will be staying in teahouses where you can purchase snacks and bottled water. Suvenier shopping is in cash in most rural parts of the world. Cash economy. You are gonna need to look up what is appropriate for tips and math out the legnth of your stay and how much you expect to spend on suveniers and other things. I can’t tell you an exact number because everywhere is different. I pull out what I think will be too much just to be safe and I can put back whatever I dont spend when I get home.

Medications: (vary based on location)

  • Regular Percriptions
  • Diamox (for altitude)
  • Malarone (for Kilimanjaro, Africa in general, central America, and other at risk countries. This drug has least amount do side effects compared to other malaria meds)
  • An antibiotic (incase of travelers diarrhea. Specific drugs are required for specific regions)
  • Ibrpofen (your new best friend)
  • Pepto-bismol tablets (helps prevent travelers diarrhea. Take this first before it gets incapacitating then take antibiotic)
  • Dayquil/cough drops (cold air, bew germs, new people.. Your probably goning to get sick at some point)
  • Daily multivitamin (can help prevent sickness as well as provide nutrients that may be missing from eating trekking food.)

Luxury items: (really just optional comforts if you have room to fit them.

  • Journal
  • Card games
  • A Book
  • Earplugs (for sleeping… trust me.)

Climbing add-ons:

  • Mountaineering boots
  • Crampons
  • Harness
  • 5-6 slings
  • Jumar
  • 3-4 caribiners
  • Climbing helmet
  • Mountaineering axe
  • Snow pants
  • Down suit (if climbing in temps below 0°F)
  • Down mittens rated 0°
  • Warm waterproof Fingered gloves
  • Prussets

Climbing gear can be heavy so spread it out and dont pack it all in the same duffel. A lot of gear is provided for you such as tents, ropes and sometimes even backpacking stoves/fuel for high camps. Much of the gear can also be rented for a small fee. Check with your guide service for their “provided gear” list.

There you have it! It may look like a really long list but don’t forget I added in all those notes, and I promiae you can succeed in meeting that under 15kg weight limit with everything on this list (minus the climbing add ons of course). I take it from personal experience.

I am currently packing for Kilimanjaro which I leave for in just a couple days! I have noticed how similar my list is compared to Nepal but I am packing less now that I know what I used and didn’t use, what I wish I had more of (snacks, all the snacks!), and since I’m not planning in a technical climb, I get to leave all the heavy climbing gear home which makes meeting the weight limit much easier.

Stay tuned over the next few weeks for trip reports from Tanzania!