TRIP REPORT: Mount Elbert (14,439′)

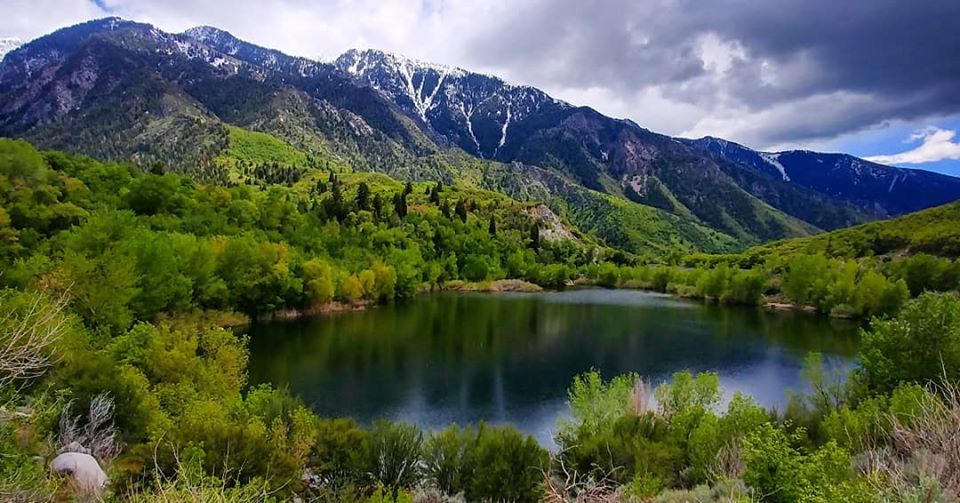
There is no better way to celebrate the summer solstice than from the highest point in Colorado! Mount Elbert is located in the Sawatch Range of the Rocky Mountains just outside the city of Leadville. Not only is it the state’s high point, but it is the second highest point in the contiguous US. A steep climb, but definitely one for the books!

Looking N-NW from the summit

Out climb started just after 3:30am from the standard North route. The trail started off pretty moderately with switchbacks for the first mile, very doable. The trail then flattens out and actually heads slightly downhill for about 5 minutes of walking or so before you reach the Contintental Divide trail fork. This flat continues for just another half mile or so before the steeper incline begins. This first steeper section goes for another mile or so until you hit treeline and makes you question your life choices.

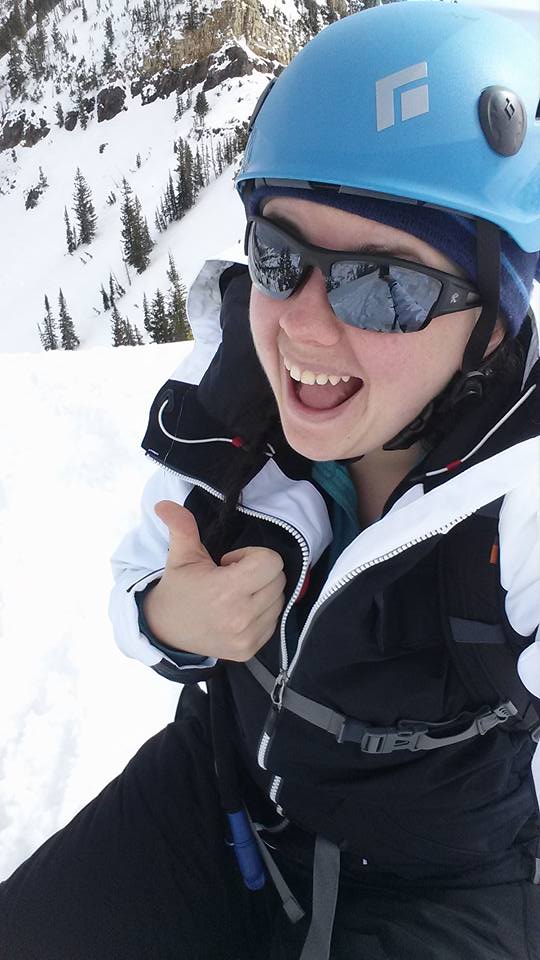
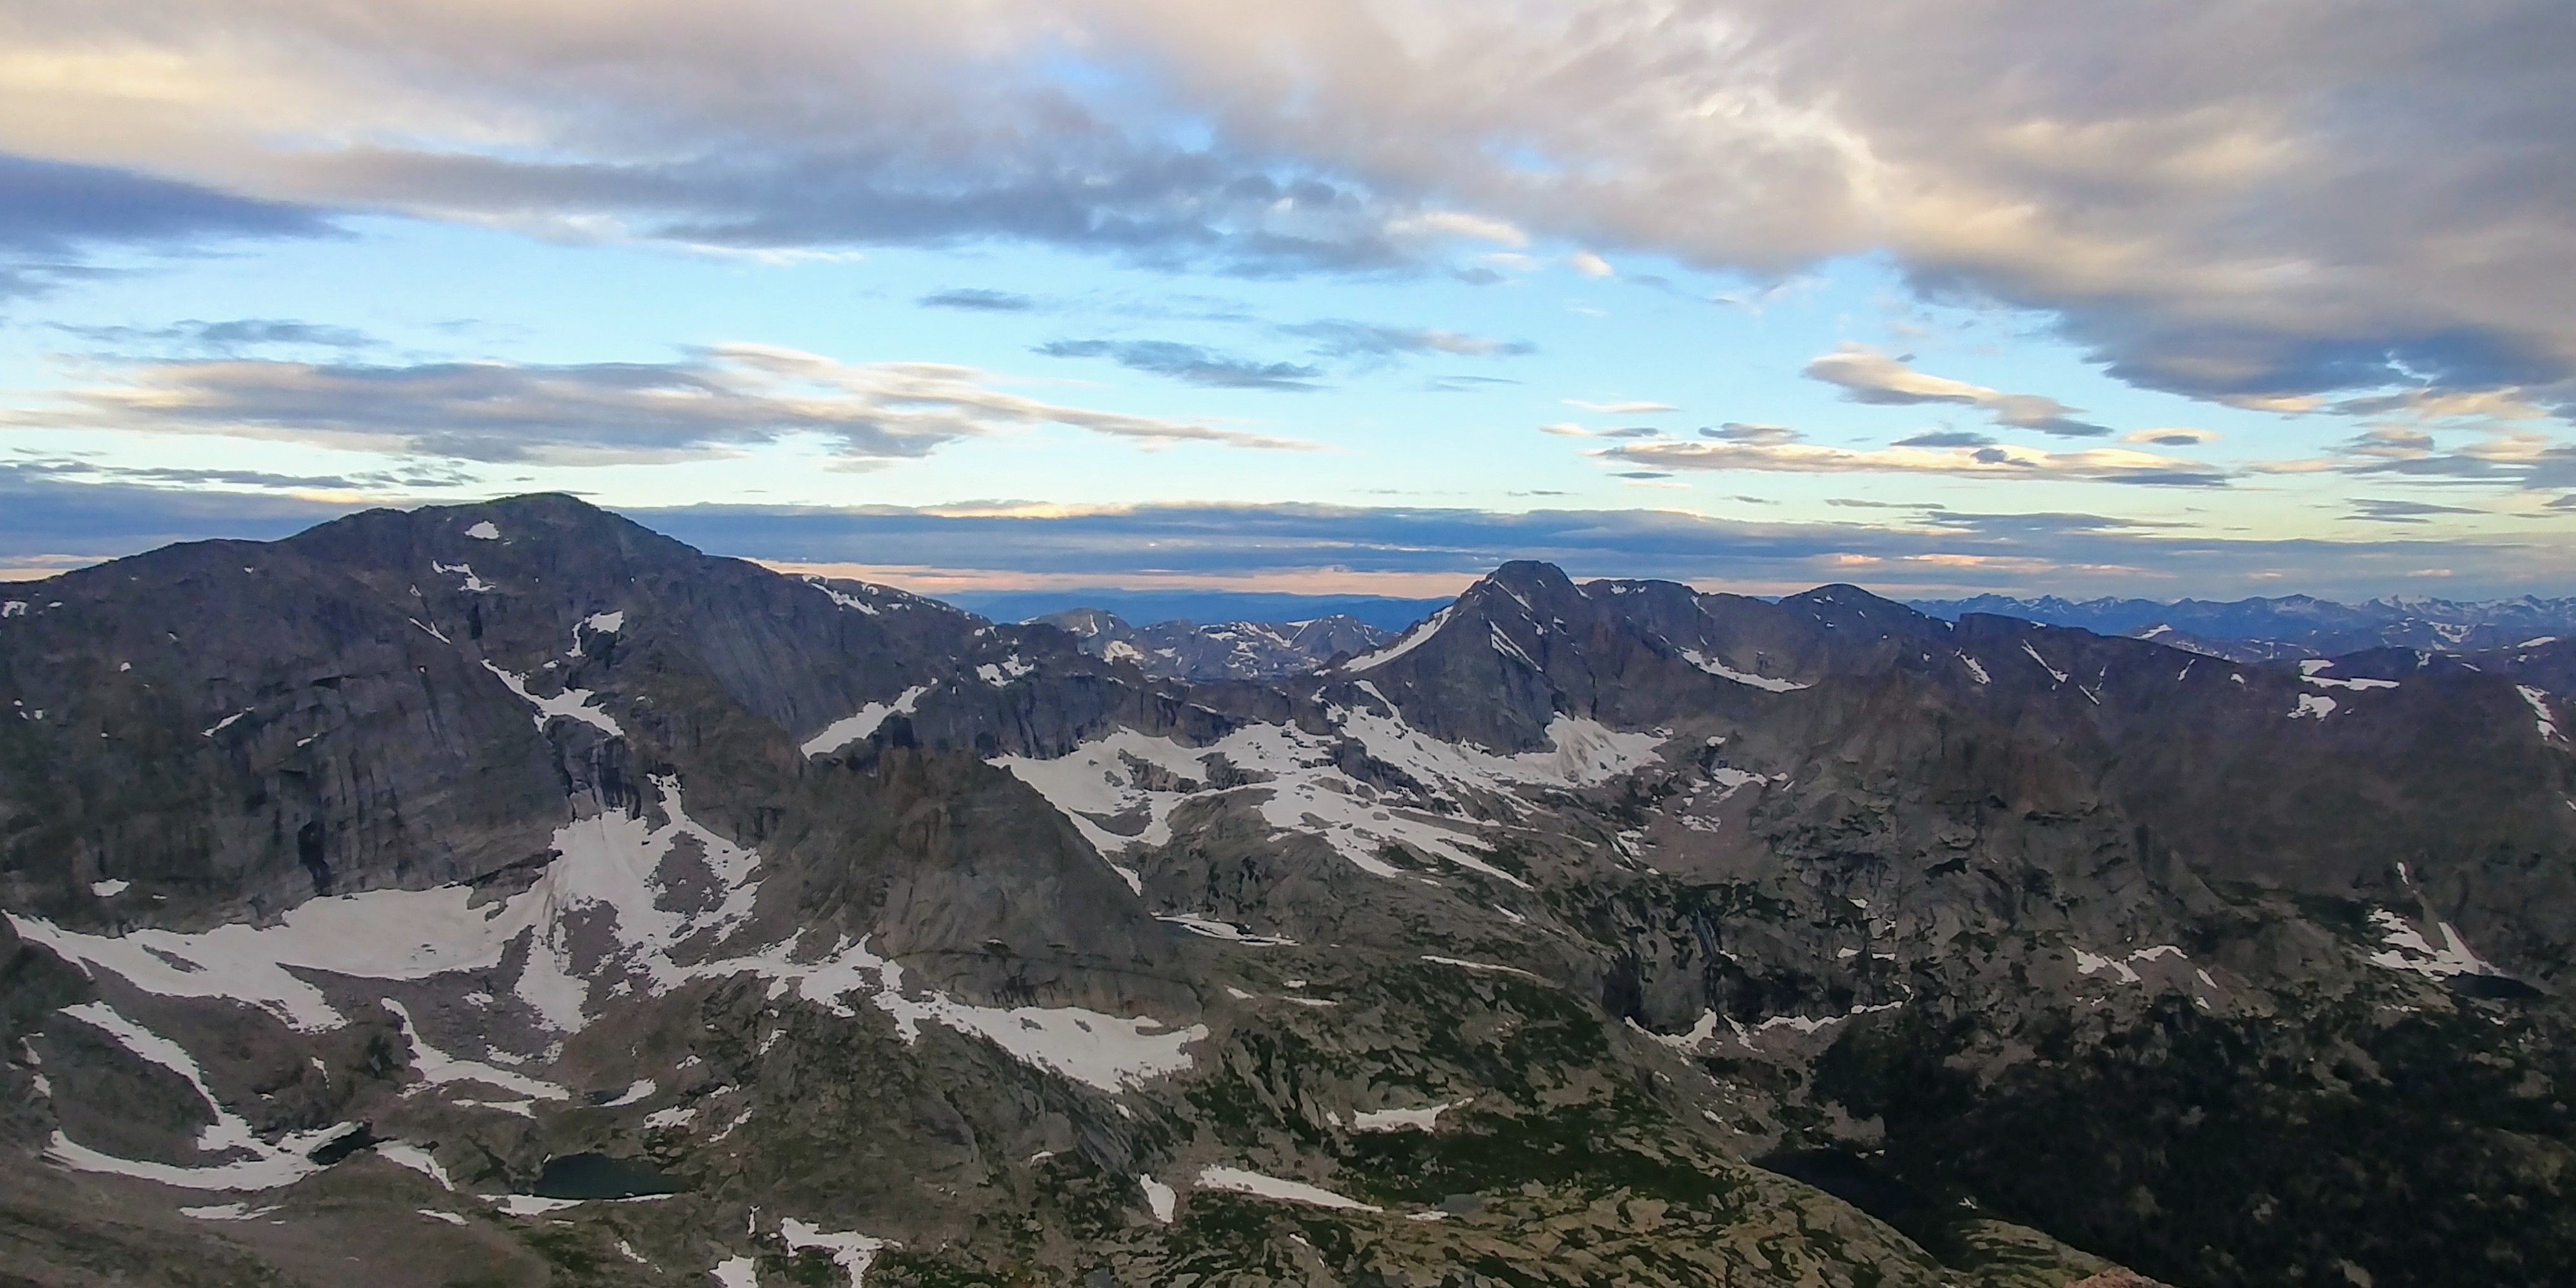
At this point, coming out of the trees the we were in twilight and sunrise was approaching. we slowly continued to make our way out of the trees just in time to see the alpenglow hit the peak in front of us and watch the sunrise. Once out of the trees you can basically see the majority of the route headed up the ridge. It is a slow steep walk but take your time and you will get there!

steepest pitch up 1st false summit

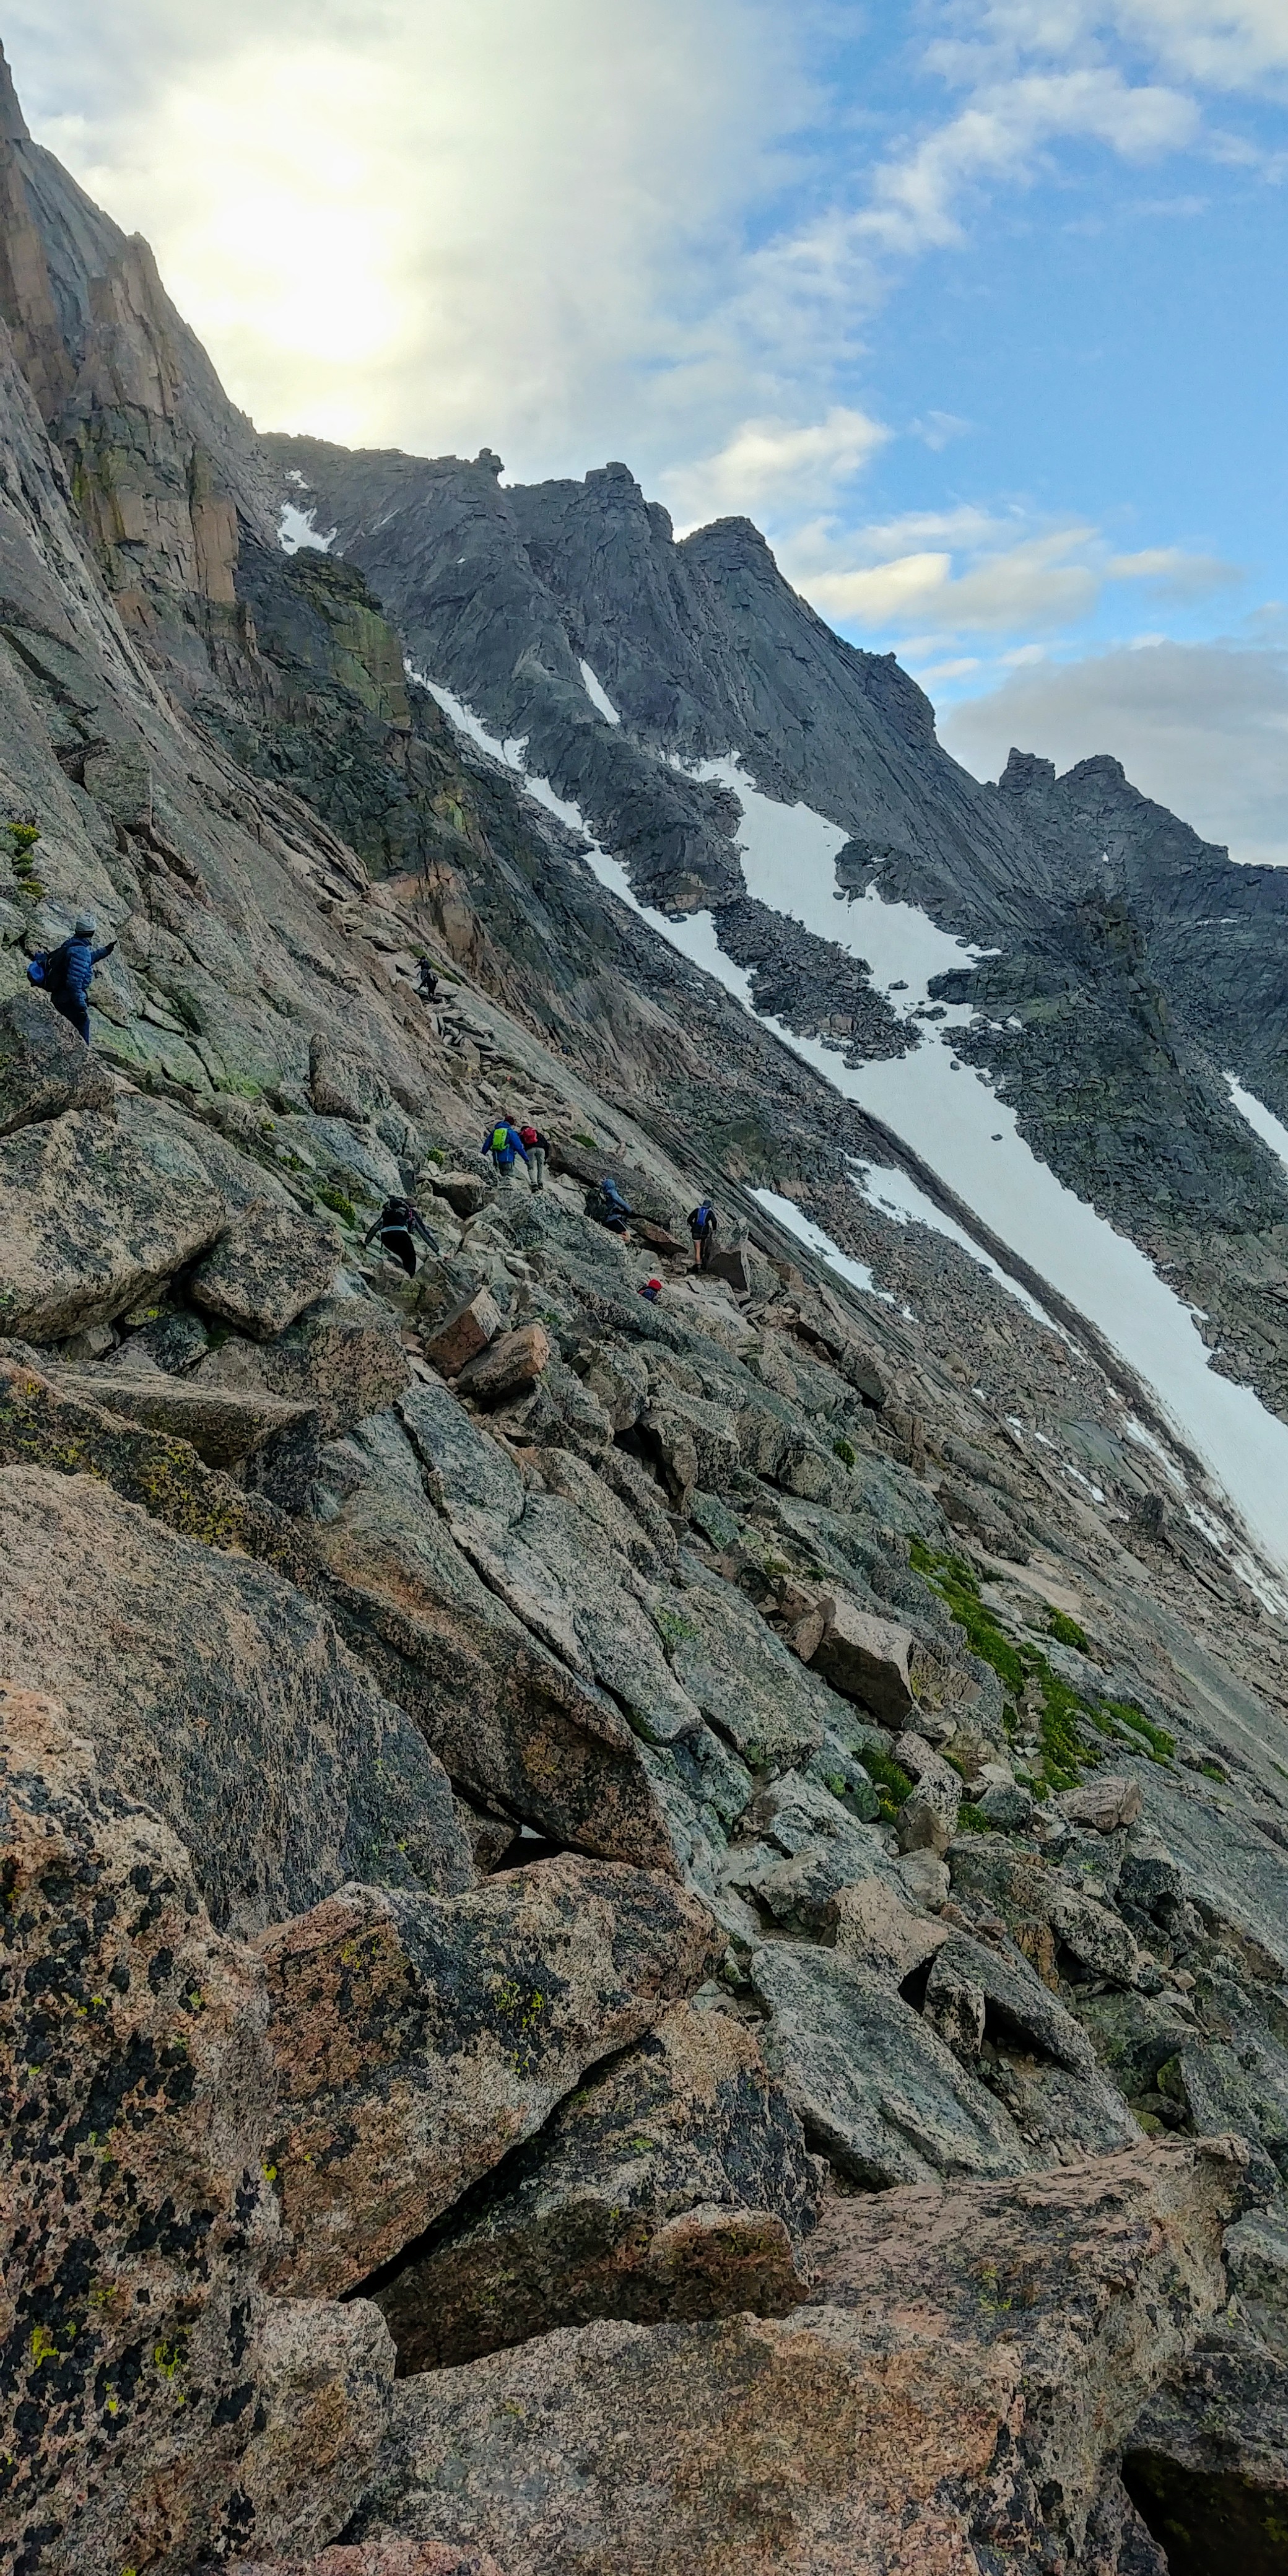
The crux of the route starts at about 13,000′. This is the steepest section and is a slow spot. Knowing you have 1,400′ left of climbing the first 900′ are right in front of you in a very short distance. This is the first false summit.

2nd false summit

As you come around the north side and to the top of the false summit you can see the second false summit in front of you, a more moderate incline in comparison as you make your way up the hill.

3rd false summit…

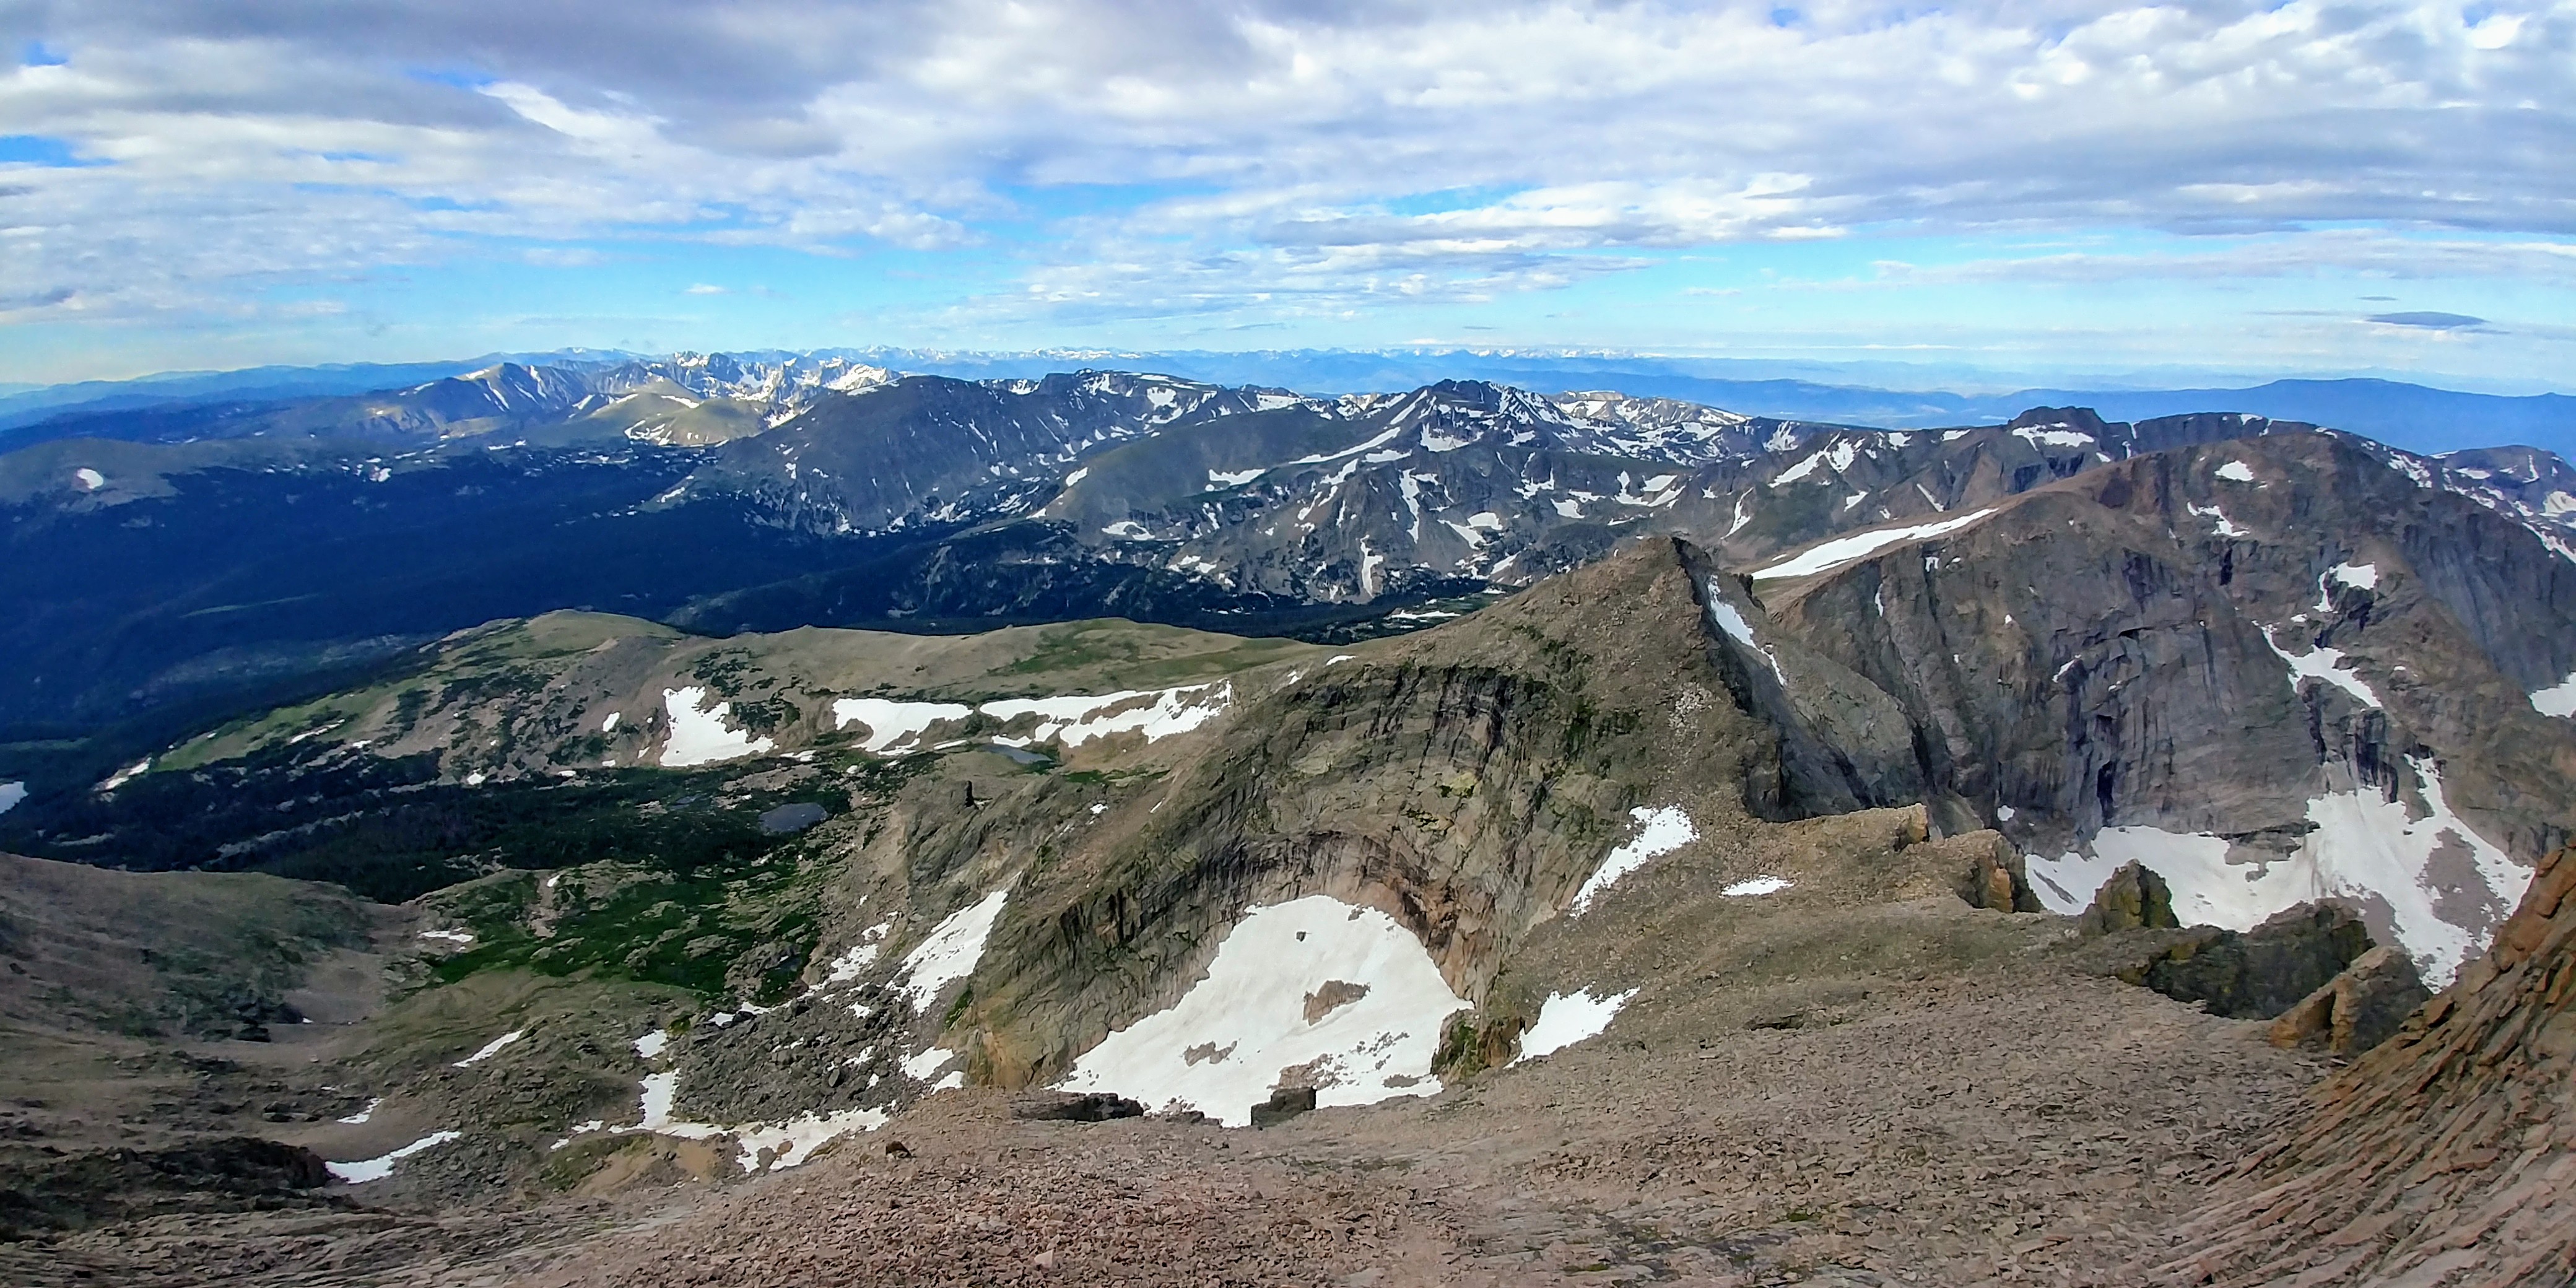
As you come up on this second false summit the 3rd and last false peak gets your hopes up as it LOOKS like it could be the real deal…. it is not. HOWEVER, as you quickly make your way up this last hill you can see the REAL summit and it is a simple 2-4 minute ridge walk away!

Actual summit just ahead!

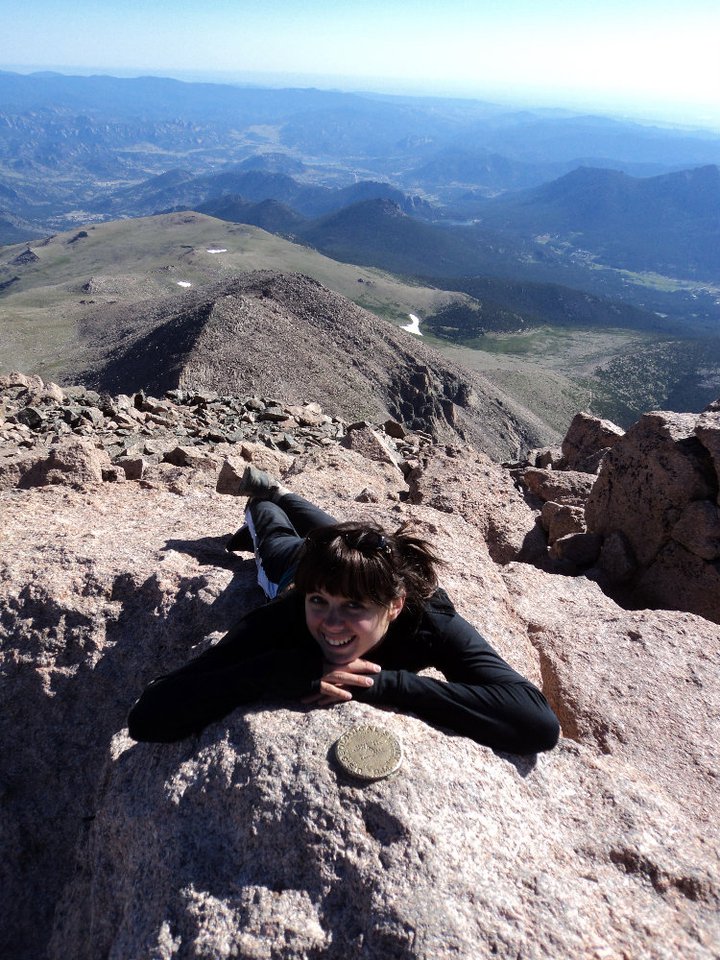
Welcome to the roof of Colorado at 14,439 feet!!!!! We took our time on the way up as we encountered wind and cold and had to keep adding layers. We summited at 8:50am.

The decent took half the time for the most part. Some steeper spots were a little slow for those needing to be gentle on the knees. (bring poles) As for difficulty, its just the steep gain and the altitude. The standard North route is a class 1. Very well maintained trail as it is heavily trafficked. We did pass plenty of people who turned around early in the morning as they were not feeling it that day. Also, being June it was VERY cold and windy for us. It had snowed the day before so the summit temps were at or just above freezing that morning and the windchill was recorded at 17 degrees Fahrenheit! (burrr) Overall, it was a BEAUTIFUL day to summit.

HAPPY SUMMER!

TRIP REPORT: Mount Nebo (11,929′)

Mount Nebo is the highest peak in the Wasatch Range in Utah. It’s located about 2 hours south of Salt Lake City near the town of Payson. It is a beautiful but challenging climb.

The trail starts out pretty mild and has a great view of North peak as you ascend. The trail is full of wildflowers and down trees. Navigating around the trees is fairly easy. The first mile and a half is the easiest part.

Once you arrive to the open meadow and cirque, the trail steepens as you head to the ridge.

As you top out on the ridge of North Peak, the trail leads around to the backside and flattens out as you work your way to the other side to the saddle.

Once you arrive at the saddle, the false peak stands in front of you. You can see the roue and the top of the false summit. Its pretty steep but straight forward.

Now for the tricky part. The summit ridge. This ridge is made of very sharp limestone and slippery shale. Gloves are highly recommended! There are no cairns or markers to mark a single solid trail. You can see what appears to be a path to the summit but it is actually pretty difficult to navigate as multiple paths exist but some dead end. I found the most direct route was to stay as close to the ridge line as possible. If you get too far below the ridge, the amount of shale increases and this rock is incredibly slippery.

The visible “path” ends approximately 100 feet below the summit. This part is rates as a class 3 scramble and it can be a little unnerving as you are trying to grab rock and hope that it’s solid and not loose shale. This was the point I actually turned around as I was climbing solo. I wasn’t sure where the recommended scramble path was since there are no markers or cairns and it was my first time on this mountain and did not feel comfortable being alone on the slippery rocks trying to figure it out.

This ridge was the MOST time consuming part of the climb. I made it to the top of the false summit. The ridge is only a half mile and it took me an hour and a half to navigate. Coming down, the shale is VERY slippery so keep that in mind. Stepping on solid rock is always better if you can. Poles aren’t super helpful on this ridge but they are on the way down the steep false summit.

Overall expect to spend 6-9 hours on this mountain depending on how fast you are. Like I mentioned, the ridge is the most time consuming part. Give yourself a turn around time. Many people just go up to the false summit to start. Start early, as there is NO shade from the base of the false summit onward.

Overall a gorgeous mountain! Definitely one to check off the list. I will be back to finish that last 100 feet! 😉

6 Resistance Band Exercises Climbers Can Do at Home

Here we are…. Well over a month into quarantine (some maybe even longer) and some of us are going crazy! I know for me I am dying to get out and climb. Spring is IDEAL ski mountaineering conditions. Yet here I sit. In my house dreaming of peaks, hoping and praying this all ends soon. We do what we can during these uncertain times. So to keep those climber muscles from getting weak, try these 6 resistance band exercises climbers can do at home.

Bicep Curls

Stand on the center of the band. Tuck in elbows in, palms up. Curl arms up nice and controlled.

Lateral Raises

Stand on one end of the band and hold the band out to the side. Raise arm to a “T” position.

Tricep Extension

Stand on the center of the band. Slight bend in the knee, and bend over slightly. Tuck in arms and extend behind you.

Overhead Tricep Extension

Stand on the handle on one end of the band and hold the band behind you. Tuck in your core so your spine is aligned. Extend arms straight back.

Bicep Row

The best way to do this exercise would be by wrapping the center of the band around door handles or around a post. Stand back and sit back slightly. Draw elbows in palms facing toward each other.

Chest Row

The best way to do this exercise would be by wrapping the center of the band around door handles or around a post. Stand back and sit back slightly. Draw elbows back with palms facing the ground. Think about squeeze your shoulder blades together.

Create a Routine

Try putting these exercises together into supersets! For example:

3 sets of 15 Bicep Curls, and 15 Tricep Extensions back to back. Rest 30 seconds between sets.

3 Sets of 15 Lateral Raises and 15 Overhead tricep extensions. Rest 30 seconds between sets.

3 Sets of 15 Bicep Rows and 15 Chest Rows. Rest 30 seconds between sets.

Don’t forget to stretch those arms when you are finished!

Want more?

If you enjoyed these 6 resistance band exercises climbers can do at home then check out my FREE Quarantine Workout Plan!

How to Train for Everest Base Camp

Trekking to Everest Base Camp is not for the faint of heart. The trek is approximately 110 kilometers (or nearly 70 miles) and gains 9,000′ (3,000m) in elevation. Knowing exactly how to train for Everest Base Camp will benefit you as you prepare for the most memorable journey of a lifetime!

What the trail to Everest Base Camp is like:

There are actually a number of different routes to get to Everest Base camp. Some include high Himalayan passes with gorgeous views, others have a side-trip to climb a nearby 6,000 meter peak! For simplicity-sake, I will talk about the standard route. Know that trail conditions will be incredibly similar no matter which route you choose.

The Everest Base Camp Trek is known for STAIRS. The trail is not a steady incline. It goes up, it goes down, then up, then down, and up, and down again. When you land in Lukla at just over 9,000′, your trail starts primarily downhill to the village of Phakding. From there, you will follow the riverbank. After that, you will head up the steep pitch to Namche Bazzar which sits at over 11,000′. Past Namche, you will make your way to the Tenboche Monastery. This involves a steep decent back down to the river, before you climb back up to the monastery.

At this point, you will have a gorgeous view of the Khumbu region including Ama Dablam. You will make your way down into the Khumbu Valley. Once you are out of the trees, you will pass through several more villages on your way up to the Khumbu Glacier where Base Camp is located. Climbing Kala Patthar is also a must if you plan to visit Everest Base Camp. This involves a moderately steep trail at 18,000′.

What this means for training:

There are a few key elements that will be necessary for a trek of this magnitude. To ensure success you must focus your training on endurance, leg strength (particularly around the knees), and mental strength. The long distance, unfathomable amount of stairs, and high-altitude will be the biggest physical challenges you face. Having strong cardio capacity will help your body adapt to the high-altitude. Strengthening your legs and your knees for the long distance, and ALL THE STAIRS will be crucial. Finally, being able to maintain physical energy for hours on end will help you maintain energy during the long days on the trail.

The mental challenges on the trek to Everest Base Camp will be different for everyone. However, there are commonalities which can be exacerbated by those physical challenges. Lack of self-confidence, fear, illness, weather, exhaustion, and seclusion can all effect your mental ability to conquer your goals. The elements commonly faced at high-altitude are unpredictable. Learning how to power through the elements and stay mentally strong will be just as, if not more important than your physical training.

Why it is important to train for Everest Base Camp:

Thanks to the internet and apps like Instagram and Facebook, wanderlust fever is getting more people outside than ever before. Those who are successfully making it to Base Camp are training beforehand.

When I was training for my first trek to Everest Base Camp, I had no reference, and no idea how to effectively train for the high altitude. The only think I knew I could do was practice being up high. Mentally, the trek to Base Camp was the hardest thing I had ever done, short of recovering from my eating disorder. Shortly after I came home from Nepal, I became a certified personal trainer. I studied sport performance and mountain performance. In the end, I figured out exactly what I needed to conquer Mount Kilimanjaro. When I got home, people asked how hard the climb was. My reply was that it was easy, in fact way easier than Nepal! I even summited a day ahead of schedule! This was because I had figured not just the physical component, but the mental one as well.

There was plenty of trial and error, research, and education. In the end, I had dialed in an effective approach to endurance training for high-altitude. In addition, the most crucial and important piece to my training stems from utilizing mental performance to help you succeed. Not only do I now help others achieve their climbing dreams, I continue to apply it in my own life.

Interested in learning more about my coaching program?

Take a look at my mountain performance coaching program. My program works by combining both personal training and mental coaching to completely prepare you for trekking and mountaineering expeditions.

Wilderness Wellness Retreat

JULY 25-26 2020

Lake Mary, Brighton, Utah

Nature therapy is the best therapy! Get out of your comfort zone by getting outdoors. Reset and recharge by learning mindfulness, stress management techniques, meditation, challenge yourself, and become one with the nature around you!

Itinerary

Saturday:

9:00am- Meet in the Brighton parking lot, parking in front of the Majestic Lift on the south end near the Brighton Center. We will have a quick briefing, distribute group gear to help carry, and double check that everyone is packed appropriately for the conditions.

Approx. 10:00am- We will begin our hike to Lake Mary. This is a mild to moderate 1 mile long trail, but with heavy packs and in a large group we will take our time.

11:00am- Set up camp, prepare lunch as a group, eat lunch, a bit of free time before our first workshop.

2:00-5:00pm- Stress Management Workshop. You will learn different skills to help manage and cope with stress.

5:00pm- prepare dinner as a group, campfire talk, free time

Sunday:

6:30am- Sunrise Yoga & Meditation

7:30am- prepare breakfast, free time before our next workshop

9:00am-12:00pm- Mindfulness Workshop. We will be learning some introspection, digging into ourselves, and learning how to listen to our heart and minds when they are distressed.

12:00pm- Prepare lunch as a group, clean up camp, group photos, etc.

Approx. 1:30pm- hike down

Approx. 2:00-2:30pm- empty group gear form packs, say goodbyes.

Cost: $135/person

Click below to register! Payment is due at registration to reserve your spot. Full refunds are available up to 30 days prior to the event. If you need to cancel within 30 days of the event only $100 will be refunded.

NOTE: This workshop requires a minimum number of sign-ups. In the rare event that the minimum number is not reached, the workshop may be cancelled and you will be 100% refunded. In this event you will be notified 2-weeks prior of the event if there is a cancellation. Be sure to follow our Facebook page for updates.

What is provided:

  • All group equipment: Tents (3 people per tent), camp stoves, pots, utensils, plates, cups, fuel.
  • 2 lunches, dinner, breakfast, and some snacks (*please let us know of any dietary restrictions)
  • Supplies for stress management activities: Journals, pencils, craft supplies, etc.

Packing list:

  • 40-40L Rucksack
  • Sleeping Bag
  • Sleeping pad
  • Warm layers such as jacket, sweatpants, gloves, beanie, etc
  • Rain jacket (just in case)
  • Biodegradable toiletries
  • At least 4L of water
  • Water purification tablets or filter (in case you run out of water)
  • Hiking shoes
  • Socks
  • Headlamp
  • Personal snacks (optional)
  • Personal journal (optional, one will be provided for you)
  • Personal Craft supplies (optional, supplies will be provided)
  • Card games (optional)

CELL PHONE RULE: Please pack your phone for emergency purposes but we ask that phones remain off for the duration of the weekend for the best possible experience. Part of this weekend is to “unplug” from our digital worlds for a while and we ask that you respect others around you at the retreat by keeping them out of sight and out of mind. Thank You!

Full Moon Mindfulness Workshops!

Learn how to be introspective and intuitive, look inside yourself, become in tune with your body, mind, and nature!

We will start at the Bells Canyon Trail head in Sandy, Utah just off the corner of Wasatch Blvd. and Little Cottonwood Rd. The hike to the reservoir is a popular, mild, 3/4 mile, well maintained trail. We will hike as a group to the lake, have our workshop lakeside on the emergency road, watch the sunset over the valley, and hike down with the light of the full moon.

Please bring a journal to write in, either a yoga mat, foam camping mat, OR crazy creek style chair (aka something to sit on you don’t mind getting dirty), water bottle, comfortable walking shoes, bug spray, a light jacket or sweatshirt, and a flashlight or headlamp.

Please be a bit early as parking can be crowded as it gets warmer, you may need to park at the dirt lot just west of the light on Little Cottonwood Rd.

Upcoming Workshops:

FRIDAY APRIL 10, 6:30pm AT THE BELLS CANYON TRAILHEAD

FRIDAY MAY 8, 7:00pm AT THE BELLS CANYON TRAILHEAD

FRIDAY JUNE 5, 7:30pm AT THE BELLS CANYON TRAILHEAD

Workshops are approximately 2 hours including the hike. More dates may be added come fall.

$20/Person

Click below to register! Payment due on arrival.

NOTE: All workshops are weather dependent. In the event of light rain, we will hold the workshop at under the awning at Hidden Valley Park on Wasatch Blvd. In the event of HEAVY rain (or snow), the workshop may be cancelled. Be sure to follow our Facebook page for updates.

Gain a Sense of Self


Who am I, Really?

Understanding your emotions and how they effect you is something every human on this planet needs to function successfully in life, in society, in relationships, in your career, and in conquering your goals and aspirations. Whenever you are struggling with making a decision, fears, or anxiety, it helps to start at the core: the emotions themselves.

WHAT IS EMOTION?

Emotion drives us, some more than others. Even those with a very analytical personality are still driven by core emotions to some degree, especially in circumstances that effect your livelihood. Emotions are simply feelings and reactions whether positve or negative towards an external stimuli. We have a variety of emotional responses such as fear, anger, joy, sadness, and disgust (sound familiar?). As much as we may love that Pixar movie Inside Out, we have many more emotions that our bodies can react and respond with and some are more complex than others. Shame, envy, contempt, anxiety, depression, surprise, happiness, love, pride, and so on. This heat map shows how our bodies feel those different emotions.

The list is endless. We have a word or phrase for over a hundred different feelings and they are all at different points on the spectrum. However every emotion, every feeling can be placed into one of two categories: Desire and Avoidance.

Try this Journal Exercise:

First Question: Which emotion do you think controls you most? Why? What do you think is fueling that emotion: desire or avoidance?

Think about what you desire most in this life. What is it that you desire? What feelings or emotions come up when you think about what you desire? Now take a different direction with desire, look at “Desire” as a whole. What does “Desire” mean to you? What does it do for you in your life? What collective emotions drive your Desire?

Now, look at the other side of the coin, what is the one thing you want to avoid most in life? What emotions or feelings come up when you think about what you want to avoid? Look at “Avoidance” as a whole. What does “Avoidance” mean to you? What does it do for you in life? What collective emotions drive your avoidance?

Last concept to ponder: What is your desire’s relationship with your avoidance? How can they work together for? So I ask you again to think on this one last time: Which one do you think has greater control of your emotions: Desire or Avoidance?

Desire and Avoidance are similar to the concept of yin and yang. A small piece of one can be found in the other and they can work together in helping you accomplish life. Your goals and aspirations are commonly driven by desire but the fear of failure or fear of the unknown can cause us to avoid certain steps to get there. Sometimes we have to do things we don’t want to do because we desire a certain outcome and a strong desire helps us conquer those fears. I think most of us prefer to have desire be in dominant control so if it is not already, think about ways where you can help it be in more control. What emotions need to take over? What do you have control over changing to make that happen?

By gaining a little bit of introspection and a better understanding on how your emotions fuel your desires, your goals, and your aspirations in life, you will be able to be more successful at reaching those goals and dreams. If you find yourself avoiding something, stop and ask yourself, why am I avoiding this? What emotions are fueling this? And will this help me get what I desire most? Avoidance is powerful and can stop you dead in your tracks. But desire can help you push past those fears and anxieties fueling avoidance to help you conquer what you want most.

Just remember practice makes perfect. Perspectives don’t change overnight. This is simply one small step in learning how to Conquer Yourself!


How to Choose the Best Gear for Your Budget!

Shopping for the best gear for your adventures can be a challenge. You can do research, you can compare products all day, but ultimately you want something that is the best fit for YOU and whatever your adventures entail.

Most gear isn’t cheap, and for me, trying to find a balance of quality and budget friendly is probably the biggest challenge of them all. I spent a number of years as a climbing dirtbag/ski bum before I got an adult job. I had to learn where to find the best quality gear at the best price and I got really good at it!

From long underwear to climbing gear, I spent a majority of shopping time researching what my best options were for what I needed. But what I need for my mountaineering, skiing, and climbing might be different than what you need. But luckily, there is now a place where there is an entire community of others like me who have done the research for you on thousands of outdoor products from camping, to water sports, climbing, mountaineering, you name it. So without further ado, let me introduce you to my new favorite community: Ask Sidebar.

Ask Sidebar is a community of ambassadors that aren’t tied to a single brand or product they have to sell. It is a community of real people, giving real honest detailed reviews and advice of ALL their adventure gear no matter what brand they are because lets be real, we all use multiple brands for multiple activities and we are available to ask specific questions to as well!

My profile is full of a wide variety of brands such as La Sportiva, REI Co-Op, North Face, Black Diamond, Singing Rock, Mad Rock, Nordica Ski, Julbo Eyewear, Tiva, Chaco, Marmot, FiveTen, Giro, Marker Apparel, Mammut, Kelty, and Vaude. You can check out my reviews or ask me questions about products I use on a frequent basis!

So, the next time you are shopping for new climbing shoes, or maybe a new tent, check out the Ask Sidebar platform to get an idea of people’s real life experiences with products you are interested in. Ask them questions, and know exactly what you’re investing in!

What to See in a Day in UAE

United Arab Emirates is a small middle eastern country on the south eastern edge of Saudi Arabia. Many people fly through Dubai if they are traveling because it is the hub for Emirates airlines. If you have a layover in Dubai long enough to see the sites, 48 hour tourist visas on-site are free to Americans and it is incredibly easy to see Dubai or even head to Abu Dhabi. SO what is there to do exactly?

Dubai:

Dubai is a very new city, it honestly reminds me of a middle eastern Vegas. Buildings are shiny, architecture is modern, and everything LOOKS rich and fancy. Thats just it…. to me, it really seemed like a ficade. The whole town seemed fake. Dubai honestly was not interesting to me, I drove right past it to get to where I really wanted to go. But irregardless, there are some minor attractions that still attract people.

Burj Kalifa

The tallest building in the world stands at 2,717′. You can go to the top, but you must buy tickets in advance. The best time to go is around sunset. Lines can be long to get up as well so make sure you go early. A friend of mine was able to get tickets for 5:30, see the town in daylight and wait up top for sunset, and watch the fountain show from up above and loved it.

Dubai Mall

The second largest mall in the world, includes the only indoor ski resort in the world. Shops include some of the most popular and expensive brand names around, so if you want to actually do some shopping, be prepared to spend money.

The Palm

The Atlantis resort is on the Palm Islands of Dubai. The rooms may be pricey but it would be a blast to stay at overnight and take advantage of the water park if you have an overnight layover!

Abu Dhabi:

Abu Dhabi is The capital of UAE about an hour and a half drive from Dubai but is seriously worth it if you have the time to spare. You can find more cultural sites in this town which is what was more personally interesting to me than Dubai when I visited.

Sheikh Zayed Mosque

THIS. This is what you NEED to see! The Sheikh Zayed Grand Mosque is the largest mosque in the country and is absolutely gorgeous. It was my favorite site in UAE and one I 110% recommend. They provide tours pretty much all day. It is a Muslim mosque and women need to make sure they are completely covered, from head to wrists, to ankles. They do provide free Abayas to cover up if you do not have anything but you have to leave collateral and can lengthen the amount of time it takes to visit the Mosque. It is incredibly hot (especially May-Sept) so if you can, go as early as possible to avoid the heat and bring an umbrella for shade. Take your time if you can. Always walk the mosque clockwise and be quiet and respectful in the prayer room. Pictures are allowed on most of the grounds but be respectful and only take photos in the designated areas. There are signs everywhere that say where it is ok and not ok to take pictures. Don’t walk on the grass as it is not allowed, even if you see others do the same. Set an example of respect.

Important things to know if traveling to UAE:

  • Whatever you plan to do in UAE, plan accordingly and give yourself a minimum of 2 1/2 hours back at the airport before your flight.
  • Women really should not wear shorts and tanks unless at the beach or swimming, it is still a predominantly muslim country despite how liberal Dubai may seem. Keep shoulders covered and wear capri legnth or longer. Don’t wear leggings unless your top is long enough to cover your butt unless you want to get looked at or cat called by Hindi and Persian men.
  • FEMALE ONLY TAXIS! This is a great option if you are a woman traveling alone. Dubai is actually considered a safe city but these are an option and are great. The Dubai taxis have pink roofs and drivers wear pink scarves.

It is definitely worth it to take advantage of your layover in UAE not matter what sites interest you. It is a small country and Dubai is a small town, you honestly won’t need more than a day to see the major tourist sites; but it is definitely one to see at least once if you are traveling through!

TRIP REPORT: Longs Peak

My 3rd successful summit of Longs Peak is in the bag!

Before I give you the details, let me take you back a little: My first summit was in August of 2003. I was 13 years old, and it was actually my second attempt. The previous year I made it to the bottom of the homestretch and turned around. I had the worst nerves and threw up at the trail head that morning and was miserable the entire climb. Despite making it like 95% of the way to the summit, I just couldn’t go any further. I was completely depleted. It haunted me for a year, so the following summer I completed my first summit. It was the first time it really solidified my interest in climbing Everest in the future.

My second summit was in 2011. I was in the throws of recovering from an eating disorder and working through major depression and anxiety. I had been in a dark place for a long time and had completely lost my passion for climbing in the midst of my mental illness. Summiting Longs again with a friend of mine was the perfect way to rekindle that fire as I was working on my recovery.

Now here I am, 8 years later, growing and chasing my dreams! I went to EBC last year, I climbed Kilimanjaro a week ago and I come home and lead a few friends up Longs Peak only days after returning! So, without further ado, here is a little synopsis of my most recent summit!

We had some weather in the forecast for today so we started at 2am. We made it to the boulderfield before sunrise and began climbing up the rocks to the keyhole as the sun rose. We were moving quickly but slowed to a crawl as we navigated the boulders and the trail moved from a class 1 to a class 2.

As we crossed over to the other side of the keyhole and began navigating the ledges, taking our time to navigate, and help my friends through the rocks as the route became a class 3.

Next came the dreaded trough. I hit a mental wall at the bottom of the trough. A combination of jet lag and still recovering form Kili made me realize how much I did not want to climb up the trough once I came up to it. It has always been my least favorite part of the climb. It is a slow exhausting crawl up to the narrows. But it just comes one step and climb at a time. This winter was one of the snowiest and so there was still a decent amount of snow in the trough. It was off most of the route, however the very top of the trough had snow on route and we had to climb around it. Once that was navigated, we climb the last final 15′ rock up and out to the narrows.

A sense of relief for me as we popped out into the narrows, and a sense of panic as my friends saw the exposed view. low clouds began to build and I knew we had to be quick. We carefully climbed through the narrows and made it to the base of the homestretch in no time.

Some crowds navigating up and down the most technical part of the the climb slowed us down. We pushed to try to keep moving to the summit as we were now in a race with building clouds. There were patches of wet spots of recently melted snow, but before we knew it we were on top at 14,259′!

Our time on the summit was short. As soon as we started back down the homestretch we actually started to get a sprinkle of snow. It made the rocks slippery and slowed us down as we cautiously made out way down the homestretch. I will say this was the scariest Longs Peak decent I have ever had out of the number of times I’ve been on this mountain. The wet slippery decent continued into the trough as the mountain became enclosed in the clouds. Exhaustion definitely set in as we made it to the bottom of the trough and began to traverse the ledges back to the keyhole. Relief hit us as the keyhole came into view. After much needed snack break, the sun came out and we descended from the keyhole to the boulderfield. Back on class 1 trail, we cruised back down to the trail head. We lucked out and didn’t get the heavy rain, hail and thunderstorm until we were about 10 minutes from the bottom.

Our total time was about 12 hours and it was definitely the slowest I have ever climbed Longs. I definitely attribute that to the slippery slick conditions on our way down. If you EVER decide to climb Longs, start early, know your limits, NEVER go off route, check the weather conditions, and re-evaluate them constantly. As soon as it started raining/snowing up top, people were turning around despite being so close to the summit which was the smart thing to do. The mountain will always be there, you can always come back. We witnessed a helicopter rescue of a 15 year old that slid about 300′ down the loft on the other side. Good news revealed later that he was OK and somehow managed no broken bones, but it shows you how sketchy the conditions became as soon as those rocks got slick. My friends asked me to lead because of my experience on the mountain and my experience with class 3 climbing. If you have never been class 3 climbing before you NEED to go with someone who has experience with that kind of technicality and exposure. And of course, NEVER climb alone.

Despite my words of caution, Longs is a classic. It is my favorite peak in the world for a number of reasons. Don’t let the exposure scare you out of trying to do it, just make sure you are 100% prepared and know the risks. Longs may be one of the most famous of the Colorado Fourteeners and is definitely one for the books!