The BEST Way to Combat Altitude Sickness

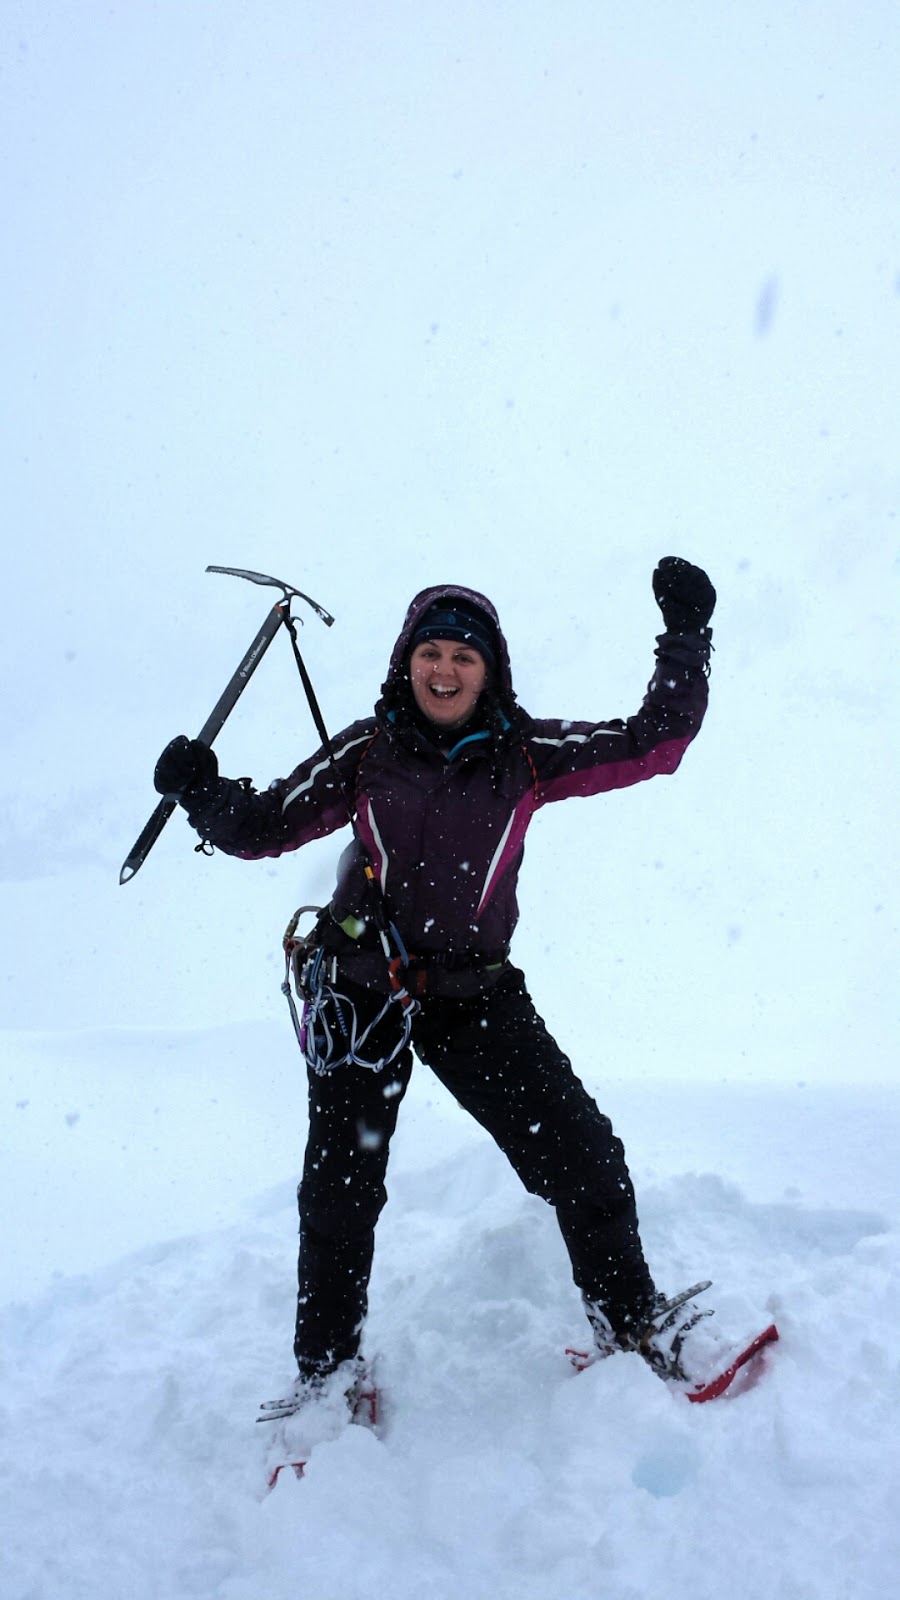
Are you fortunate enough to live near the mountains?

GOOD. You are going to need the altitude.

I’ll get right to the point. The BEST way to combat altitude sickness is acclimatization. No matter what the elevation of your nearest peaks are, taking advantage of high elevation before embarking on an expedition can be crucial to avoiding Acute Mountain Sickness during your trip. If you are within a short drive distance from anything at least 2-3,000 vertical feet from where you live, pay attention, this is for you! The goal in training is to get as high as you can for as long as you can to get a head start on acclimatizing for your climb.
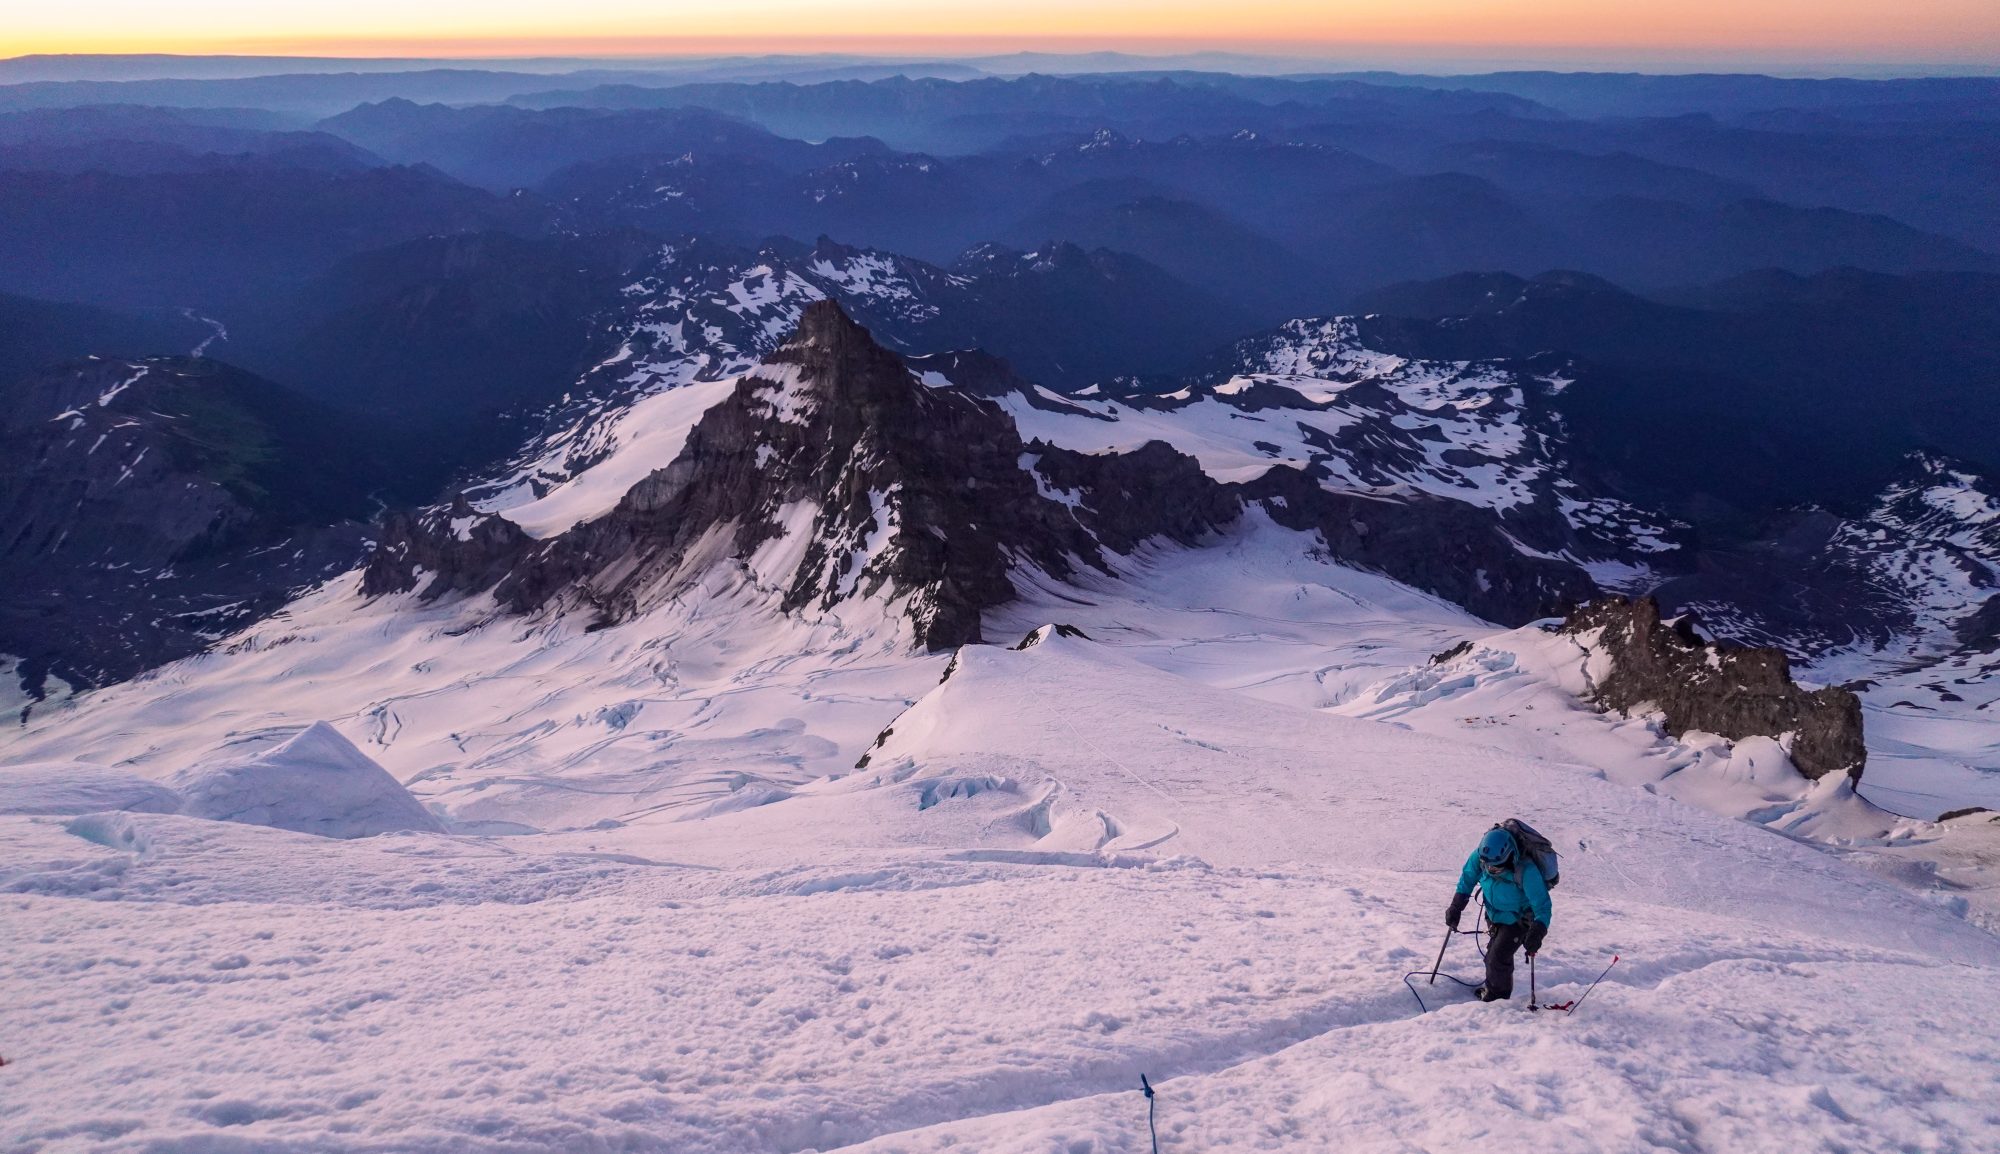
STEP 1: Hang Out.

I would like to hope and think that if you are planning an expedition, or even a simple trek to Everest Base Camp, that you have SOME experience hiking at elevation. This step may be obsolete. But if it’s been a while, or you have been living at sea level, simply drive up the canyon and get higher. DO NOT go higher than 8,000 feet above where you live when you first start. (this means if your town is at 2,000 feet above sea level, don’t go above 10,000 feet). Ascending too fast can be dangerous if your body is not used to the altitude. Take your time. slowly increase the altitude, drink LOTS of water, and enjoy the view.
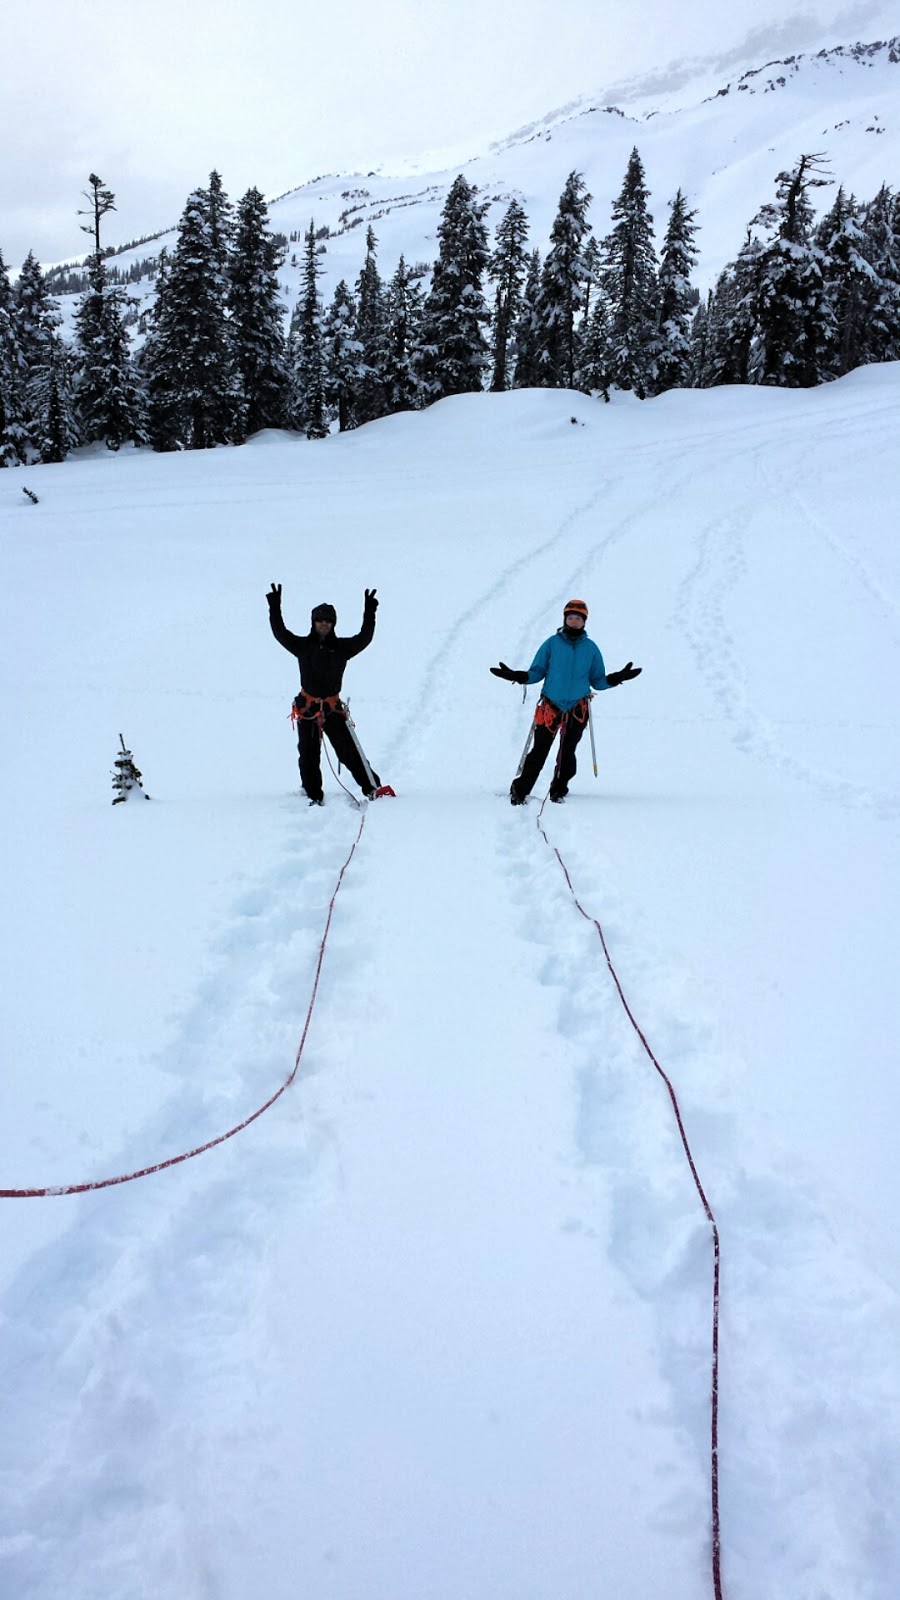
STEP 2: Work Out.

After taking a few trips up into the mountains, it is time to start working out at higher elevations. Altitude Sickness can start as low as 8,000 feet above sea level. If you live in a low sea level state like California, I do not recommend a trip to the High Sierras as your first hike. Start lower. you want to start working out no more than 3,000 feet above where you live. You can gradually increase the elevation as your body becomes more adapt to the altitude. Take gradually longer hikes and with gradually heavier packs. Again, Water is key. You dehydrate faster at high altitude as your body needs it more. Most cases of Acute Mountain Sickness actually start from dehydration.
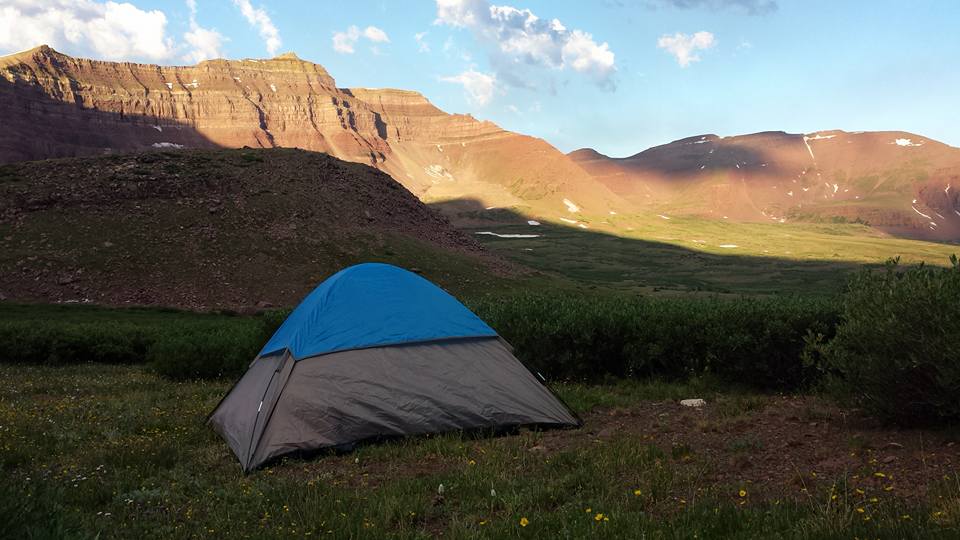
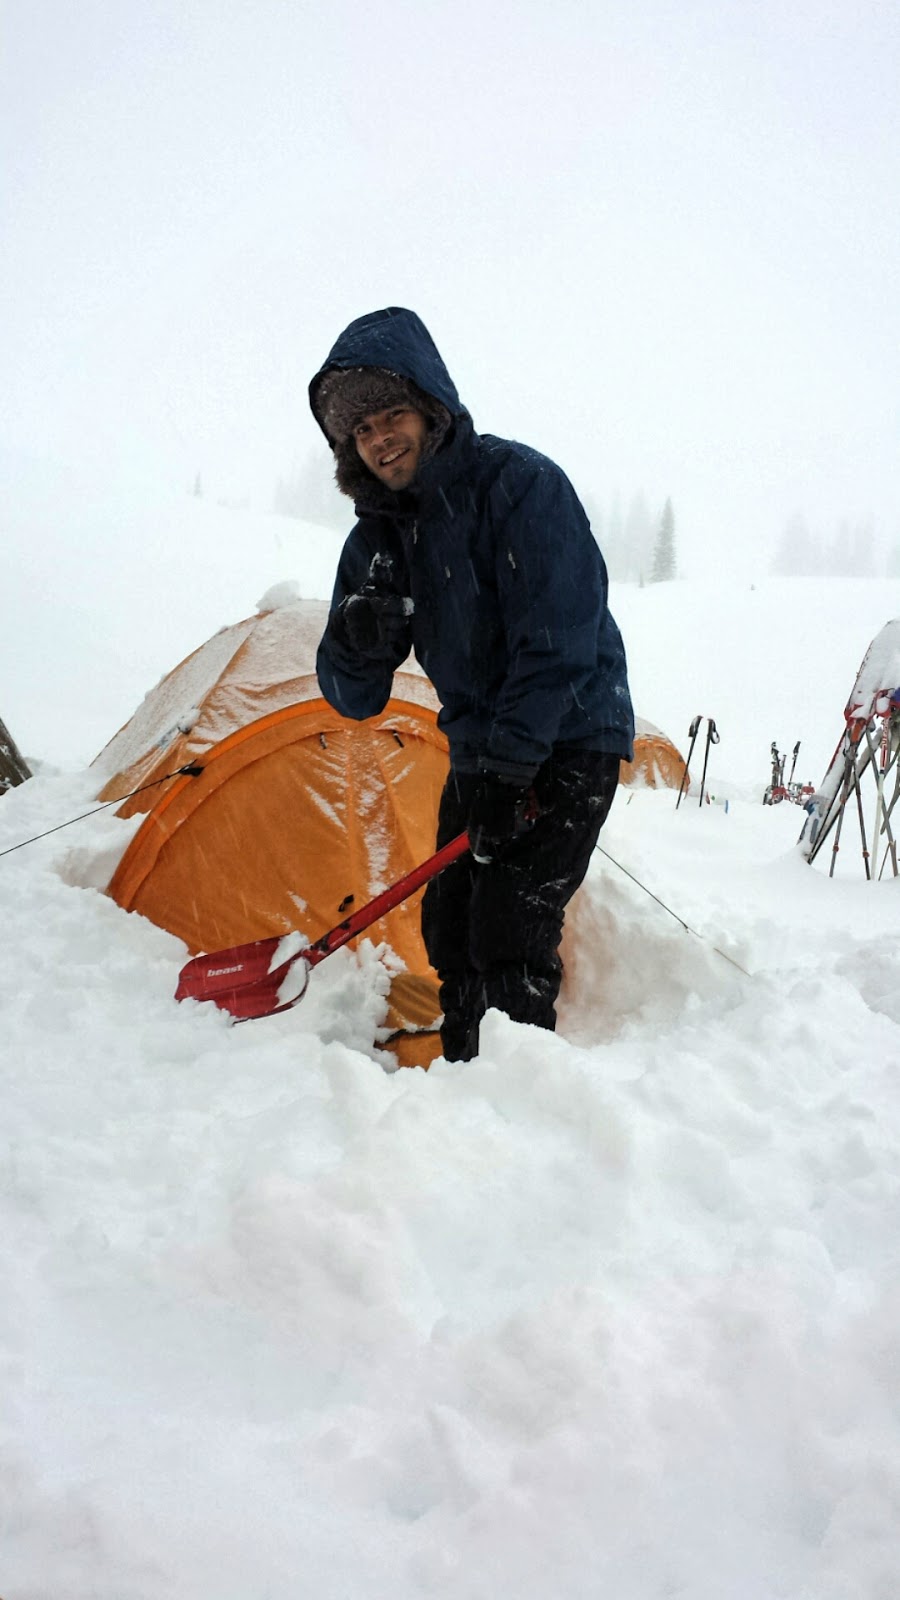
STEP 3: Camp Out. 

When you are feeling confident in your ability to hike high and feel good, it is time for a camp out! Sleep anywhere from 3-5,000 feet from where you live, but no more than 6,000 for the first night. Your body may feel adapted, but wait until it has to try to rest and sleep at that altitude. Your body uses sleep-time to heal itself. If it can’t feel like it’s getting properly rested, you won’t wake up feeling so good the next morning. If you are doing a multi-day trip, or decide to come back another weekend, you can slowly increase the sleeping altitude. try not to increase it by more than 1,000 feet per day. If you start feeling like you have a headache, light headed, nauseous, or dizzy, descend immediately.

Vertically Challenged?

Many major cities have Hyperbaric Therapy Clinics that can be beneficial to your training. Some are as cheap as $35/session. If this is simply not an option, a road trip to the nearest mountain range will do you some good, even if you can only find time for one weekend camping trip. Any elevation is better than no elevation. Regardless, the #1 key for those at at low elevations, is to maximize cardio fitness.

5 Mountain Training Exercises You Can Do Without a Mountain

Once you feel like your body is getting into the groove of things as you train, you will want to start implementing targeted exercises. This means that you are doing things that specifically target muscle groupings or body functions needed while mountain climbing. Ideally, you would want to take a day hike with a certain amount of weight and hike trails with increasing elevation gain. However, not everyone has immediate access to nice high peaks to train on so I have come up with a few ideas you can do at home or in a gym.

#5: Hill Sprints

You may not have mountains, but most places have a nearby hill. Whether its an entire neighborhood in length, or just a little one at a park, you can strap on a pack, and time yourself. The first goal is to get faster. You want to be climbing at a rate of 1000 vertical feet per hour minimum before adding weight.

#4: Weighted Hill Climb

This is how you can add onto the sprints. you try it, add 10% of your body weight added to a pack. Each week, try to get a little bit faster and/or add 5% more weight. Your goal should be that able to carry a 20-25% of your body weight in a pack up 1000 vertical feet per hour nearing the date of your trip. If hills are simply non existent where you live, stair masters, or treadmills with high incline will work just fine as long as you don’t mind people in the gym giving you a look for wearing a rucksack.

#3: Stadium Stairs

High school and college stadium seats are full of stairs! Did you know that they are a great way to build endurance? You can create your own interval workout on any stadium seating! The bleachers are great for long strides. a great deep thigh burn in your quads, and high intensity cardio on your heart and lungs. The smaller little stairs can be used for rapid sprint bursts, or a rest walk on the way back down. On a target training day, hauling a heavy rucksack up and down those stairs will REALLY work those leg muscles. You can use the same method as the hill sprints and climbs by adding more weight and trying to increase speed over time.

#2: City Hike or Ride

NOTE: If you live in a crowded city, notorious for bad air quality, this one is NOT recommended. Keep your lungs healthy! Time to start putting miles on your boots. However, you may not have a mountain to climb on. If that is the case, pick 2 points in the city you live. they can be anywhere, or you can make it fun and visit some landmarks. You will be carrying 30-40lbs in your pack, and taking a stroll through the town. If your town is pretty flat, start with a goal of 5-6 miles (should take about 2-3 hours). Increase it by a mile or two each week. you can map out a loop, or have someone drop you off and pick you up and two different points, or utilize public transit. Just remember that once you start walking, don’t stop until you reach your endpoint. Another option would be to take a bike ride! Aim for at least an hour total ride time to start (12-15miles), and with the same idea, pick a landmark, and don’t stop until you reach your destination and return. Just be sure to obey rules of the road!

#1: Beach Run

Okay, okay so just because you don’t have mountains, doesn’t mean you have a beach either… but do you know where you can find sand dunes nearby? Or maybe sand trails or dirt hills? Running in the sand has always had a notorious reputation for being challenging and exhausting. The loose grains beneath your feet don’t give you traction and can slow you way down. This is a good way to build endurance not only in your heart and lungs, but in your legs. Equestrian parks are a GREAT place to run around for this. those annoying little wood chips are almost as bad as sand. If you are not a ran of running, simply strap on your pack, and try taking a stroll. Shoot for a 20-minute mile with 30-40lbs in your pack. That will get your heart pumpin’!

5 Mountain Exercises Without a Mountain

Once you feel like your body is getting into the groove of things as you train, you will want to start implementing targeted exercises. This means that you are doing things that specifically target muscle groupings or body functions needed while mountain climbing. Ideally, you would want to take a day hike with a certain amount of weight and hike trails with increasing elevation gain. However, not everyone has immediate access to nice high peaks to train on so I have come up with a few ideas you can do at home or in a gym. So here are 5 mountain training exercises you can do without a mountain!

#5: Hill Sprints

You may not have mountains, but most places have a nearby hill. Whether its an entire neighborhood in length, or just a little one at a park, you can strap on a pack, and time yourself. The first goal is to get faster. You want to be climbing at a rate of 1000 vertical feet per hour minimum before adding weight.

#4: Weighted Hill Climb

This is how you can add onto the sprints. you try it, add 10% of your body weight added to a pack. Each week, try to get a little bit faster and/or add 5% more weight. Your goal should be that able to carry a 20-25% of your body weight in a pack up 1000 vertical feet per hour nearing the date of your trip. If hills are simply non existent where you live, stair masters, or treadmills with high incline will work just fine as long as you don’t mind people in the gym giving you a look for wearing a rucksack.

#3: Stadium Stairs

High school and college stadium seats are full of stairs! Did you know that they are a great way to build endurance? You can create your own interval workout on any stadium seating! The bleachers are great for long strides. a great deep thigh burn in your quads, and high intensity cardio on your heart and lungs. The smaller little stairs can be used for rapid sprint bursts, or a rest walk on the way back down. On a target training day, hauling a heavy rucksack up and down those stairs will REALLY work those leg muscles. You can use the same method as the hill sprints and climbs by adding more weight and trying to increase speed over time.

#2: City Hike or Ride

NOTE: If you live in a crowded city, notorious for bad air quality, this one is NOT recommended. Keep your lungs healthy! Time to start putting miles on your boots. However, you may not have a mountain to climb on. If that is the case, pick 2 points in the city you live. they can be anywhere, or you can make it fun and visit some landmarks. You will be carrying 30-40lbs in your pack, and taking a stroll through the town. If your town is pretty flat, start with a goal of 5-6 miles (should take about 2-3 hours). Increase it by a mile or two each week. you can map out a loop, or have someone drop you off and pick you up and two different points, or utilize public transit. Just remember that once you start walking, don’t stop until you reach your endpoint. Another option would be to take a bike ride! Aim for at least an hour total ride time to start (12-15miles), and with the same idea, pick a landmark, and don’t stop until you reach your destination and return. Just be sure to obey rules of the road!

#1: Beach Run

Okay, okay so just because you don’t have mountains, doesn’t mean you have a beach either… but do you know where you can find sand dunes nearby? Or maybe sand trails or dirt hills? Running in the sand has always had a notorious reputation for being challenging and exhausting. The loose grains beneath your feet don’t give you traction and can slow you way down. This is a good way to build endurance not only in your heart and lungs, but in your legs. Equestrian parks are a GREAT place to run around for this. those annoying little wood chips are almost as bad as sand. If you are not a ran of running, simply strap on your pack, and try taking a stroll. Shoot for a 20-minute mile with 30-40lbs in your pack. That will get your heart pumpin’!

There you have it! Hopefully you can use these 5 mountain training exercises you can do without a mountain in your training routine!

Need help coming up with a training plan? Check our our Mountain Performance Coaching Program!

Creating a Mountain Training Plan

So you have signed up for an expedition and are planning a big climb. Now what?! Usually the first, as well as one of the most important questions one tends to ask themselves is “how do I train?”. Mountaineering requires a well rounded level of fitness. I have studied, trained, and practiced for a number of years now and I have found the “easiest” way to get you started! So, Let’s create a mountain training plan:

Here’s what you will need in your mountain training plan:

A Timeline: A minimum of 12 weeks is recommended for any major climb, but for large expeditions like Everest or Cho Oyu, one should plan for anywhere between 6 months to a year of targeted training depending on current athletic state. If you are out of shape, start smaller, and plan out extra weeks to get into the groove of things.

Cardiovascular Fitness: Cardio fitness includes your heart and lung’s ability to use the oxygen in the air and is measured through aerobic exercises like running, swimming, and cycling. you will want to keep track of your heart rate and you will want to push it to a variety of levels. On days that focus only on cardio. focus on getting to 85% your maximum heart rate. On target days, where you might be hiking or carrying a backpack full of weight, shoot for 65-75%.

Intervals: Mixed into your cardio days, you will want to work intervals where you rotate from about 70% MHR to 85% MHR. This will help your cardio endurance by changing the various intensity levels.

Targeted Exercises: This means hiking with weight,  gaining elevation, working out AT elevation (if you can), doing hill sprints, rock climbing, stair climbers, whatever you have access to. This focuses both strength and cardio endurance. We will go in more detail later.

Strength Training: Strength training focuses on muscle groups you will be using on the mountain. You can start with a well rounded strength day until you feel able enough to focus on muscle groups. regardless of what you work on, always shoot for 60% MHR during strength training to increase cardio endurance as well.

Flexibility: Safety and preventing injury are #1. You MUST stretch EVERY DAY (including rest day). This will keep you limber, as well as help with muscle fatigue. If you feel you are painfully sore constantly, you are not stretching enough. Having a full range of motion while you climb is extremely important. There are two different types of stretches, kinesthetic and static. Kinesthetic means “stretching in motion”, while static stretches are when you hold a stretch pose for 15 to 20 seconds. Be sure to do kinesthetic stretches before exercise to warm u your muscles. Examples include body twists, jumping jacks, high knees, squats and much more. After excising when your muscles are warm, you can do static stretches to prevent lactic acid build up. NEVER do static stretches on cold muscles as you could severely tear something. (take it from someone who learned this lesson the hard way.)

What is the end goal?

Mountaineering is an endurance sport. Many sports involve either long, slow and steady progress, or short fast bursts like sprints. Mountaineering requires a wide range of different intensity levels all day long. This means we have to train our bodies to do it all.

SO… How should we map it out?

Well, If you feel you are out of shape, that is your first goal! You want a minimum of 180 minutes of cardio each week when you start (NOT including your target exercises). As you get closer to your climb you should be increasing the amount. By the time you reach your final training weeks, you should have nearly doubled that time and your target exercises should be full day hikes, or exercise days. (I suggest planning these on the weekend).

Your strength training should be at least twice a week (not including your target exercise). Intervals at least twice a week, and again, stretch every day.

Here is an example of what a week might generally look like:

Begin mapping out your first 4-6 weeks and see how your body does. You can adjust it accordingly as you go along. By then end of your 12 week plan, you should be focused on walking or hiking 5+ miles a day, 5-6 days a week with added weight, strength training, and intervals mixed in. 

For help and tips in creating a mountain training plan, check out my mountain performance coaching program!

Just get moving!

TRIP REPORT: Mount Lady Washington, CO (13,281′)

Report from 8/20/16

The Overlooked 13er…

I know I wasn’t planning on any cool peaks during my week off, but it happened anyway! After all, what is a vacation without a massive mountain to climb? *winky-smiley-face*

Mount Lady Washington is located in Rocky Mountain National Park. It stands front-right of  Long’s Peak which is the park’s only 14er. This little pile of rocks constantly gets overlooked since a large majority of the people who hike this trail go to hike Long’s Peak.

L to R: Mount Meeker, Long’s Peak, Mount Lady Washington

However, MLW has literally the most sunning view I have ever seen in my life. It is one I highly reccomend if you are visiting RMNP. (See what I did there? I got lazy and just used letters…) Anyway, Mount Lady Washington, also known as “MLW”, “Lady”, “Lady Washington”, or “#5 in the Grand Slam”. It stands at 13,281 feet above sea level. It’s not nearly as impressive in size as its 14,261 foot neighbor, but it has very understated qualities.

I started my hike at 4:30am however the trail was not scarce. Because of the unpredictable weather the Colorado 14ers create because of their height, anyone wishing for a successful summit of Long’s has to leave in the middle of the night. I passed many hikers who were on their way up to Long’s Peak, and as I asked in passing to each group I went by, not a single person was hiking anything else. 

First light on the trio. (MLW is the pile of rocks on the right)

I reached Chasm Junction 3 1/2 miles from the trailhead just before sunrise. I took a break here and waited for the stunning view. Soon after the mountain turned pink, the orange, I headed up the trail less than 1/4 mile more before taking a hard left. There is no maintained trail on MLW and there are basically two main ways people reach the top. One is directly up the front, east face. It is a steep 2,000 foot climb in class 2 tundra/class 3 scrambling mix. The other is to hike to the Boulder Field camping area another mile and a half up the trail (also known as basecamp to Long’s), then to follow the Northwest ridge. I decided on the shorter steeper route for my ascent, and the longer, flatter route for the way down to save my knees. It was steep, slow going, and strenuous boulder hopping that seemed to never end. I was literally the ONLY person on that mountain all morning and I honestly doubt anyone else summited after I did. No one else that I passed on the way down was planning on MLW, and if there was anyone attempting the Grand Slam that day, they would’ve gotten rained out since it’s the last peak in the series and it began to rain just after I made it back to the trail head. 

my line up MLW

When I finally made it over that ridge, I was immediately in awe. The summit view, like I mentioned before, was absolutely incredible. I have climbed Long’s Peak 3 times, summited twice, and you do not get a better view on that mountain than on MLW. The famous diamond face on Long’s was massive as it stood right in front of me on that pile of annoying, frustrating rocks. It was immediately worth it. I sat, in solitary silence, just staring and the magnificent and majestic mountain standing in front of me. Long’s Peak has always been my favorite mountain and 14er, but I had never seen it like this before… My eyes teared up and I fell in love with Long’s all over again.

The Diamond (pictures do NOT do it justice)

Soon after decending the northwest ridge, I was reunited with the Long’s Peak trail, and the crowds. I enjoyed my solo time on MLW, and it is a peak I will never forget. 

The Boulder Field

My Summit List is growing!! Check it out!

TRIP REPORT: King’s Peak, Utah’s High point (13,528′)

Report from 7/25/16

For 5 years,  I have attempted to take a trip to the high Uintas to climb Utah’s highest point, and for 5 years, that plan failed for various reasons…. until now!

King’s Peak is a long multi-day trip with long trails and class 2 scrambling at the peak. But what planned on being a 3-day trip ended up being a very long 2-day trip. My climbing partner and I decided we would rather go home and have a day off to rest rather than attempting to go straight back to work. Needless to say, I slept in until noon and my legs are so sore that I fell over trying to stand up out of bed.

We began our adventure Saturday by driving the 3 hours from Salt Lake to the Henry’s Fork Trail Head. (Believe it or not but you have to go through Wyoming to get there.) We started hiking with our heavy packs and managed to burn through 5 1/2 miles of trail in around 2 hours. It was hot, and there were mosquitoes everywhere, and naturally we forgot to pack bug spray. We slowed down after crossing the main foot bridge that spans the Henry Fork River as the trail steepened and we were getting tired.

Henry’s Fork Basin

After another 3 hours we made it to about 11,500 feet and set up camp. After making a quick pasta meal, we attempted to fall asleep knowing we had a long early day ahead of us.

Sunrise on Henry’s Fork Peak and Mt. Powell
Our tent site

After waking up at around 5:15 am, we watched the sunrise, ate breakfast, and began getting ready for our day. We climbed to 12,000 feet to Gunsight Pass where we left the main route to follow a well known shortcut route that would shave 4 miles off our total distance. As much as everyone praises this shortcut, I beg to differ. it was well cairned for the first 1/3 of a mile but after the trail flattened out into a field, the cairns were incredibly far apart and hard to keep track of. However, even getting a little off track wasn’t bad because it was very easy to see where to go since the main trail went up the far side of the field. (but, I found snow! ..I love snow)

The scrambling and boulder hopping on the ridge was nothing new to me, however there was A LOT of it. A full mile and 1,000 feet of elevation gain was full of rocks, rocks and more rocks. Knowing my own personal pace, I assumed that last mile would take about an hour…. because of the scrambling and boulder hopping, it took nearly 2 hours instead to reach the summit. Finally, we arrived to 13,528 feet, and what a relief.

Summit View

The way back down was exhausting. Stepping ever so carefully from rock to rock, controlling every move (which is why my legs are so sore) and trying not to worsen my blisters that had formed the day before. By the time we got back to camp we were already exhausted; my ankles bruised from trying to manipulate the rocks in high-top hiking boots. We talked about staying the second night anyway but the nearest water source was a mile down the hill and we were out of water. We decided to just take it slow, stop to refill water bottles at the stream down the trail, and even wear flip flops on our way down. it was 9 miles back to the car… and yes, I did it in flip flops. My ankles were so bruised and my blisters had popped despite my best efforts, so it was actually more comfortable to hike down without boots on. it was slow going and we were completely exhausted by the time we got back to the car since we spent 15 hours of our day on foot.

King’s Peak is center-back

I am glad I finally got to cross this one off my list, but it was definitely the hardest climb, physically, that I have ever done. Will I do it again? probably not, but who knows. I have bigger and better mountains planned and this was a good test of my physicality to see what I specifically need to train better in the future (and its apparently my calves).

TRIP REPORT: Mount Evans, CO (14,265′)

Report from 6/24/16

Right now, I am sitting in my grandparents living room in Littleton, CO. About 12 hours ago (it is now 4:00pm) I woke up for an “early bird” hike.

Tomorrow my cousin is getting married in Estes Park so I decided to come a day early and play! An old friend from summer camp was supposed to meet up with me to go climb Greys and Torreys Peaks this morning. However, about a week ago she messaged me and said she was unable to get the day off. This meant that my only option left for a hiking partner would be my husband (who is not exactly a fan of hiking). We talked about it and he agreed to do something “easy”. (There is no such thing as an easy fourteener) So my plans to do G&T were scratched and we decided to climb Mount Evans since it is a bit closer to Denver and the hike is a lot shorter.

We woke up at 4:15am (which, believe it or not, is pretty late by 14er standards.) For those who have climbed in Colorado before or live there, they understand that those mountains are so high they create their own weather as the day heats up. Any hike you do must start early enough that you can summit and get below treeline before the thunderstorms kick in, and this is why we wake up at ungodly hours of the morning….

Since this hike is so much shorter, I knew that if we started at sunrise, summit by about 8 and returned, we would have plenty of time to spare. So, we took the hour and a half drive up to the trail-head at Summit Lake (12,800) where we saw big horn sheep and watched the sunrise and began our hike at about 6:30. We were originally planning on taking the West Ridge route which was an estimated 2 1/2 hours. But I knew a lesser known route up the Northeast face that would shave an entire hour off that climb time (and would make my husband a lot more inclined to climb the mountain). This was an incredibly direct route where you basically just go straight up the side instead of up and around Mount Spalding and the ridge-line.

We were only a tiny bit slower on the uphill than I predicted. We reached the 14,265 foot summit at 8:15am. The skies remained clear enough we hung out on the summit for about an hour and a half  enjoying the views (and mountain goats) before heading back down.

When we got back down we enjoyed one last view of the lake and headed out. Clouds formed from nothing within about 20 minutes and the rain kicked in just as we were getting back onto the freeway. (proves just how fast things can change in these mountains.)

Overall, it was a fun little peak with spectacular views and I am super proud of my husband for climbing his first fourteener!!! He still thinks I’m crazy, but after the views he saw this morning, I think he might finally be beginning to understand why these peaks become my happy place. Now it is time to shower and get ready for a wedding!

Cascade Glacier School

Report from 1/8/16

WHAT A WEEK!

Where do I even begin?!

I guess I should begin by introducing the man behind the scenes: Dan Mazur. Dan is the owner and founder of SummitClimb and is an amazing climber and expedition leader with a variety of high peaks under his belt. He offered his home to us and welcomed us with open arms. I was the first to arrive with two others on my team that I arranged a carpool with from the airport. One other team member arrived just before dark and the five of us hung out around a backyard bonfire getting to know each other. We all felt star struck as we talked to Dan and asked him questions about all his climbing and experiences. Questions like: “Did you know Rob Hall and Scott Fischer?” to which Dan would reply: “Oh yeah! I was actually their lead up K2.” to which we would squeal like little girls.

That first morning consisted of a breakfast meeting going over logistics and the itinerary for the week and getting to know each other. We totaled 10 team members including Dan. There was John from Lebanon, Akash from New Jersey (originally India), Ben from New Hampshire, Andreas from Germany (originally Canada), Shankar from Seattle (originally India), Steve from Seattle, Akib from Ohio (originally Bangladesh), and Lindsay, my tent-mate who is from Virginia but living in Dubai for work. We then spent the day checking gear, getting groceries, and preparing for the mountain. 

The next morning we work up at 5am to head for Rainier from Olympia. We arrived at Whittaker Mountaineering around 8:30 to pick up snowshoes and any other gear people needed to rent. We then headed up the mountain to the Paradise Visitor Center to get our permit for winter camping on the mountain. After a quick lunch and putting our packs together in the parking lot, we finally started hiking up the hill. The snow was deep and the snowshoes were a new experience, especially with 70lbs of weight on my back. A storm began to kick in just as we were arriving at our camp location. it was roughly sunset and the storm kicked in hard and fast. We had to pitch our tents as quickly as possible in the storm as it was getting dark. After situating ourselves, my tent-mate and I made a quick dinner and got ready for a long night in the storm.

Akash digging out his tent after the storm

We received 13″ of snow overnight. It was incredibly dense and we actually woke up to rain making the snow on our tents even heavier. We had a slow morning waiting out the storm in hopes of learning some mountaineering skills after the rain would subside. 

The best moment of the whole trip was when the storm dissipated enough to allow the mountain to come out for a short moment. Because of the snowy forecast, we were all concerned we wouldn’t receive the chance to actually see Mount Rainier because everything was so socked in; but we got lucky and that moment was glorious. As soon as the clouds moved away, the view was so spectacular and the mountain was incredibly majestic. Because Mount Rainier stands alone with such a high prominence, it looked so massive! Even though we weren’t going to get to attempt a summit bid this trip, I KNEW I needed to plan on a quick return to climb this glorious mountain. After staring at that colossal peak in all its glory, I have to come back this ASAP…. Rainier is calling my name.

The magnificent view didn’t last long. Within about 20 minutes the clouds returned and enclosed the peak. We spent the day learning glacial rope travel, and applying ice anchors. We worked until after sunset before heading back to our little basecamp for dinner and another long night. The unfortunate reality of winter camping is the short days. The sun would set by 4:30 and we would spend upwards of 16 to 18 hours in our tents. 

The next day we experienced snow all afternoon. We went for a hike down to the Nisqually Glacier just to try to get a look at the mountain but the snow was so heavy that there was very little visibility. Our trek took us through trees on a steep hill, and down a steep pitch that required a rappel. 

Despite the lack of visibility, the ridge we stopped at still had view enough of the massive rock formations hiding in the fog on the other side of the glacier to make us feel so incredibly small in comparison.

We returned to camp by sunset but a decision was to be made. Due to the weather conditions, we could not spend time learning crevasse rescue or ice climbing on the mountain. If we were to camp one more night in the snow, the plan the next morning would be to pack up and head back to Olympia. However, leaving that evening would give us the opportunity to spend the next day at a local climbing gym learning what we needed to. We decided to hurry and pack up camp and head down in the dark where we would then pack up the cars and head to Olympia.

Last moment on the mountain (LtoR) Akib, Akash, Me, Shankar, and John

A couple local team members went home to sleep in their own beds, but the rest of us stayed at Dan’s and woke up to go play at the Warehouse Rock Gym in Olympia. We learned how to tie prusik knots and climb out way up the rope in the event of a fall into a crevasse. We also practiced using ascenders as well as creating pulley systems for helping someone who is injured out of a crevasse. The rest of the afternoon was spent, just enjoying the gym and getting in some climbs. 

John, Ben, Me, Dan, Lindsay, Akash, Andreas, Akib

That evening we said goodbyes to most everyone on the team and it was just Akash, John and I left to keep Dan company on our final night in town. Akash and John were the two I carpooled with from the airport and we arranged to carpool back the next morning. We spent that final evening listening to more of Dan’s amazing stories around one final bonfire and just enjoying each others company. The next morning it was off to the airport, where we said our last goodbyes and parted ways not knowing when we might see each other again. As a team we all became good friends and saying goodbye to everyone was difficult.

Overall, this trip was an amazing learning experience! It was an incredible way to build a foundation for my mountaineering skills. I have been rock climbing since I was a toddler, but mountaineering is an entirely different beast!