
Long time, no write!
One of my goals for 2024 is trying to get back into the habit of regular blogging.
For today’s adventure, I want to talk specifically about photography and capturing your adventure.
Landscape photography has been a passion of mine since my teen years. This is why I do what I do. I have learned a lot over the years. I majored in photography in early college before I switched to teaching, but I honestly learned more about capturing the landscape by getting OUT there and actually doing it and expirimenting with it. SO, without further ado, here are some things I have learned that you may not expect, and I believe are applicable to ANY skill level.
This is what everyone needs to know about landscape photography:
anyone can take a photo of the landscape, but a good photo takes more than you think.
Everyone has a smartphone, and a lot of people these days also have professional cameras for the sake of social media. However, just because you have a nice camera, doesn’t nessisarilly mean the photo is automatically amazing. It takes YEARS of practice. Even I still end up with a mix of good photos and bad photos each trip and I have been doing this for over 20 years! I take THOUSANDS more photos than actually get uploaded to my site or socials because it isn’t always as simple as a quick snap and go. Some days I am not even trying and it works out, other days I work my butt off for a particular shot and it doesnt pan out like I had hoped. A good landscape photo comes down a few technical things: composition, lighting, focal legnth, aperture, and framing. However, there is one component that is more important than the rest… Ultimately, a truly good landscape photo connects you to the imagery and tells a story.
Composition
Composition is all about how the elements in your photo are arranged. While there are many compositional rules to photography that can be implemented, there are 3 compositional rules to always keep in mind with landscape photography:
- The rule of thirds
- Depth
- Symmetry
The rule of thirds and is one of the most BASIC photography rules every photographer should know. think about dividing your photo into thirds both vertically and horizontally. Your landscape should closely line up with one of those third lines and prominent subjects should be focused onto either the right third or left third of your photo.

showcasing layers in the landscape.
Depth is incredibly important especially with wider landscape shots because your goal is to capture all the layers in the landscape. It showcases that flow of the land, giving the illusion almost of movement. If you take a photo that comes out looking really “flat” try to reposition yourself, your focal legnth and aperature, or shoot in a little bit different direction to see if you can get more layers to your landscape.
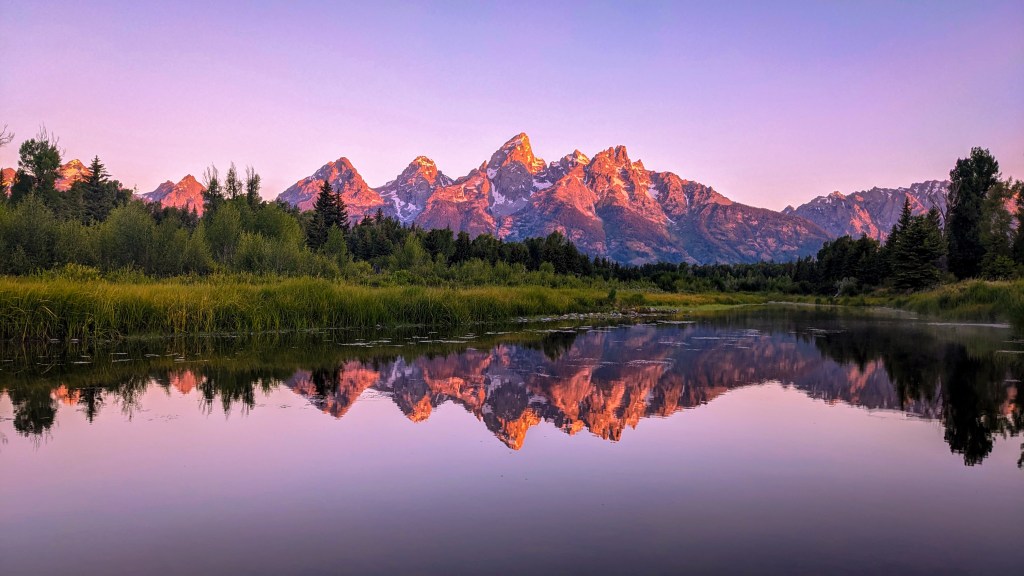
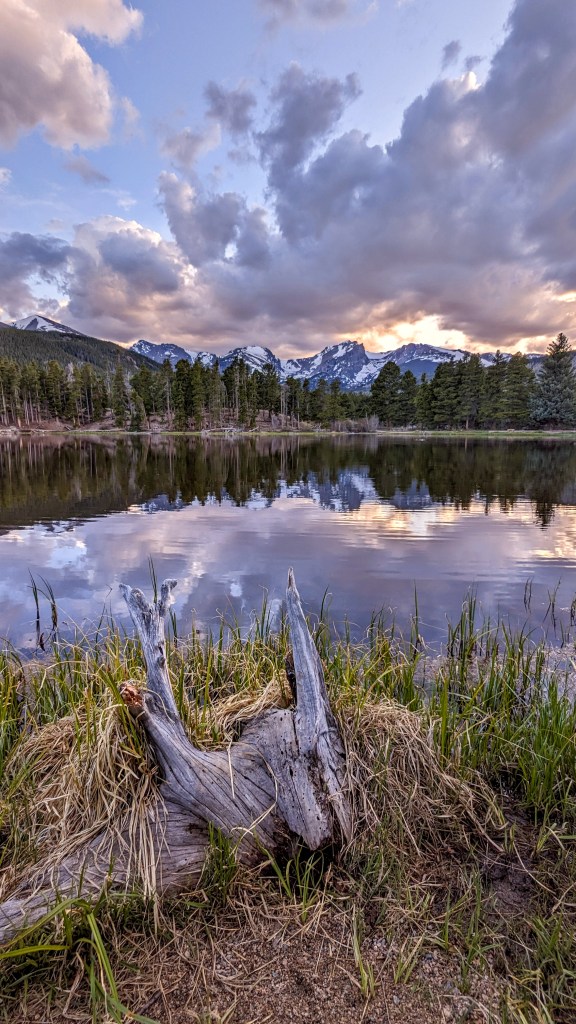
Symmetry is another important component in landscape, ESPECIALLY for reflection photos! You may still have the rule of thirds at play for your mountain scape but your true landscape line will actually split right down the center of the photo. If you are lucky enough to get a perfectly still lake with no wind, and can’t quite tell which way is up in your reflection, you have done your job.

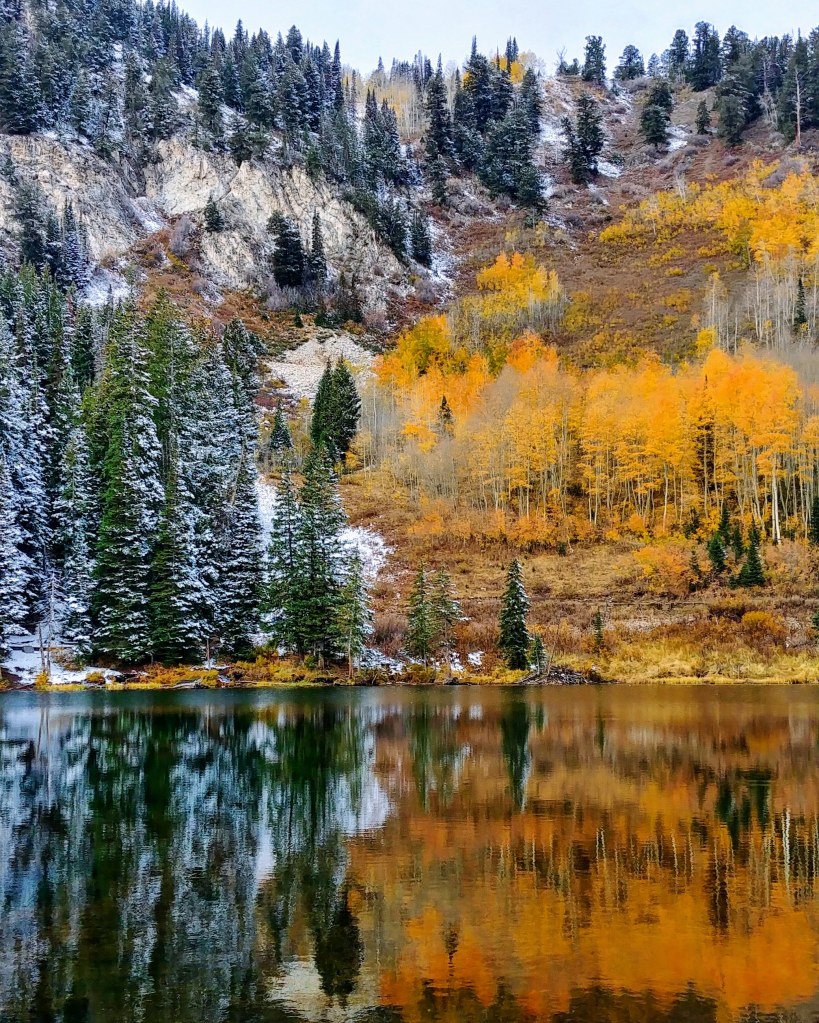
This crowd favorite of “When Season’s Collide” is compositionally my favorite photo. I zoomed into a very particular point on the hill across the lake where the snow and fall leaves meet and it created an element of symmetry with aligning the natural split down the center of fall vs winter.
LIGHTING
If I go for a hike midday, the likelihood of good photos is honestly lower with the harsh mid day sun. Have I gotten great midday shots before? Yes! But it definitely isn’t the norm. The lighting on those days really has to work out PERFECTLY for where I am at. For example: These two Chasm Lake photos below were taken a year apart. The first one, I caught much earlier in the morning, with the Diamond face of Long’s Peak in full sun. In the second photo, the sun was masked behind clouds, leaving a darker cast on the Diamond. While I could edit the second photo to be artsy and moody, in a general sense, the sunny photo is better, and I love this photo, but these still aren’t the “best”.


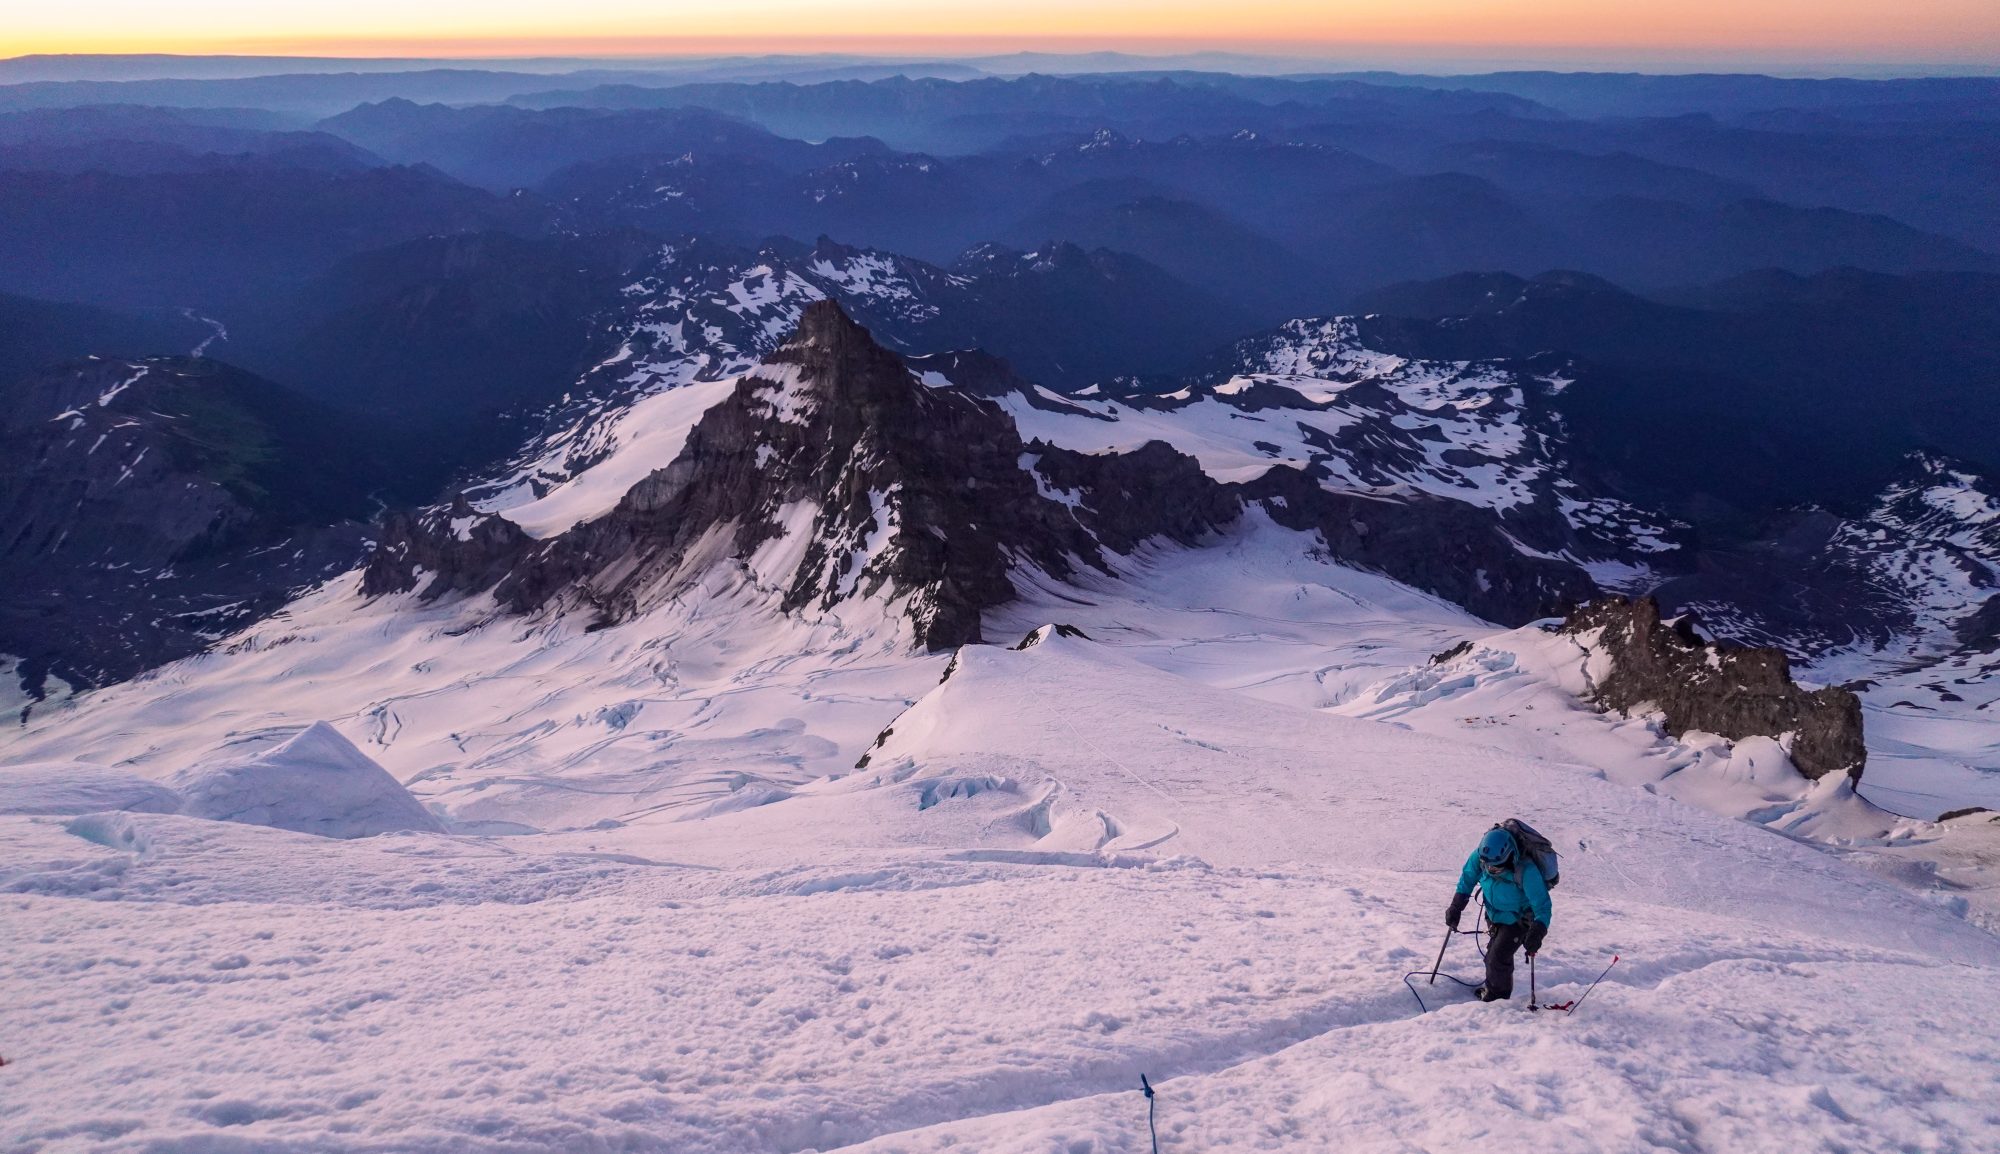
Typically shooting at sunrise or sunset gives you much better lighting. Every photographer knows the “Golden Hour” is Queen, but in landscape, Alpenglow is KING.

The pinks and oranges cast on the mountainside are unique to Landscape Photography. This happens as the light bends around the curvature of the earth as it is just rising or setting. Golden Hour can still give some excellent landscape shots, but capturing the alpenglow is one of the best ways to light up your landscape.
Focal Legnth
Knowing when to shoot wide and when to zoom in will really depend on what and where you are trying to shoot. Your focal legnth determines how wide or zoomed in a shot is. This is where I personally let nature quite literally speak to me. I find if there is comething I want to draw more focus to then I will zoom in and set my aperature up to really focus on. For example: Pheifferhorn Peak from a full frame shot of about 18mm is just a distant peak in the background, but zoomed in 300mm, you can see the details and texture in the ridgeline. I chose to zoom in on that cloudy day to really draw focus and emphasis on the movement of the clouds engulfing the peak.

Even on the same day in the same shoot, I may try different focal lengths to see what speaks to me. Each image offers a different perspective. I have personally sold BOTH of these Devil’s Castle photos below to different clients. Taken only maybe a minute or two apart but they are both very different despite being the same peak. I personally really enjoy wider shots, I love seeing all the different layers nature has to offer. But I also occasionally love a good focused image. In this case I love both of these for different reasons. The colors were spectacular that day and I loved the backglow I was getting off the edges of the trees and the peaks as the sun set. I loved showcasing the entire Albion Basin but I also loved framing Devil’s Castle in the leaves and showing it off standing alone as it is a pretty iconic peak here in the Wasatch.


Aperture
Your aperture will determine your depth of field to draw focus to a particular area. Think of it like the iris of your eye. It gets bigger and smaller around your pupil depending on what you are trying to focus on. This is where it regularly confuses people because the wider your aperture is open, the smaller your Fstop number is.

If you have a wide shot and you are focused on that whole shot, you want a smaller aperture (higher Fstop number). Each camera is a little different and has it’s own sweet spot. Usually somewhere around F16 gives you a pretty wide range of focus throughout the whole of your image. If I have a subject I want to focus on and want my background a little blurry, I will throw my aperture open as wide as it can go (lower Fstop number). However, sometimes I want to focus on both! In this case, I may find an aperture somewhere in the middle to enure my subject still stands out but both my subject and background are in focus. In this case, it is more important ofr my subject to be totally in focus.
Framing
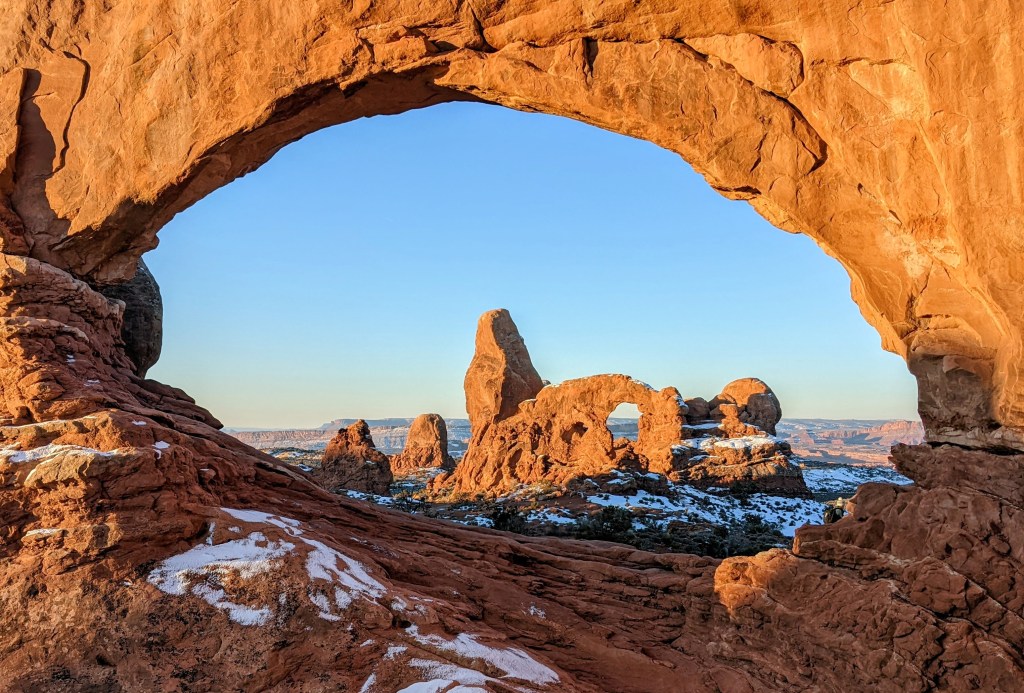
When you think of what framing means to you, what comes to mind? If you are thinking of a way to create a picture frame around your image than you are technically correct. However, when I talk about framing in the terms of landscape photography, it is SO MUCH more than that. Nature is not a perfect rectangle. There are so many different ways to fram your image. Play with levels! Get low to the ground, use trees, flowers, plants, or even the clouds to your advantage. Try out different persepectives or create windows in your image like this image of Turret Arch framed through Window Arch, Arches NP.
My all time favorite photo is of Ama Dablam, Nepal. It is a MASSIVE mountain and framing a peak like this isn’t exactly something I can do in a wide open tundra field on my own. I got lucky and had a nice layer of clouds to work with. I took probably over 40 photos from this spot while I watched the clouds dance around the base of the mountain. The mountain is framed by the blue skies, the clouds, and yellow hills below.

Framing is all about perspectives. There are SO MANY different ways to frame an image but it is up to you as the photographer to decide where they eye should be drawn to.
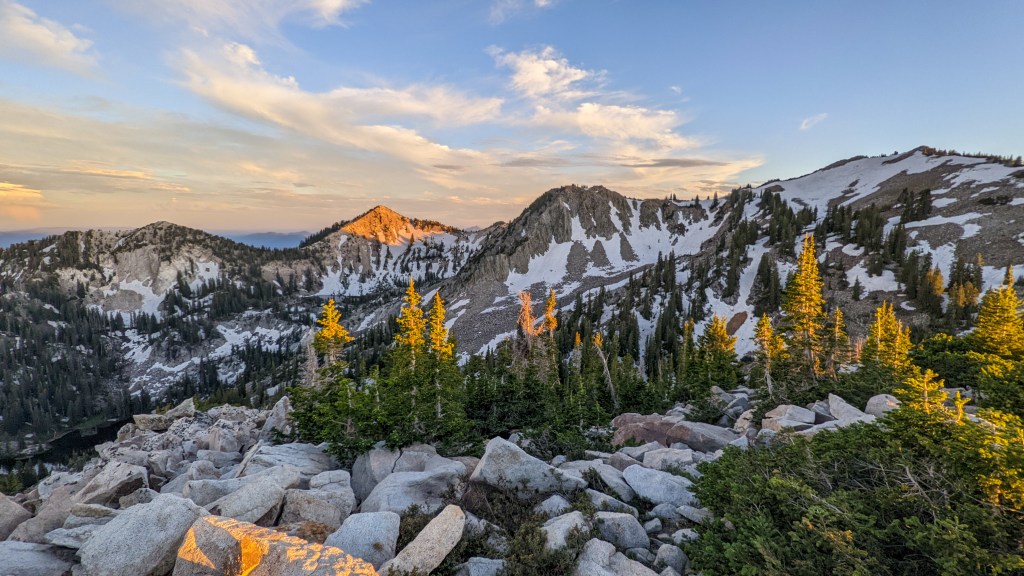
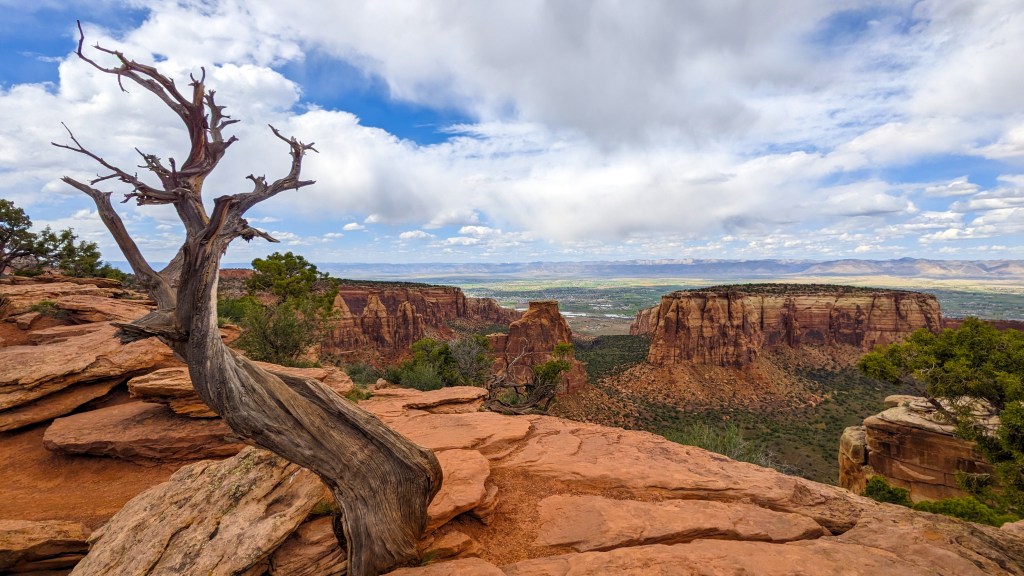
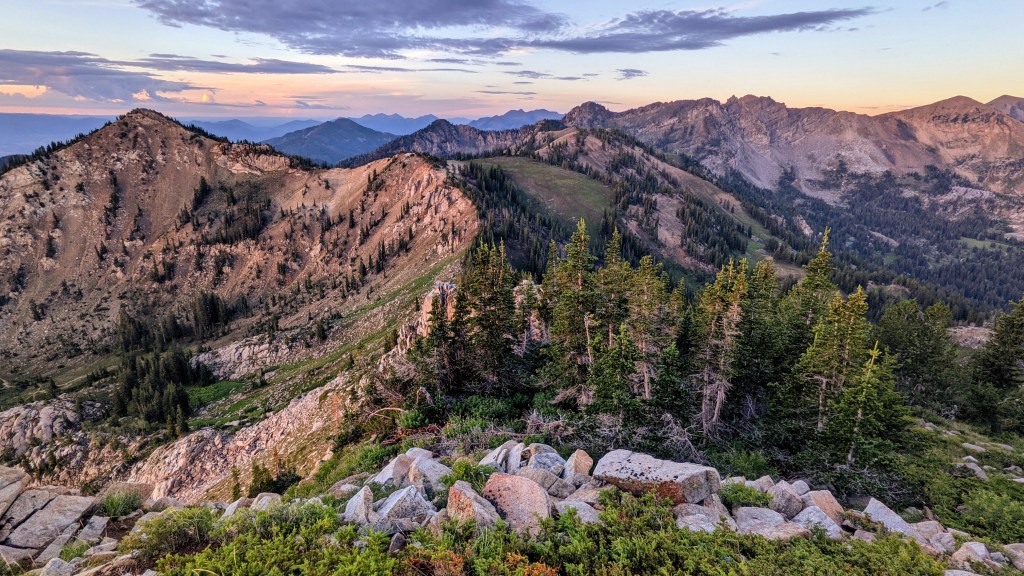
On the left, this image of Sunset Peak above is the subject. Your eye is drawn to the sunset glow on the peak (hence where it gets it’s name). The trees in the foreground also help frame it as it is the only peak in the sun. On the right is Colorado National Monument and Grand Junction in the background framed by the tree. You’re eye may be initially drawn to the tree at first but then you find yourseld focusing on the details in the background as the roundness and placement of the tree in the image create almost rounded frame around the background.
THe most important component of all:
Connection. I have noticed that if I go out into nature with the mentality and intention of connecting to my world around me, mother nature talks back. I see perspectives I haven’t seen before, even if it is a hike I have done 100 times. I am much more present and aware of my surroundings and am able to pay so much more attention to the colors, shapes, and scenes around me. Out of the thousands upon thousands of photos I have taken over the years, the photos not only I personally deem the best, but clients of mine have deemed their favorites as well, are the ones where I was personally connecting to nature and those photos are then able to tell a story.
The first photo I ever sold at an art show was this one below. A Wasatch sunrise from Mount Wolverine. At first, I honestly didn’t think much of this photo, but the more you look at the waving ridgelines, it speaks. You may not know the exact story just by looking at it, but this was actually the first real hike I did after stress fracturing my foot on Mt. Whitney. It was a night I couldn’t sleep and decided to go for a hike instead and got to reconnect with the mountains after 2 months of being stuck at home all summer. After Whitney, I was burnt out and that 2 month break was actually quite needed and it shows. After Nepal and Kilimanjaro, I began to lose sight of WHY I would get out into nature in the first place. It had become all about training for the climbs and when I got hurt, it forced me to take a break and a step back to reevaluate my priorities. This was the first time in a long time I wasn’t hiking to “train”. I was hiking to connect and rejuvinate in nature and that led to this photo:
Obviously, I am not expecting someone to glean that entire backstory from this image… but what I do hope the audience sees is that connection. To me, this image is peaceful, which is EXACTLY what I was feeling at the time. The soft pastels of the early morning light providing that warmth, the distinct ridgelines showcasing different paths, almost like metaphorically standing at a crossroads.
It can seem silly, but that connection matters. A side by side comparison can showcase a lack of care and connection to the environment. Sure, the landscape can still look pretty, but does the image really speak to you?
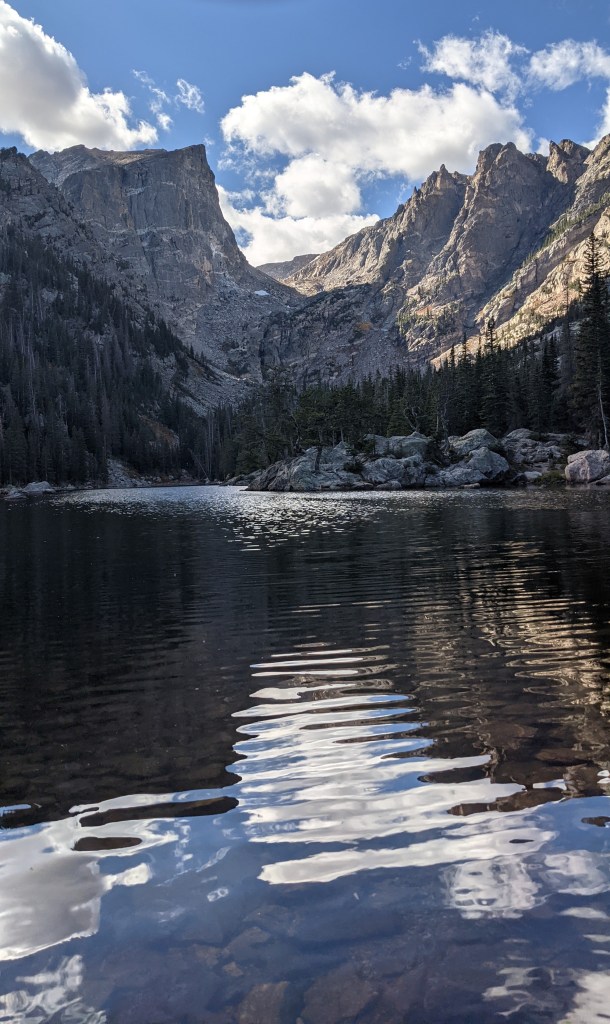

I purposely tried to pick similar photos of the same place and under similar circumstances. This is Dream Lake in RMNP, CO. My husband was also with me when I took both of these photos. In comparing these photos, on the left is a quick snapshot from the generic tourist photo-spot. We took a quick pitstop at Dream while we were hiking down from another lake. It’s not nessisarily a terrible photo, but lighting is a bit dull as clouds have everything in shadow and winds picked up causing ripples in the water. I wasn’t nessisarilly connecting to the enironment in this moment, I just wanted a quick picture on my way down the trail. On the right is first thing at sunrise about a year later, little to no wind, and also a slightly different perspective from the left flank of the lake in the rocks. You get immersed by so many different textures in this photo from the clouds, the rocks, and even the trace of snow on the peak. I was specifically connecting to this location, we were there with intention and I was present in the moment. This one also tells yet another story. This was the morning of me and my husband’s 10 year wedding anniversary. We were up there together, connecting with the mountains and with each other. When I see this photo I see magic. The magic nature has to offer in all the different textures and colors. This one speaks to me and immerses me.
Moral of the story
You don’t have to have some crazy backstory to every photo, but it SHOULD immit a feeling. The beauty of adventure photography is that in reality, a lot of my photos do have stories. There is adventure behind nearly every image and that is part of the whimsy and wonder. That is part of what immerses you into feeling like you are actually there. As you go out and explore, the biggest peice of advice I offer you is just BE PRESENT. Slow down and pay attention to the world around you. It may surprise you. Immerse yourself into your surroundings before you snap a photo and as a result we will be immersed with you.

